
MPV ES 4WD V6-3.0L SOHC (1997)
NOTE: Before installing the parking brake shoes, apply grease to the shaded areas shown in the figure.
2. Install in the reverse order of removal indicated in the table.
3. After installation, check the parking brake lever stroke.
4. If the parking brake shoes have been replaced, settle the parking brake shoes. See: Settling
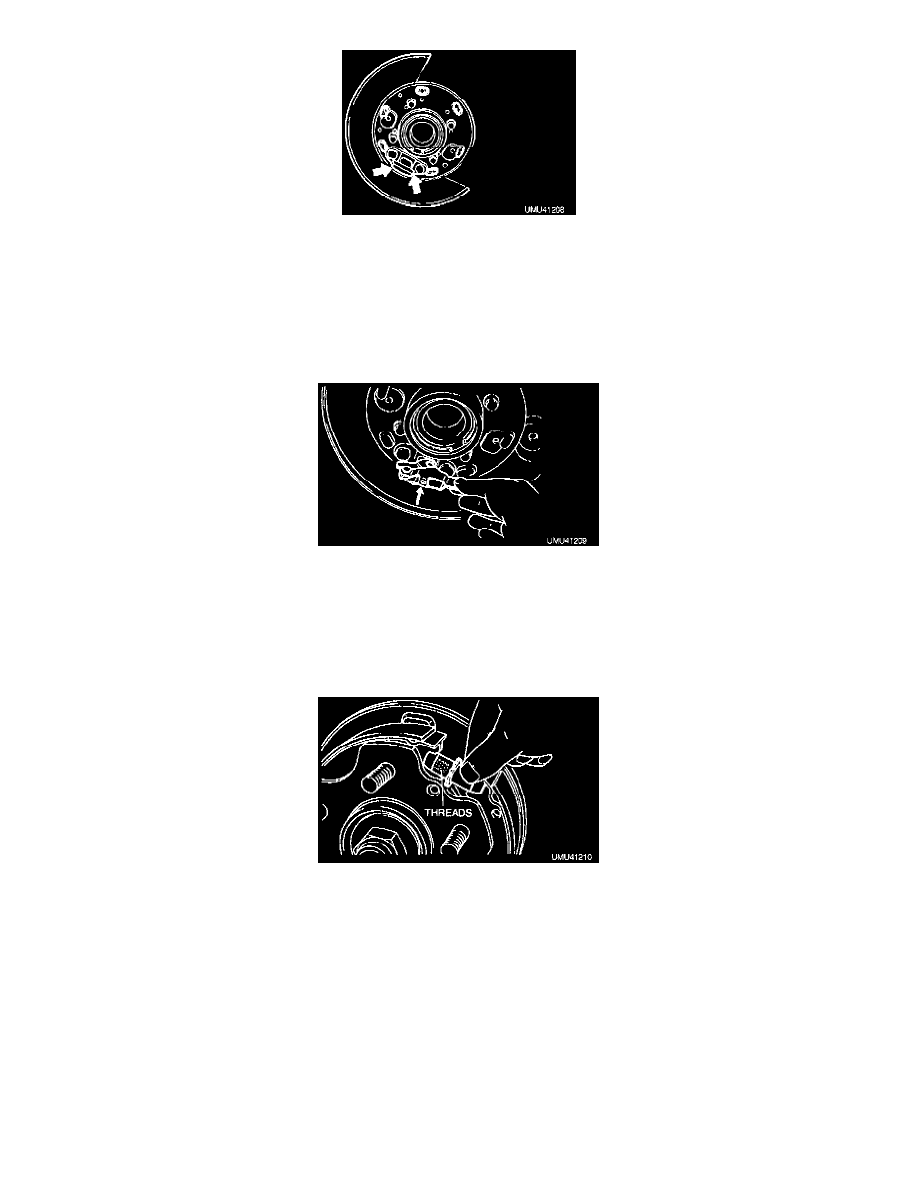
INSTALLATION NOTES
Operating Lever
Connect the operating lever to the parking brake cable. The arrow mark on the operating lever should be facing the front.
Adjuster
1. Compress the adjuster to the smallest possible size by screwing the threaded part inward.
2. Install the adjuster between the brake shoes. For the left wheel, install the adjuster with the threaded part facing the front. For the right wheel,
install the adjuster with the threaded part facing the rear.
Disc Plate
1. Remove any rust or grime on the contact face of the disc plate and wheel hub.
2. Install the disc plate and align the marks made before removal.
3. After installing the disc plate, adjust the parking brake shoe clearance as described below.
a. Remove the service plug from the disc plate.
b. Insert a screwdriver into the hole and turn the adjuster in the direction of the arrow until the disc plate locks.
NOTE: The arrow is marked on the disc plate.
c. Turn the adjuster 3-5 notches in the opposite direction to set the proper clearance.
NOTE: When turning the adjuster 4 notches, the shoe clearance will be 0.32 mm (0.013 inch).
d. Verify that the brakes do not drag when turning the disc plate by hand.
e. Install the disc plate service plug.