
MPV LX 4WD V6-3.0L SOHC (1997)
Trim Panel: Service and Repair
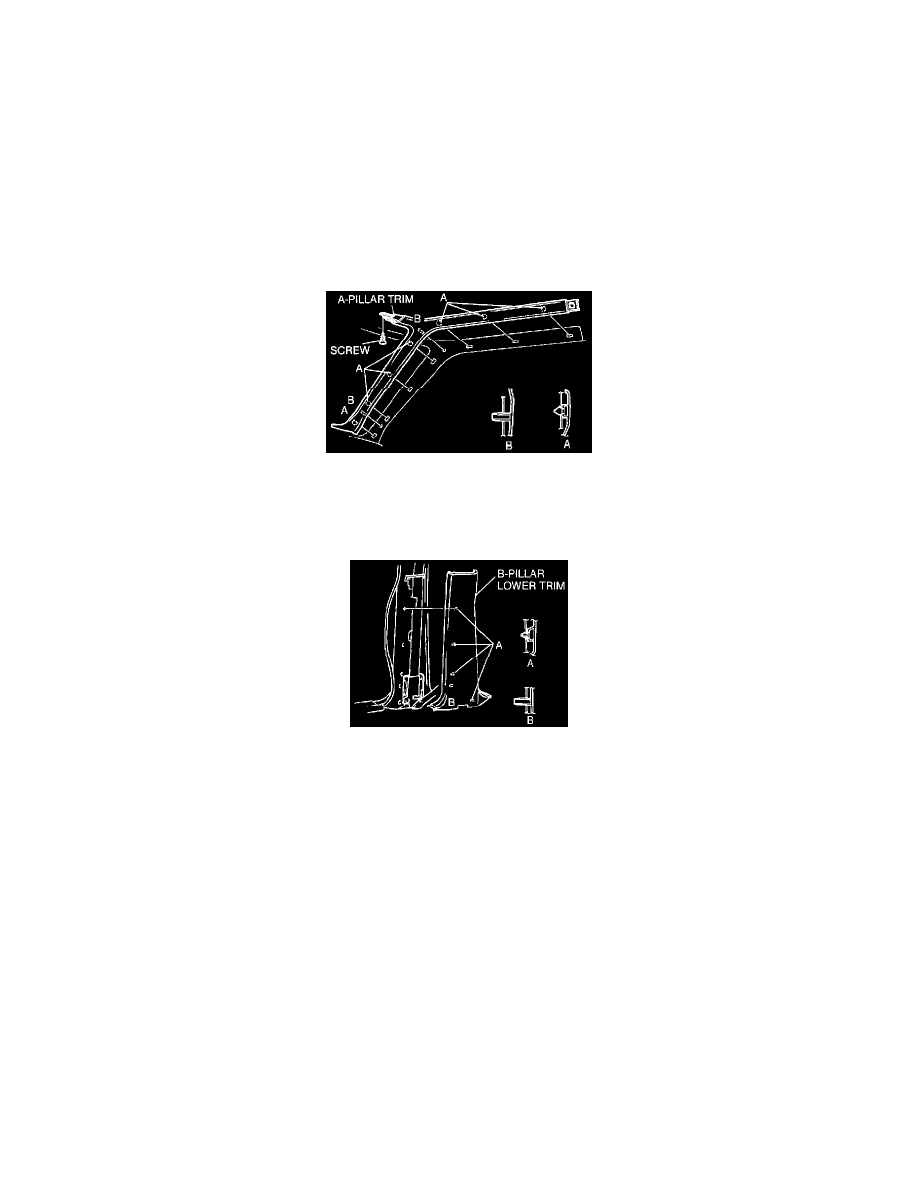
A-Pillar Trim Removal / Installation
1. Remove the rear header trim.
2. Remove the rear side trim.
3. Remove the mat set end plate.
4. Remove the front scuff plate.
5. Remove the rear scuff plate.
6. Remove the D-pillar trim.
7. Remove the B-pillar lower trim.
8. Remove the B-pillar upper trim.
9. Remove the front header trim.
10. Remove the A-pillar trim installation screw.
11. Pull the A-pillar trim forward to disengage clips A and pins B from the body, and remove the A-pillar trim.
12. Install in the reverse order of removal.
B-Pillar Lower Trim Removal / Installation
1. Remove the front and rear scuff plate.
2. Pull the B-pillar lower trim forward to disengage clips A and pin B from the body, and remove the B-pillar lower trim.
3. Install in the reverse order of removal.
B-Pillar Upper Trim Removal / Installation
1. Remove the rear header trim.
2. Remove the mat set end plate.
3. Remove the rear side trim.
4. Remove the D-pillar trim.
5. Remove the front and rear scuff plate.
6. Remove the B-pillar lower trim.
7. Remove the front seat belt upper anchor and the rear No.1 seat belt upper anchor.