
MX-3 V6-1844cc 1.8L DOHC (1993)
MX-3 TIMER INSTALLATION
1.
Write down all preset radio stations.
2.
Disconnect the negative battery terminal.
3.
Remove the trim that covers the engine ECU.
4.
Remove the connector at the ECU and tape from the ECU harness.
5.
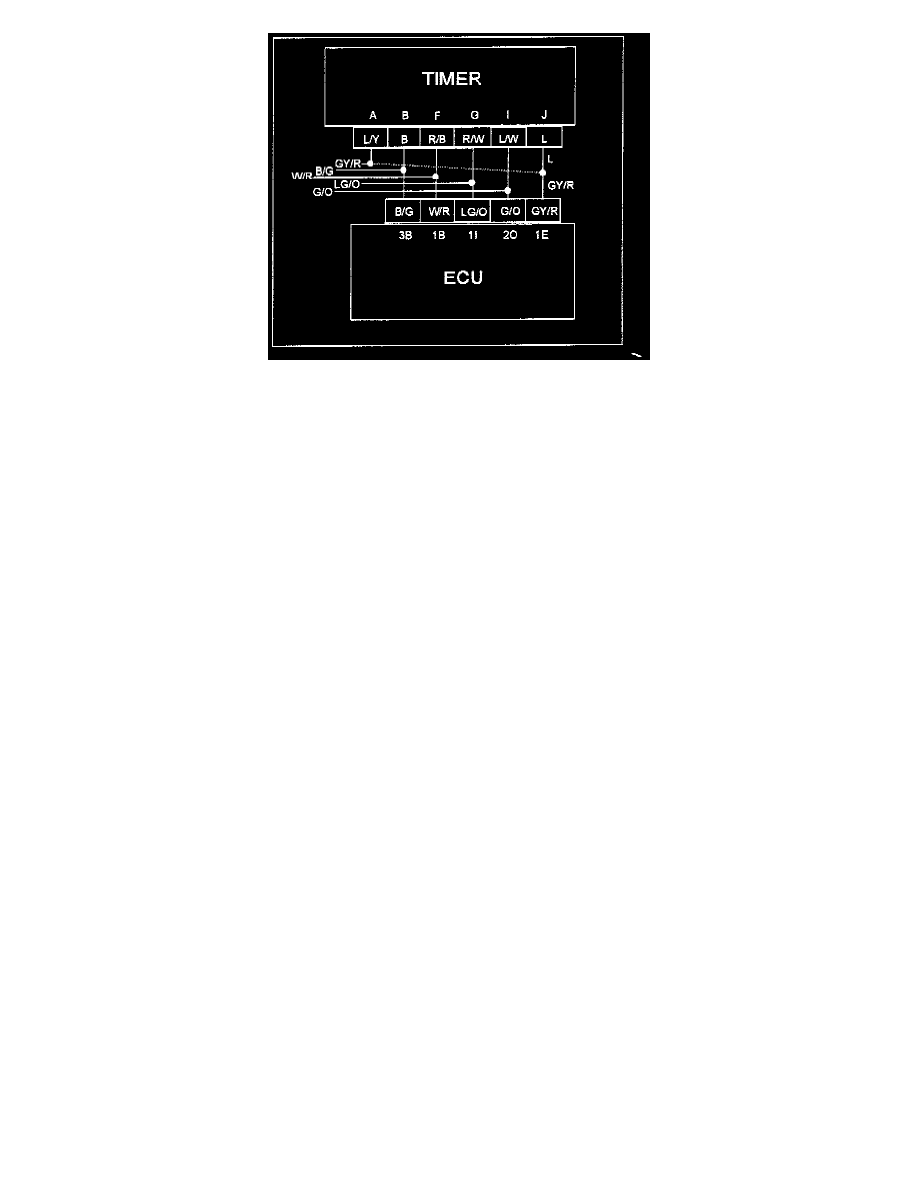
Connect the timer kit terminals as described below:
^
Cut the GY/R wire at the 1E terminal of the ECU approximately 70 mm from the connector.
^
Connect terminal "A" (L/Y wire) of the timer to the vehicle harness side of the GY/R wire.
^
Connect the "J" terminal (L wire) of the timer to the ECU side of the GY/R wire.
^
Connect the "B" terminal (B wire) of the timer to the 3B terminal (B/G wire) of the ECU.
^
Connect the "F" terminal (R/B wire) of the timer to the 1B terminal (W/R wire) of the ECU.
^
Connect the "G" terminal (R/W wire) of the timer to the 1I terminal (LG/O wire) of the ECU.
^
Connect the I terminal (L/W wire) of the timer to the 20 terminal (G/O wire) of the ECU.
NOTE:
Do not tangle wires or harness. Use shrink tube or quality electric tape when splicing wires together.
6.
Connect the timer and ECU connectors.
7.
Attach the timer to the ECU with double sided tape.
8.
Wrap the harness securely to avoid interference with surrounding parts.
9.
Install trim cover
10.
Connect the negative battery terminal and reset radio stations and clock.
PARTS INFORMATION
Part Number
Description
Quantity
KL01 18 SAC
Timer Kit
1