
RX7 2RTR-1308cc 1.3L MFI (1991)
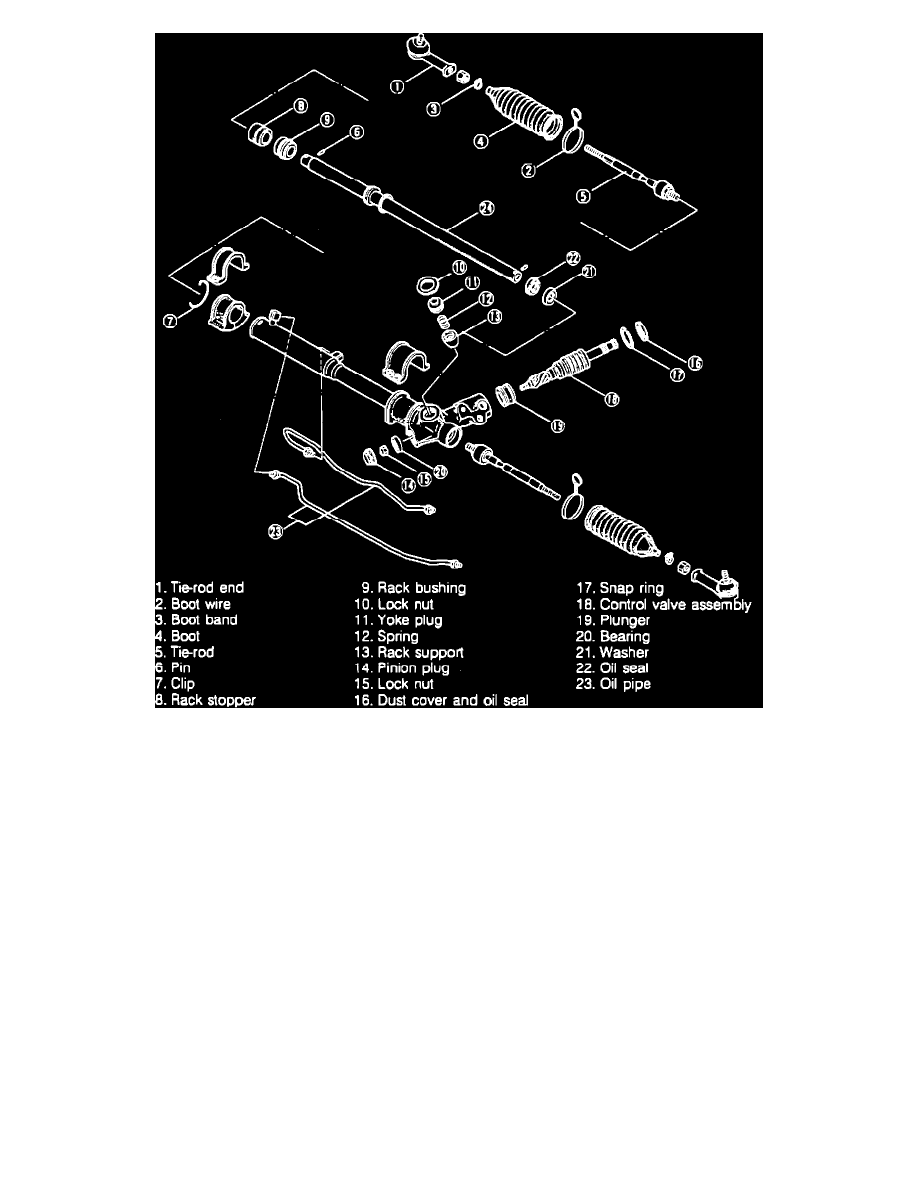
Fig. 10 Disassembled View Of Power Steering Gear
1.
Secure gear and linkage assembly in a suitable vise.
2.
Mark position of tie rod ends for assembly reference, then remove tie rod ends from tie rods, Fig. 10.
3.
Cut boot wires, then remove boot clamps and the boots.
4.
Secure rack gear in vise, then remove tie rods and spring pins.
5.
Rotate rack stopper clockwise until end of clip projects out, then turn in opposite direction to remove clip, rack stopper and rack bushing.
6.
Remove rack bushing oil seal using a suitable screwdriver. When removing oil seal, use care to avoid damaging rack bushing.
7.
Remove locknut and yoke plug, then the spring and racket support.
8.
Remove pinion plug and locknut from housing.
9.
Remove dust cover and snap ring from housing.
10.
Carefully tap control valve assembly out of housing using a suitable punch.
11.
Carefully remove O-ring and piston ring from control valve assembly.
12.
Remove bearing from control valve using a suitable press.
13.
Remove plunger and bearing from housing.
14.
Remove washer and oil seal from rack.
15.
Remove oil pipes from rack housing.
16.
Position oil seal remover (tool No. 49 F032 311) on end of rack, then remove the rack assembly.
Assembly
1.
Before assembly, the following components should be coated or packed with lithium base grease or equivalent:
a. Pinion gear and rack teeth.
b. Tie rod ball joints.
c. Inside of both boots.