
RX7 2RTR- 1308cc 1.3L FI (1987)
Control Arm: Service and Repair
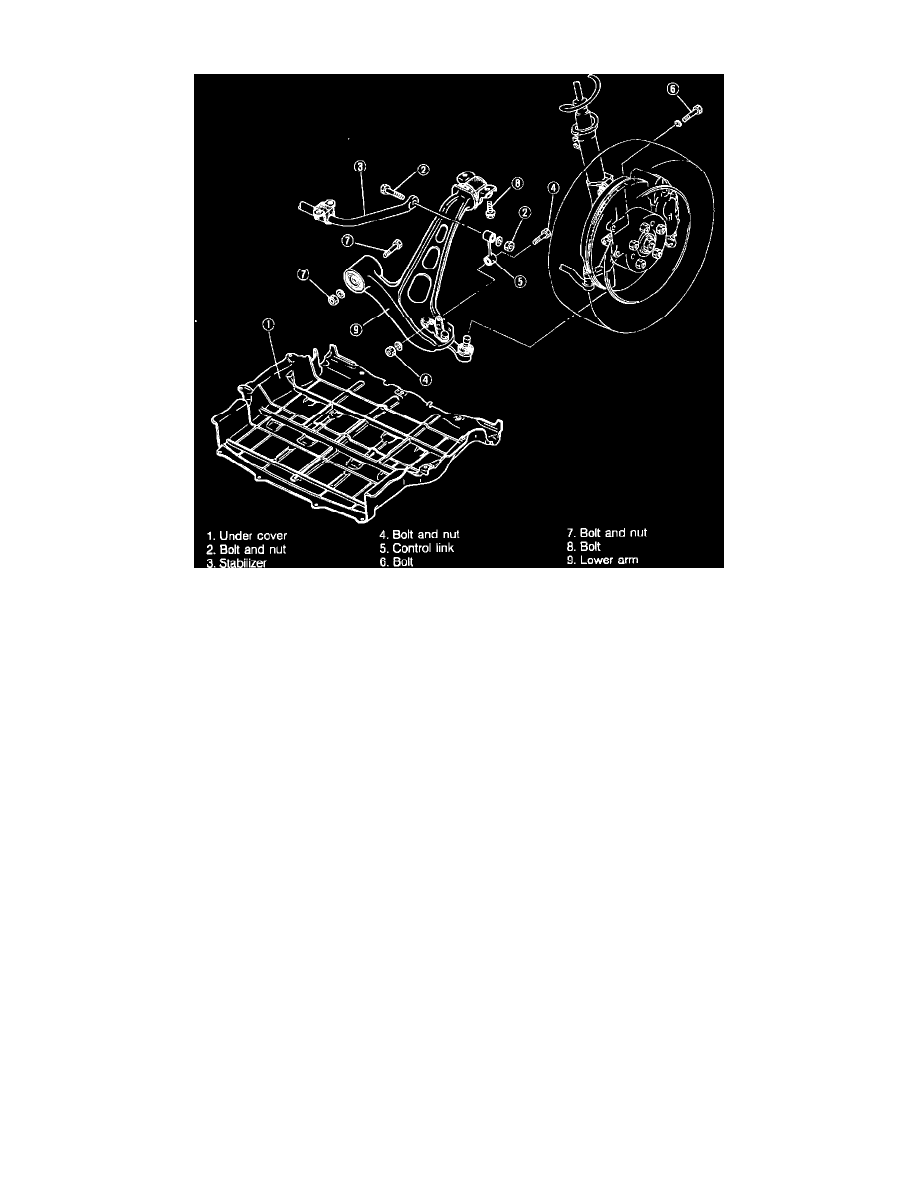
Fig. 4 Lower control arm & related components. 1986-88 RX-7
REMOVAL
Remove lower control arm and attaching components in numerical sequence shown in Fig. 4.
INSPECTION
Check lower control arm for wear or damage. Check control arm bushings for deterioration or wear. Check ball joint preload, adjust if necessary. Check
dust boot for damage.
FRONT BUSHING, REPLACE
1.
Place tools 49G030627A and 49G030625A or equivalents, against front bushing.
2.
With assembly placed into a suitable press, press out the bushing from control arm.
3.
Install new bushing, an press bushing approximately halfway into control arm.
4.
Place tools 49G030627A, 49G030625A and 490823146 onto bushing.
5.
Place assembly into a suitable press, and press bushing into control arm.
REAR BUSHING, REPLACE
1.
Place tools 490710520, 49G030627A and 49G030625A or equivalents, against lower arm.
2.
Place assembly into a suitable press, and press out bushing. When using tool 490710520, do not over tighten clamp nuts on tool or damage to
the control arm may result. Hand tighten the tool's clamp nuts only.
3.
With control arm placed in a press, press new bushing into control arm approximately halfway in.
4.
Place tool 490823146 or equivalent against the new bushing, then press bushing into control arm.
BALL JOINT PRELOAD CHECK
1.
Install preload attachment tool 490180510B or equivalent onto ball stud.
2.
Using a suitable spring scale, measure ball joint preload. Measure preload after shaking ball joint stud 3 or 4 times.
3.
Pull spring scale and with ball joint stud rotating, reading obtained should be 4.4-7.7 lbs.