
RX7 2RTR- 1308cc 1.3L Turbo FI (1989)
4.
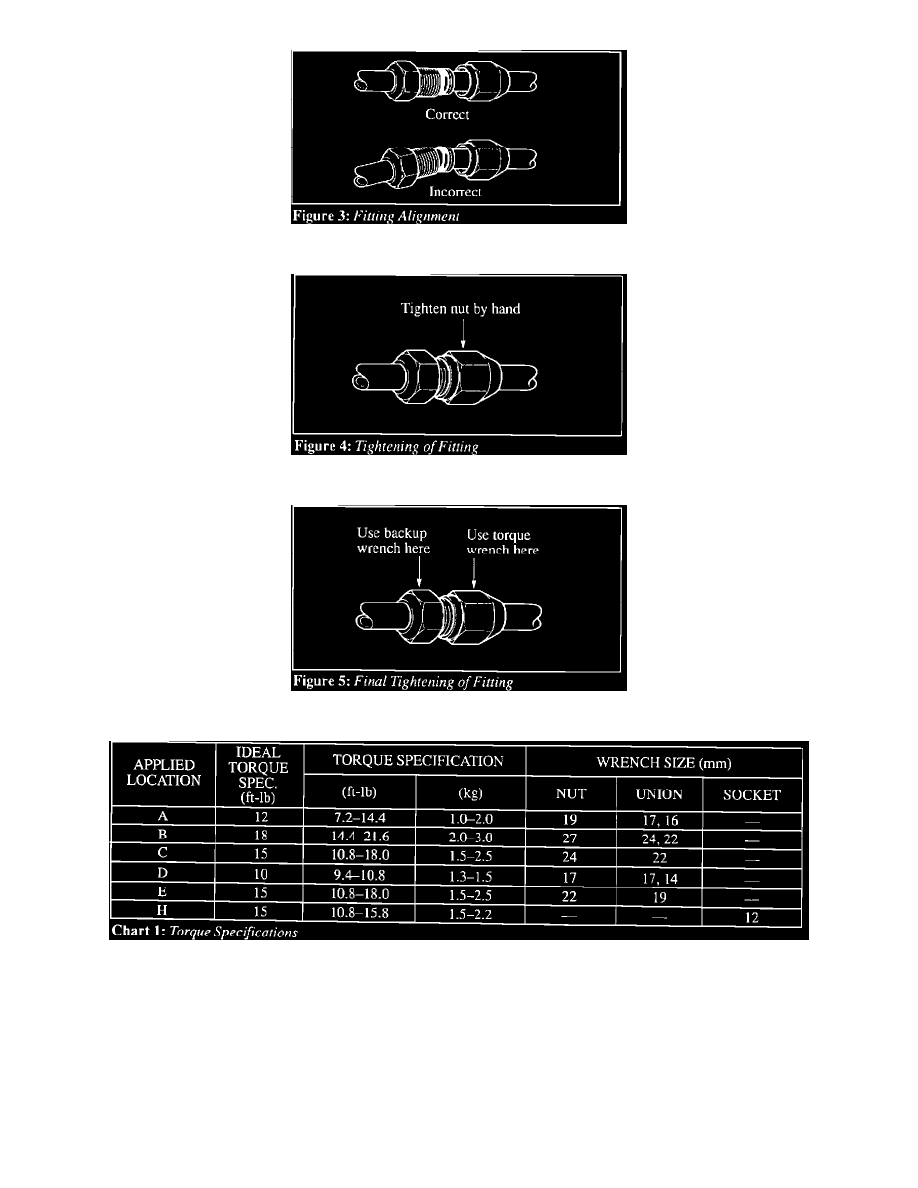
Align both fittings before threading on the nut (figure 3).
5.
After threading on the nut, tighten it by hand as much as possible (figure 4).
6.
Torque the nut to the proper specification, using a backup wrench to prevent damage (figure 5).