
Grand Marquis V8-4.6L Flex Fuel (2010)
Shift Indicator: Adjustments
Selector Lever Indicator Adjustment
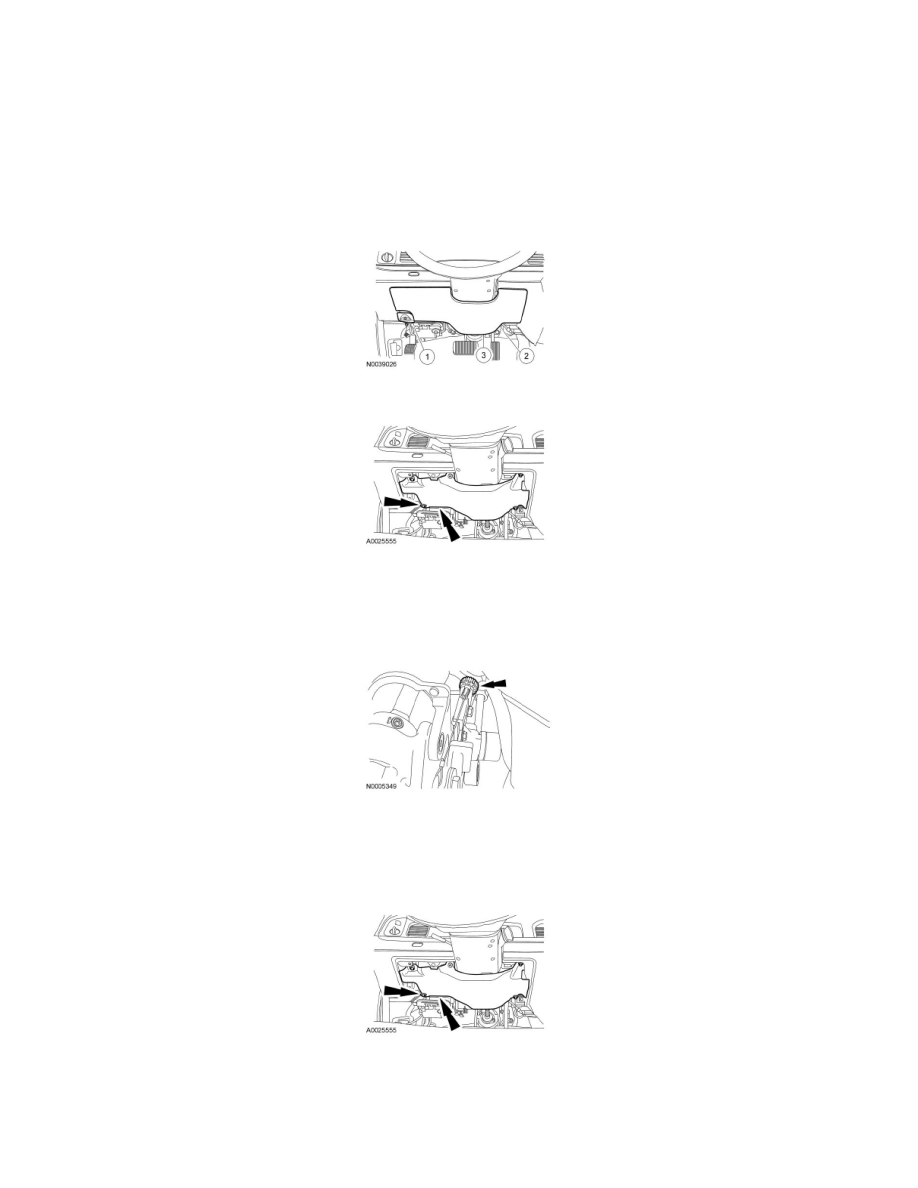
1. Remove the lower steering column opening finish panel.
1. Remove the screw and position the parking brake release handle aside.
2. Remove the screw from the lower steering column opening finish panel.
3. Pull outward to release the retaining clips and remove the lower steering column opening finish panel.
2. Remove the 5 screws and the lower steering column opening finish panel reinforcement.
3. Rotate the selector lever clockwise until it bottoms out (1st gear), then rotate it counterclockwise 2 detents ((D) position).
4. Hang a 1.4 kg (3 lb) weight on the gearshift.
5. Rotate the thumbwheel to center the selector lever indicator in the middle of the (D) position.
6. Remove the 1.4 kg (3 lb) weight.
7. Rotate the selector lever into each detent to verify that the selector lever indicator matches the selected range. Readjust, if necessary.
8. Install the lower steering column opening finish panel reinforcement.
9. Install the lower steering column opening finish panel and parking brake release handle.