
Merkur Xr4ti L4-140 2.3L SOHC Turbo (1985)
Suspension Spring ( Coil / Leaf ): Service and Repair
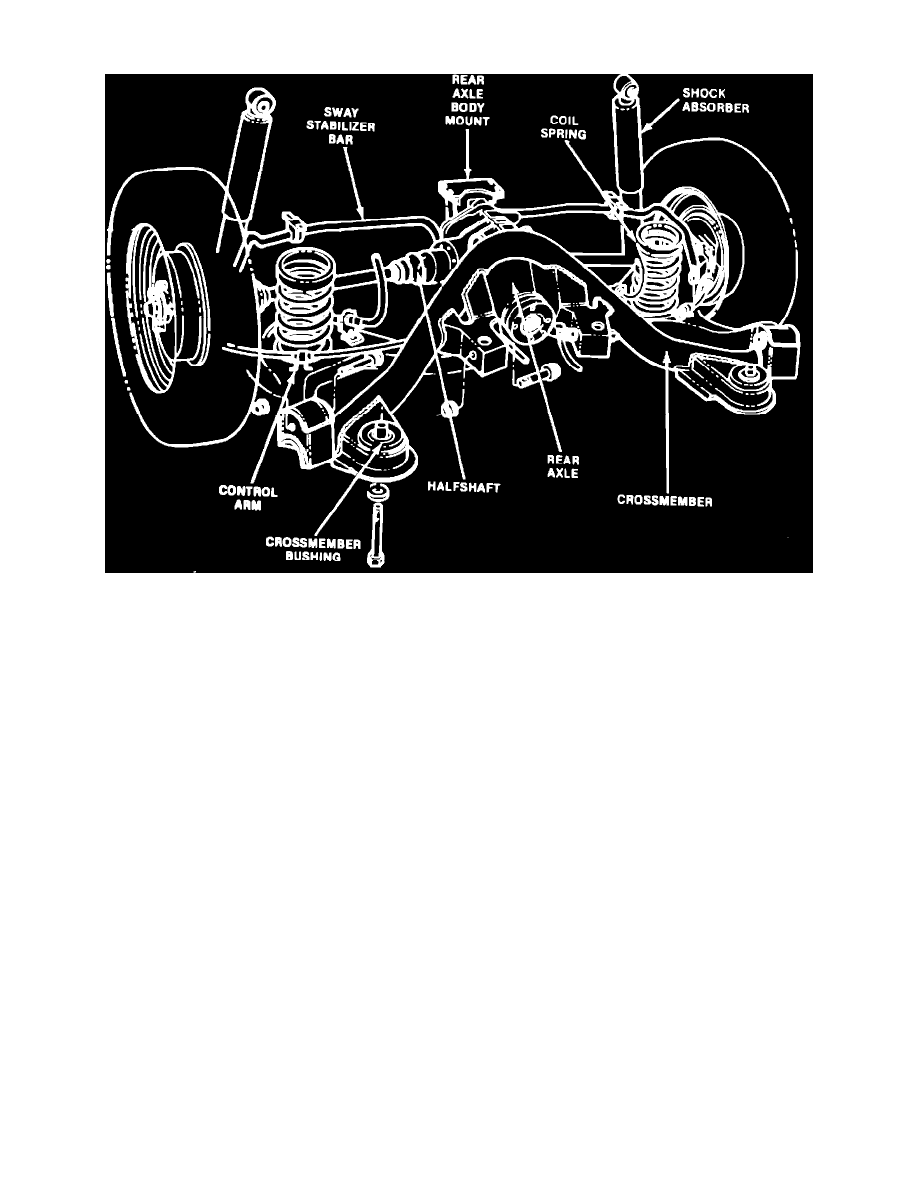
Fig. 2 Rear suspension exploded view. XR4Ti
Removal
1.
Raise and support vehicle with rear wheels and suspension hanging free.
2.
Remove bolts attaching halfshaft to wheel stub shaft, Fig. 2. To prevent damage to constant velocity joints, tie halfshaft to convenient underbody
component.
3.
Remove clip attaching rear brake hose to routing bracket on control arm.
4.
Using line wrenches, disconnect brake tube from brake hose.
5.
Remove cap from bottom of shock absorber.
6.
Using suitable jack, raise lower control arm enough to relieve coil spring tension from shock absorber.
7.
Remove lower shock absorber attaching nut and bolt.
8.
Slowly and carefully lower jack until it can be removed.
9.
Support axle housing using suitable jack.
10.
Remove rear axle mount to body attaching bolts and disconnect axle vent tube.
11.
Slowly and carefully lower jack until coil spring and its seat can be removed. Do not remove support from rear axle. Lower axle only enough to
allow removal of coil spring.
Installation
1.
Install spring upper seat on spring end with color code and plastic sleeve, ensuring that end of coil seats against step in spring seat and that seat
tabs are positioned between first and second coil.
2.
Install coil spring and seat assembly, then raise rear axle into position and install body mount attaching bolts. Torque two inner bolts to 37-41 ft.
lbs. and four outer bolts to 37-50 ft. lbs. The body mount bolts must be cleaned, and new Loctite applied.
3.
Remove axle support and position it under control arm, then raise jack until coil spring is compressed enough to allow installation of lower shock
absorber attaching bolt.
4.
Install attaching nut on shock absorber bolt, torquing nut to 30-37 ft. lbs., or bolt to 33-40 ft. lbs.
5.
Remove control arm support and install shock absorber cap.
6.
Position brake hose through routing bracket on control arm and connect it to brake tube.
7.
Install brake hose retaining clip.
8.
Position halfshaft and install attaching bolts, torquing bolts to 28-31 ft. lbs.
9.
Connect axle vent hose located at top right hand corner of axle housing.
10.
Ensure that stabilizer bar link is connected to control arm.