
Merkur Xr4ti L4-140 2.3L SOHC Turbo (1985)
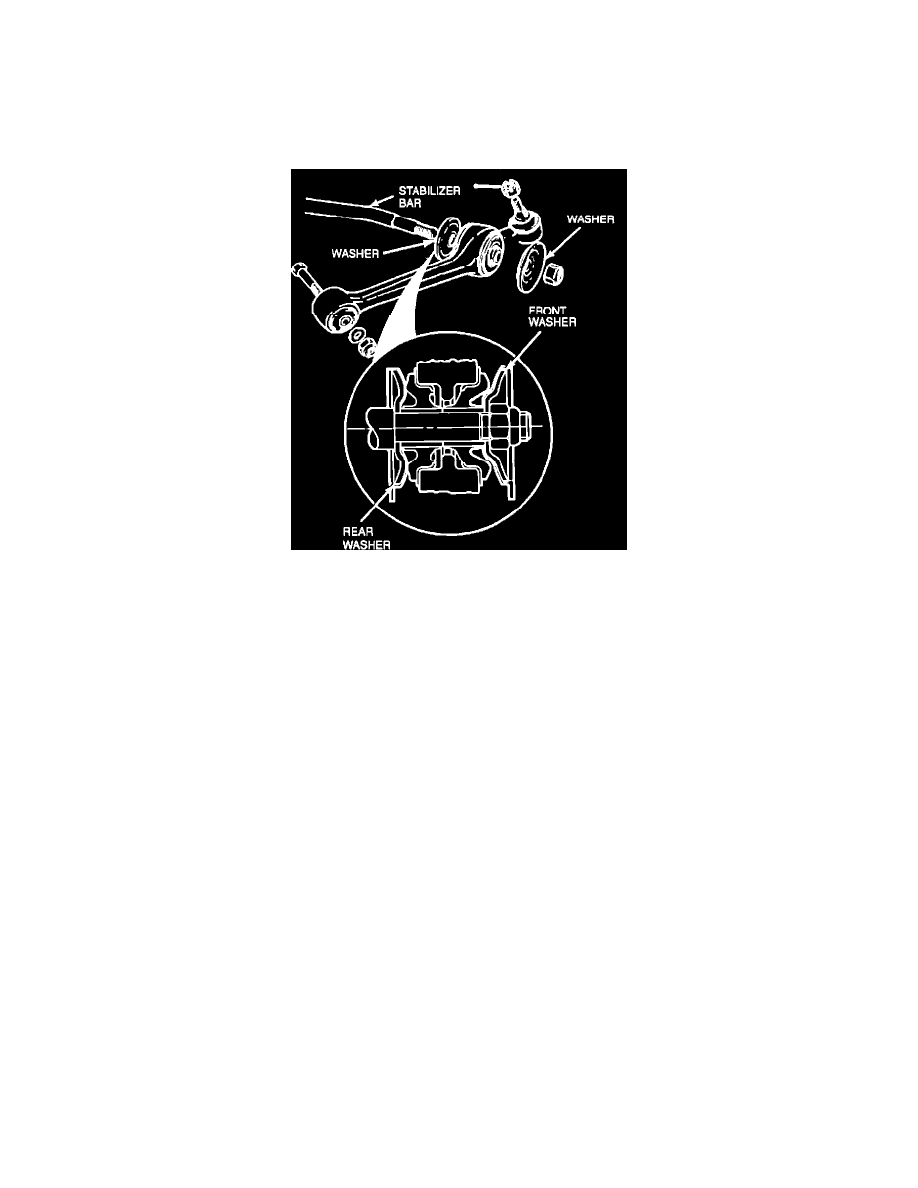
Figure 5
b.
Install the control arm to bushing replacer (T88M-5493-B) or equivalent, Figure 5.
c.
Tighten the screw to seat the bushing in the lower control arm.
5.
Turn the lower control arm over in the vise and install the other bushing following the procedure in Step # 4.
Figure 6
6.
Install the rear washer and the washer cover on the stabilizer bar. Slide the control arm on the stabilizer bar, Figure 6.
NOTE:
THE REAR WASHER HAS A SHALLOWER DISH THAN THE FRONT WASHER. WHEN THE WASHER IS INSTALLED, MAKE
SURE THE PLASTIC COVER IS IN PLACE BETWEEN THE DISHED STEEL WASHER AND THE BUSHING. THE DISHED SIDE
OF THE STEEL WASHER FACES AWAY FROM THE BUSHING.
7.
Install the front washer, the front washer cover and the nut. Do not tighten the nut at this time.
NOTE:
THE STABLIZER BAR NUTS MUST BE TORQUED WITH THE CAR OFF THE HOIST. A STEERING WHEEL NIBBLE
CONDITION MAY BE CREATED IF THE NUTS ARE NOT TORQUED CORRECTLY.
8.
Install the control arm ball joint.
a.
Position the control arm ball joint into the spindle carrier.
b.
Install the attaching nut.
c.
Tighten the nut to 48-63 ft.lbs. (65-85 N-m).
d.
Install a new cotter pin.
9.
Grip the bottom of the strut or spindle/carrier assembly and pull inward until the control arm enters the crossmember and aligns with the bolt holes.
Use a drift punch to hold the arm in alignment while installing the attaching bolt.
10.
Install the control arm pivot bolt, washer and attaching nut. Snug the attaching nut, but do not tighten it at this time.
11.
Install the tie rod end to the spindle carrier.
a.
Install the attaching nut.
b.
Tighten the attaching nut to 15-23 ft.lbs. (20-32 N-m).
c.
Install a new cotter pin.