
Montego AWD V6-3.0L VIN 1 (2005)
Removal and Installation
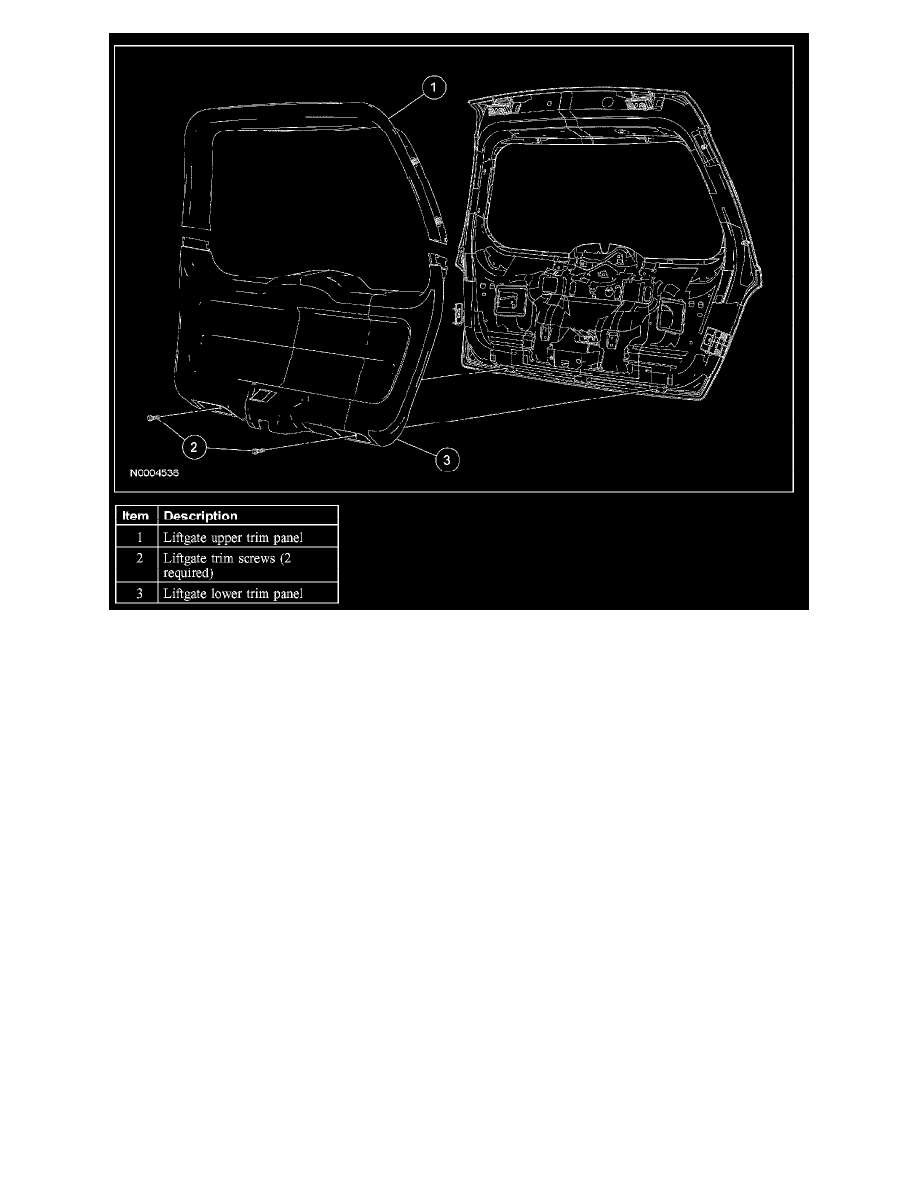
1. Remove the upper trim panel by pulling toward the middle of the liftgate window glass to release the retaining clips.
2. Remove the 2 liftgate trim screws.
3. Remove the lower liftgate trim panel by pulling straight outward.
4. To install, reverse the removal procedure.
Rear Quarter Trim Panel
REAR QUARTER TRIM PANEL
Removal and Installation
1. Remove the C-pillar trim panel.
2. Remove the D-pillar trim panel.
3. Position the bottom portion of rear door weatherstrip aside to gain access to rear portion of scuff plate trim panel.
4. Position the rear portion of the scuff plate trim panel aside to gain access to the rear quarter trim panel retaining screw.
5. Remove the rear quarter trim panel retaining screw.
6. Position the 2nd row seats in the flat position.
7. Position the 3rd row seats in the flat position.
8. Remove the 3rd row safety belt anchor-to-floor bolt trim cover.
9. Remove the 3rd row safety belt anchor-to-floor bolt.
-
To install, tighten to 40 Nm (30 lb-ft).
10. Remove the cargo net retaining hooks.
11. Position the rear of the rear quarter trim panel away from the body.
12. Disconnect the auxiliary power electrical connector.
13. Remove the rear quarter trim panel.
-
Pull the rear quarter trim panel toward the inside of the vehicle to release the retaining clips.
14. To install, reverse the removal procedure.
Scuff Plate Trim Panel
SCUFF PLATE TRIM PANEL