
Villager V6-201 3.3L SOHC VIN T SFI (1999)
8. Cut the urethane sealant canister nozzle.
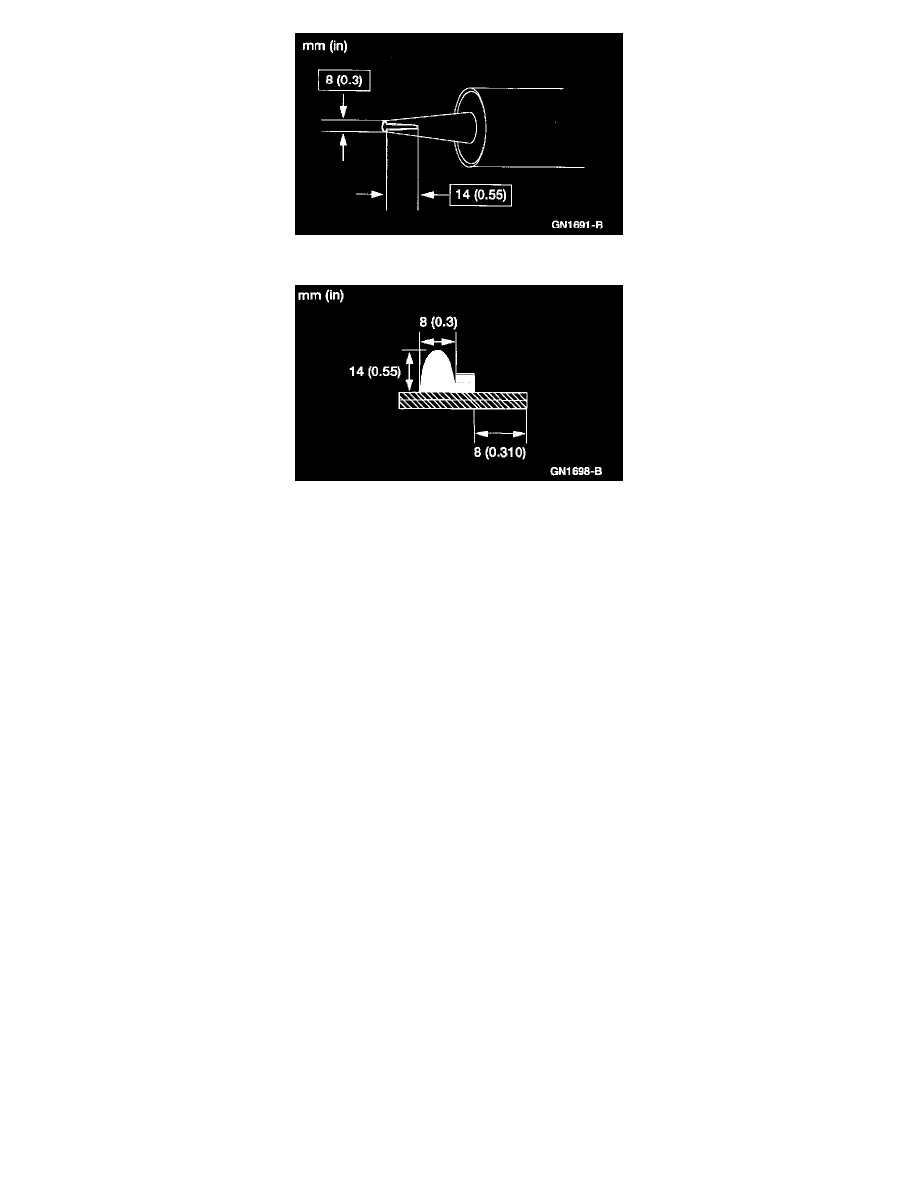
9. Apply a bead of Urethane Adhesive around the pinch weld on top of the remaining bead of urethane.
^
Make sure that the bead of urethane is smooth and even. If necessary, reshape the bead with a suitable tool, using care not to trap air in the
bead.
CAUTION: After replacing urethane installed glass, the vehicle should not be driven until the urethane has cured. The curing time at 21°C (70°
F) and 50% relative humidity is 24 hours (decreasing at higher temperatures and higher humidities). Refer to the detailed instructions provided by
the manufacturer in the kit. Inadequate curing of the urethane may adversely affect the strength of the urethane adhesive bond.
NOTE: Ensure the Urethane Metal Primer is clean and dry.
10. Use the alignment marks to install the windshield glass.
CAUTION: Open the windows to prevent the windshield glass from being pushed out by air pressure if a door is closed.
NOTE: Use tape to hold the windshield glass in place until the Urethane Adhesive cures.
11. After the Urethane Adhesive has cured, check for water leaks and add Urethane Adhesive where needed.
CAUTION: Use only Urethane Adhesive meeting Ford specification WSB-M2G316-B to repair water and air leaks in the Urethane Adhesive.
12. Raise the front of the headliner into position.
13. If equipped, install the overhead console.
14. Install the sun visor clips.
^
Install the screws.
15. Install the sun visors.
16. Install the interior A-pillar upper trim panels.