
Diamante Sedan V6-3.5L SOHC (1999)
Parking Brake Lever: Testing and Inspection
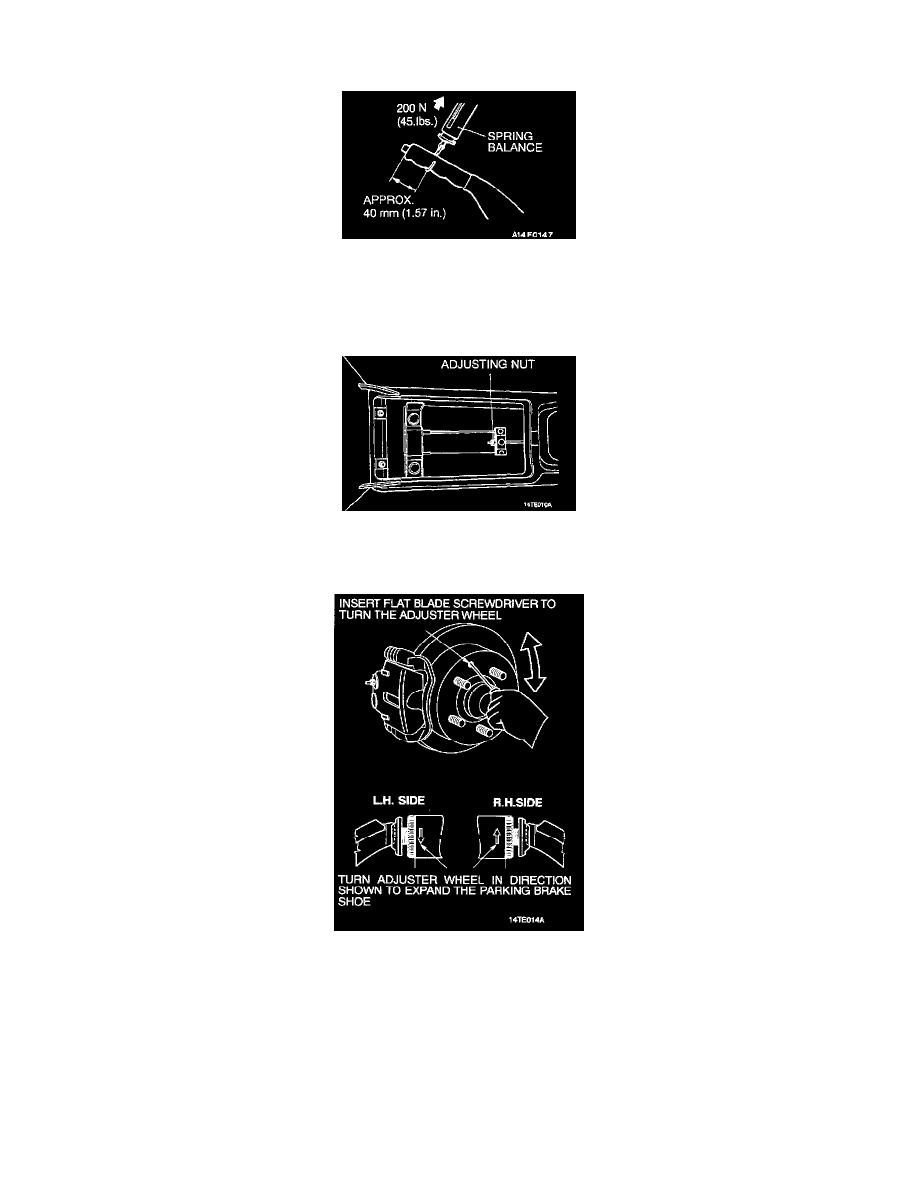
PARKING BRAKE LEVER STROKE CHECK
1. Pull the parking brake lever with a force of approx. 200 N (45 lbs.) and count the number of notches.
CAUTION: The 200 N (45 lbs.) force of the parking brake lever must be strictly observed.
Standard value: 3-5 notches
2. If the parking brake lever stroke is not the standard value, adjust as described below.
1. Remove the inner compartment of the floor console.
2. Loosen the parking brake cable adjusting nut to the end of the cable rod, to allow slack in the cables.
3. Jack up the rear of the vehicle and support on jack stands and remove the rear wheels.
4. Temporarily install the wheel nuts so that the back of the nuts contact the brake disc and hold the disc in position.
5. Remove the brake shoe adjustment hole plug, and insert a flat blade screwdriver to turn the adjuster wheel (to expand the shoe) sufficiently to
prevent the disc rotating.
6. Rotate the adjuster wheel 5 notches in the reverse direction to allow the disc to rotate freely. Carry out this operation on both sides.
7. Remove the temporarily installed wheel nuts and install the rear wheels.
8. Tighten the parking brake cable adjusting nut inside the vehicle to achieve a 3-5 notch stroke of the parking brake lever at the specified lever
force.
CAUTION: If the number of brake lever notches engaged is less than the standard value, the cable has been over adjusted. Be sure to adjust it
to within the standard value.