
Eclipse L4-1795cc 1.8L SOHC (1990)
(3) Move tensioner fully toward water pump and temporarily secure tensioner.
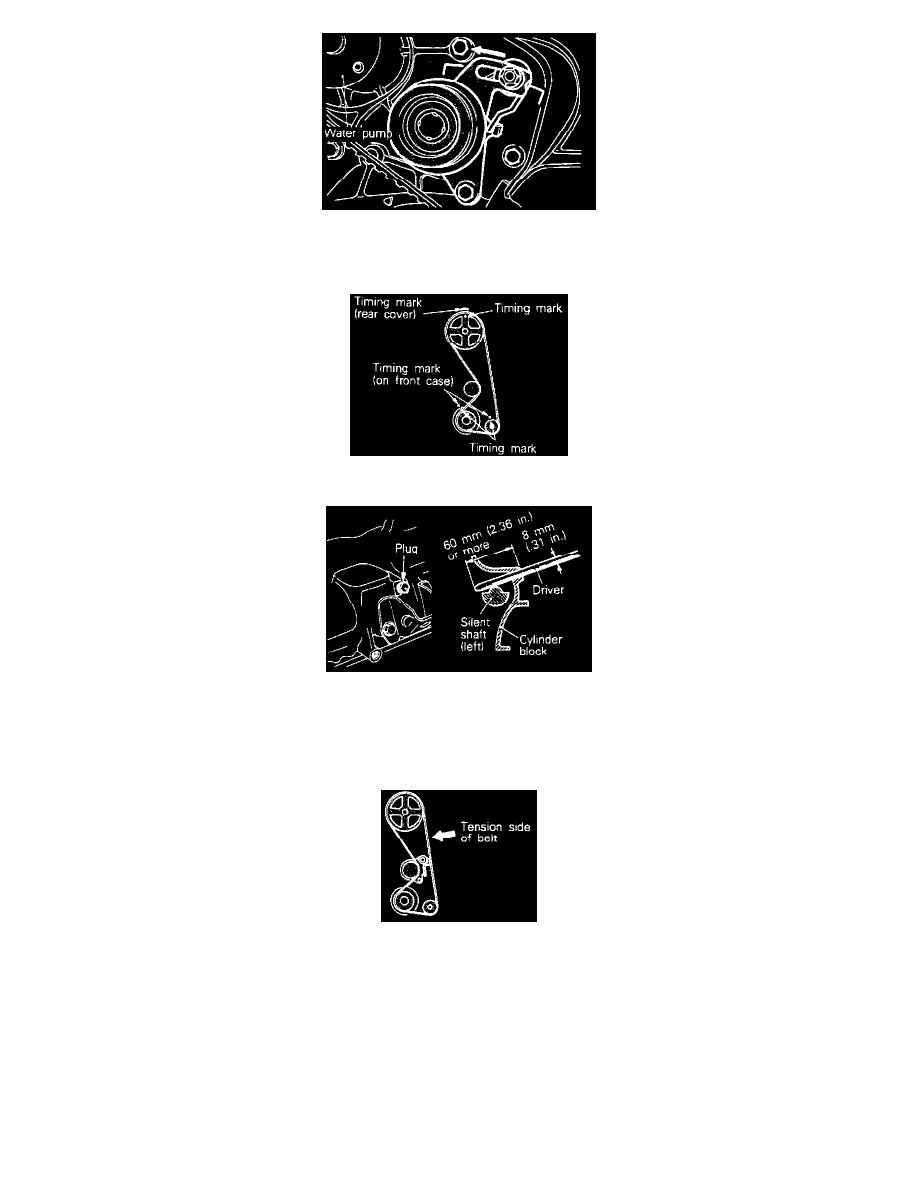
19. Installation of timing belt.
(1) Ensure that the timing marks of the camshaft sprocket, the crankshaft sprocket, and the oil pump sprocket are all aligned.
(2) When aligning the timing mark of the oil pump sprocket, remove the plug of the cylinder block; then insert the shaft of a cross-tip (+)
screwdriver with a shaft diameter of 8 mm (0.31 in.) into the plug hole and check to be sure that the screwdriver's shaft can be inserted at least
60 mm (2.36 in.). Do not remove the screwdriver until the timing belt is completely attached. If the screwdriver's shaft can be inserted only to a
depth of about 20 to 25 mm (0.79 to 0.98 in.) because it contacts the silent shaft, turn the sprocket by one rotation and align the timing mark
once again; then check again to be sure that the screwdriver's shaft can be inserted at least 60 mm (2.36 in.).
(3) Install timing belt. While making sure that tension side of belt is not slackened, install timing belt onto crankshaft sprocket, oil pump sprocket
and camshaft sprocket in that order.
Caution: If the timing belt is reused, install so that the arrow marked on it at the time of removal is pointing in the clockwise direction.
-
Adjustment of timing belt tension.