
Eclipse L4-1795cc 1.8L SOHC (1990)
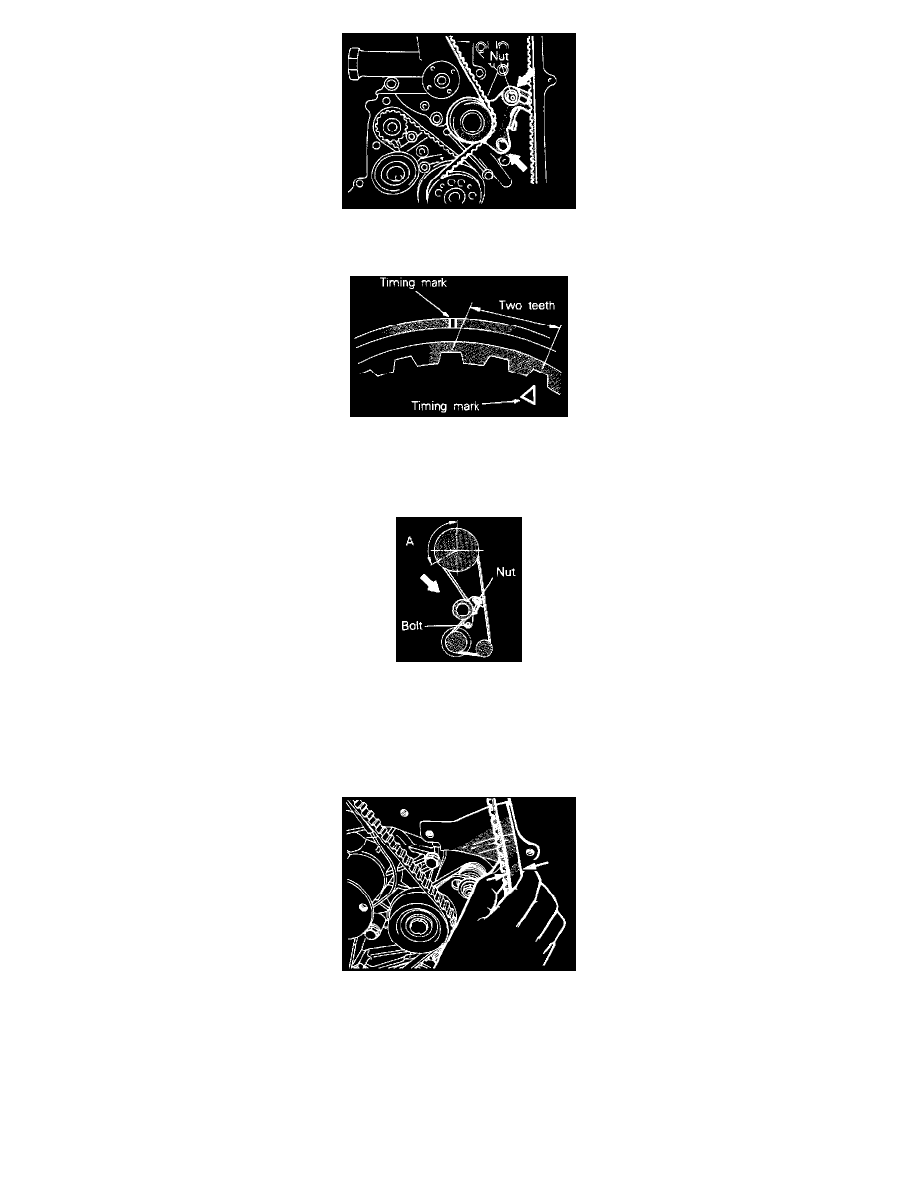
(1) Loosen tensioner mounting nut. By so doing, tensioner will be moved by spring and will apply tension to belt.
(2) Recheck to be sure that each sprocket's timing mark is correct.
(3) Turn the crankshaft clockwise by two teeth of the camshaft sprocket.
Caution: As the purpose of this procedure is to apply the proper amount of tension on the timing belt, be sure not to rotate the crankshaft
counterclockwise or place pressure on the belt to check the amount of tension.
(4) Apply force on tensioner toward turning direction, (in the direction of the arrow) such that no portion of the belt raises out in portion A, place
the belt on the camshaft sprocket such that the belt sprocket teeth are fully engaged.
(5) Tighten the tensioner installation bolt and tensioner spacer in that order.
Caution: If the tensioner spacer is tightened first, the tensioner will rotate with it and belt tension be thrown out of adjustment. Always tighten the
bolt first.
(6) Check to see that the clearance between the outside of the belt and the cover are within the standard value by grasping the tension side
(between the camshaft sprocket and oil pump sprocket) of the center part of the timing belt between the thumb and index finger.
Standard value: 12 mm (0.40 in.).
14. Installation of timing belt front lower cover /12, timing belt front upper cover.