
Eclipse GS L4-2350cc 2.4L SOHC MFI (2002)
CAUTION: The driveshaft joint uses special grease. Do not mix old and new or different types of grease.
2. Fill the TJ case with repair kit grease and insert the driveshaft, and then refill the TJ case with repair kit grease.
Grease quantity:
100 ± 10 g (3.5 ± 0.4 oz) <2.4L ENGINE>
105 ± 10 g (3.7 ± 0.4 oz) <3.0L ENGINE>
NOTE: The grease in the repair kit should be divided in had for use, respectively, at the pint and inside the boot.
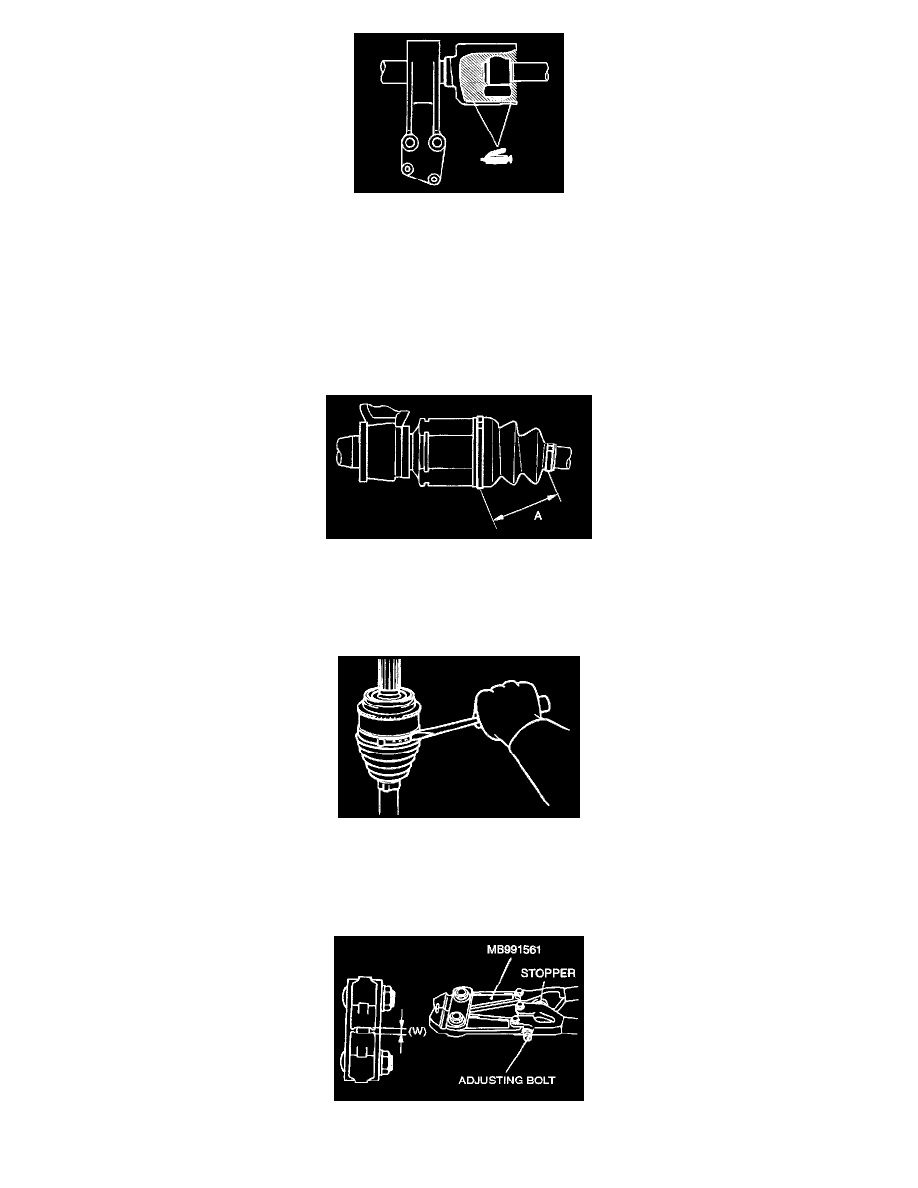
>>G<< TJ BOOT BAND (SMALL)/TJ BOOT BAND (LARGE) INSTALLATION
1. Position the TJ outer race so that the distance between the boot bands is at the standard value.
Standard value (A): 85 ± 3 mm (3.3 ± 0.12 inch)
2. Remove part of the TJ outer race to release the air pressure inside the boot.
BJ BOOT REPLACEMENT
1. Remove the boot bands (large and small).
NOTE: The BJ boot bands cannot be roused.
2. Remove the BJ boot.
3. Turn the adjusting bolt on the special tool MB991561 so that the size of the opening (W) is at the standard value.