Eclipse GS L4-2350cc 2.4L SOHC MFI (2002)

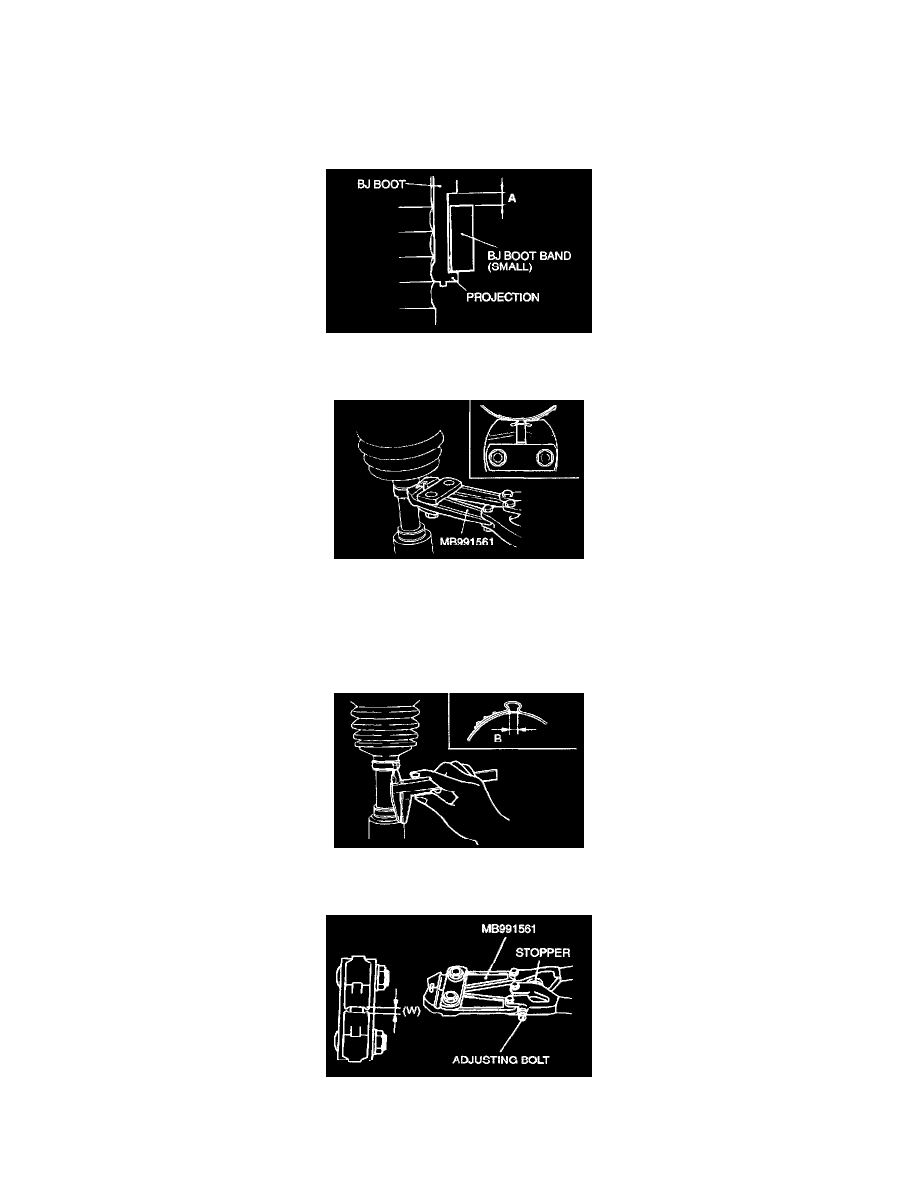
Standard value (W): 2.9 mm (0.12 inch)
If it is larger than 2.9 mm (0.12 inch)> Tighten the adjusting bolt.
If it is smaller than 2.9 mm (0.12 inch)> Loosen the adjusting bolt.
NOTE: The value of W will change by approximately 0.7 mm (0.03 inch) for each turn of the adjusting bolt.
NOTE: The adjusting bolt should not be turned more than once.
4. Place the BJ boot band (small) against the projection at the edge of the boot, and then secure it so that there is a clearance left as shown by (A) in
the illustration.
CAUTION:
^
Secure the driveshaft in an upright position and clamp the part of the BJ boot band to be crimped securely in the jaws of the special tool
MB991561.
^
Crimp the BJ boot band until the special tool MB991561 touches the stopper.
5. Use special tool MB991561 to crimp the BJ boot band (small),
6. Check that crimping amount (B) of the BJ boot band is at the standard value.
Standard value (B): 2.4 - 2.8 mm (0.10 - 0.11 inch)
If the crimping amount is larger than 2.8 mm (0.11 inch)> Readjust the value of (W) in step 4 according to the following formula, and then repeat
the operation in step 6.
[W = 5.5 mm (0.22 inch) - B]
