
Eclipse Spyder FWD L4-2350cc 2.4L SOHC 16 Valve (1996)
4.
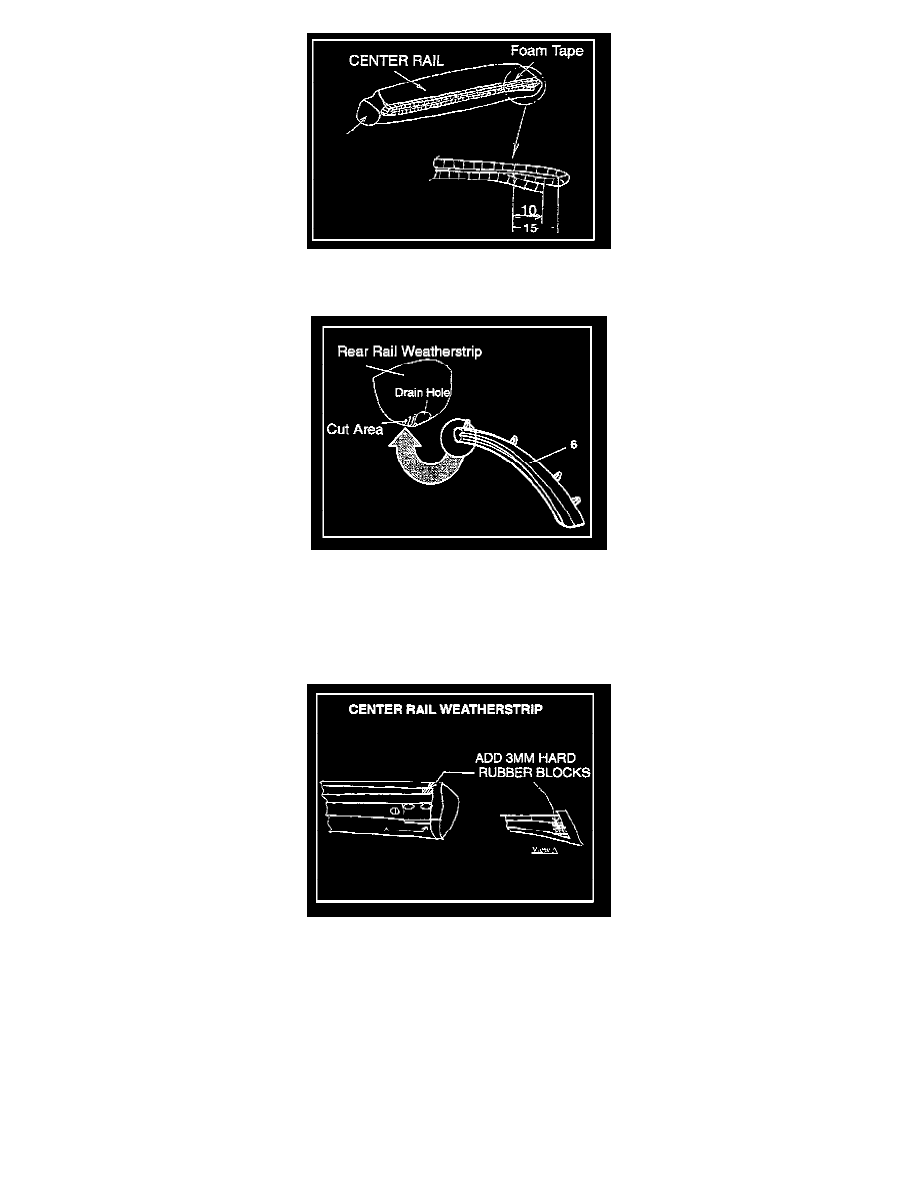
With the center rail weatherstrip and holder removed, remove the foam along the edge of the center rail and apply a new piece of self-adhesive
foam around the lip of the center rail as shown. (For vehicles produced prior to 3/97)
5.
With the center rail weather strip still removed locate the drain hole in the front lower edge at the front of the rear rail weatherstrip. Carefully
increase the size of this drain hole, elongating the hole toward the inside of the vehicle as shown. This will allow a greater flow of water to drain
from this area and out of the weatherstrip.
! CAUTION
Be careful not to cut the hole too large or in the outward direction. This will collapse the weatherstrip and allow more water to enter the vehicle.
6.
Reinstall the center rail weatherstrip and holder, making sure that the holder screws are aligned according to the match-marks made on removal.
Inspect the fit of the center rail weatherstrip to the front and rear rail weather-strips. There should be a smooth fit without any gaps or binding. The
rear rail weatherstrip should slightly overlap the center rail weatherstrip. If there is a gap at either or both ends of the center rail weatherstrip,
remove the weatherstrip again and insert a 3 mm long hard rubber pad at the front and/or the rear of the weatherstrip where the holder bracket
inserts as shown. This will allow the weatherstrip to be stretched reducing the gap(s) between it and the other weatherstrip(s).
7.
Reinstall the weatherstrip and holder. Check the alignment of the glass in relation to the weatherstrip, then water test to make sure the leak is
corrected.
C.
Front Rail/Center Rail Leak at Highway Speeds or in Heavy Rain - Front Door Area Leaks
1.
WEATHERSTRIP ADJUSTMENT AND INSPECTION