
Eclipse Spyder FWD L4-2350cc 2.4L SOHC 16 Valve (1996)
a.
Inspect the weatherstrip for damage or abnormal compression and replace if necessary.
b.
Remove the weatherstrip and make sure the holder is adjusted properly according to the procedures in this bulletin. If not, move the holder
outward as necessary to provide the proper pressure on the glass. Retest.
2.
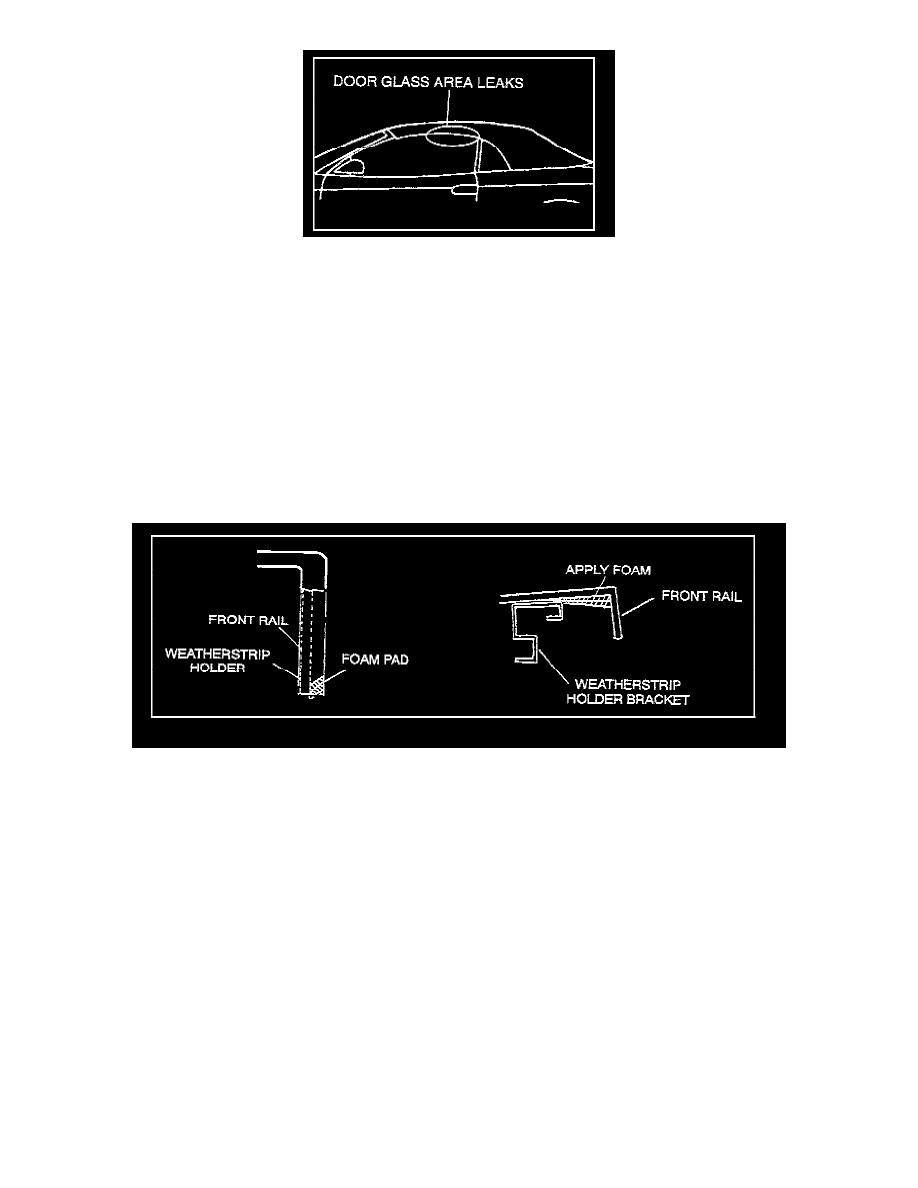
FOAM ADDITION
If there is still a water leak from the joint between the front and center rail weatherstrips after adjustment, add a foam pad at the edge of the front
rail weatherstrip holder.
a.
Open the top to the half-open position.
b.
Remove the front rail weatherstrip.
c.
Mark the location of the front rail weatherstrip holder retainer screws, then remove the two lower screws from the holder.
d.
Lift up or slide the holder bracket away from the rail and slide a piece for self-adhesive foam pad (30 mm long x 20 mm wide x 5 mm thick)
under the edge of the holder. Wrap it outward to the edge of the rail assembly as shown above.
e.
Reinstall the weatherstrip holder back into its original position using the match-marks for the screw as a guide. Reinstall the weatherstrip
and check for gaps between the front rail and center rail weatherstrips. If there is excessive gap, go back to step B.6. and install the hard
rubber pads in the center rail weatherstrip. If not, water test to see if the leak is corrected.
PARTS INFORMATION
PARTS REQUIRED
Butyl Tape
Foam:
Any self-adhesive closed cell black foam tape (3M Scotchfoam 6375 or equivalent)
Header - 70 mm x 12 mm x 5 mm
Center Rail Wrap - 520 mm x 12 mm x 5 mm
Front Rail - 30 mm x 20 mm x 5 mm
Hard Rubber Pads: 3 mm x 5 mm x 10 mm
WARRANTY INFORMATION
Service information only. No special warranty procedures apply.