
Lancer Evolution L4-2.0L DOHC Turbo (2003)
Part 3 Of 3
REMOVAL AND INSTALLATION
CAUTION:
^
Before removing the steering wheel and air bag module assembly, always refer to Service Precautions, Air bag Module and Clock Spring. Also,
set the front wheels so that they are facing straight forward, and remove the ignition key. If you fail to do this, the SRS clock spring will be
damaged, causing the SRS air bag to be inoperative and serious injury.
^
*1: Indicates parts which should be initially tightened, and then fully tightened after placing the vehicle horizontally and loading the full weight of
the engine on the vehicle body.
^
*2: Indicates parts which should be temporarily tightened, and then fully tightened with the vehicle on the ground in the unladen condition.
^
If the vehicle is equipped with the Brembo(TM) disc brake, during maintenance, take care not to contact the parts or tools to the caliper because
the paint of caliper will be scratched.
REMOVAL SERVICE POINTS
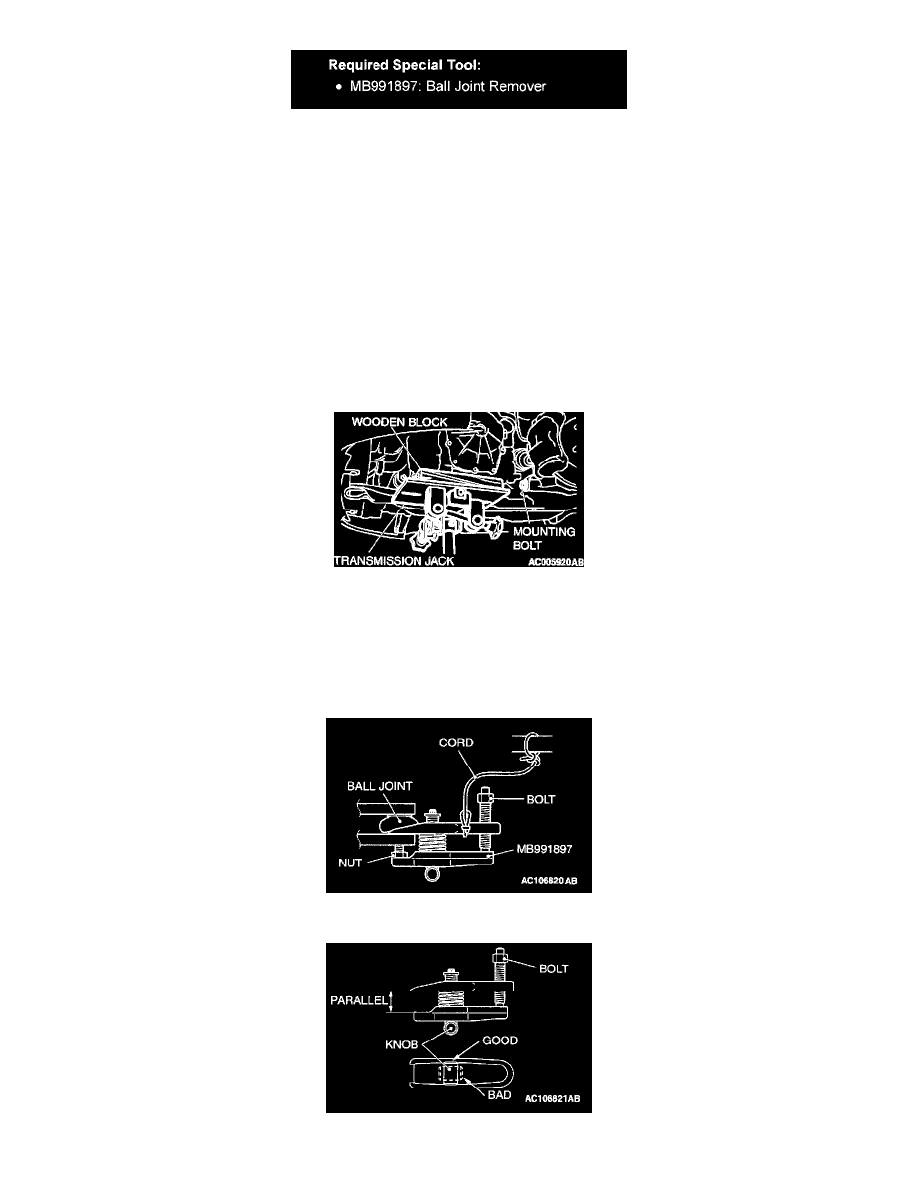
<<A>> LOWER ARM ASSEMBLY REMOVAL
Lift the transaxle with a transmission jack, and then withdraw the front mounting bolt on the left lower arm assembly
<<B>> TIE ROD END AND KNUCKLE DISCONNECTION
CAUTION:
^
Do not remove the nut from ball joint. Loosen it and use special tool MB991897 to avoid possible damage to ball joint threads.
^
Hang special tool MB991897 with cord to prevent it from falling.
1. Install the special tool MB991897 as shown in the figure.
2. Turn the bolt and knob as necessary to make the jaws of special tool MB991897 parallel, tighten the bolt by hand and confirm that the jaws are