
Montero LS 4WD V6-2972cc 3.0L SOHC 12 Valve (1994)
Axle Shaft: Service and Repair
Installation
1. After applying specified grease to outer surface of wheel bearing outer race and lip of new oil seal, drive them into bearing case using handle tool,
No. MB990938-01 and bearing and oil seal installer tool, No. MB990937-01, or equivalent.
2. Slide bearing case and wheel bearing over axle shaft, lubricate wheel bearing rollers, then install wheel bearing inner race with axle bearing
remover/installer tool, No. MB990799, or equivalent.
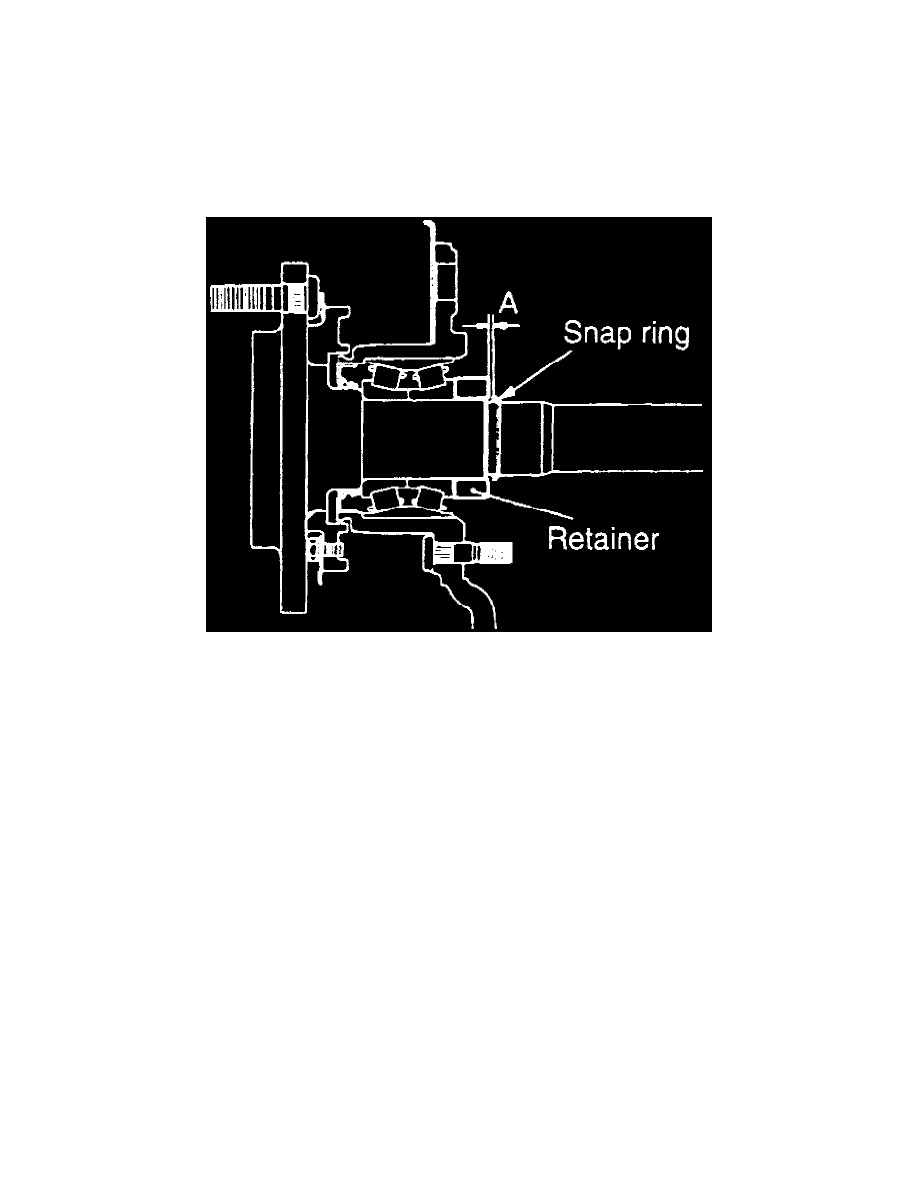
3. Install bearing retainer as follows:
a. Press on bearing retainer while confirming that 11,023 lbs. of pressure or more is needed to start the bearing retainer on the axle shaft and
17,637 lbs. of pressure or more is used for the final pressure input.
Fig. 7 Axle Bearing Retainer Snap Ring Clearance
b. Install retainer snap ring, and measure clearance (A) as shown Fig. 7 is less than 0.0065 inch.
4. Lubricate lip of new oil seal, then using oil seal installer tool, No.MB990930-01 and handle tool No. MB990938, or equivalent, drive oil seal into
axle housing.
5. Adjust axial play of rear axle shaft as follows:
a. Remove any old sealant and rust from mating surfaces of bearing case and axle housing.
b. Insert a 0.04 inch shim and O-ring into left side of axle housing and apply semi-drying sealer to mating surface of bearing case.
c. Insert left side axle shaft assembly into left side of axle housing, then tighten bearing case to specifications.
d. Insert right side axle shaft assembly into right side axle housing without using shim or O-ring, then torque bearing case to 4 ft. lbs. Measure
gap between bearing case and axle housing.
e. Loosen nut and separate right side axle shaft assembly from axle housing.
f.
Using a shim with thickness equal to that of measured gap and a shim with thickness of 0.0020-0.0079 inch, insert shims and O-ring into axle
housing, then apply semi-drying sealant to mating surface of bearing case.
g. Insert right side axle shaft assembly into right side axle housing, then tighten bearing case to specifications.
h. Using dial indicator, check that axial play of axle shaft is 0.002-0.008 inch. If not, adjust shim thickness.
6. Lubricate bearing case and axle housing end.
7. Attach brake assembly, with wheel cylinder, to axle housing.
8. Insert O-ring between axle housing end and bearing case, then apply semi-drying sealant to bearing case.
9. Tighten bearing case to specifications.
10. Connect brake line to wheel cylinder, then install rear brake drum and wheel.