
Montero XLS 4WD V6-3.5L SOHC (2001)
Clockspring Assembly / Spiral Cable: Testing and Inspection
Required Special Tool:
MB991613: SRS Check Harness
MB991223 (MB991222): Harness Set (Probe)
If, even one abnormality is discovered in Steps 1 to 5, replace the clock spring with a new one.
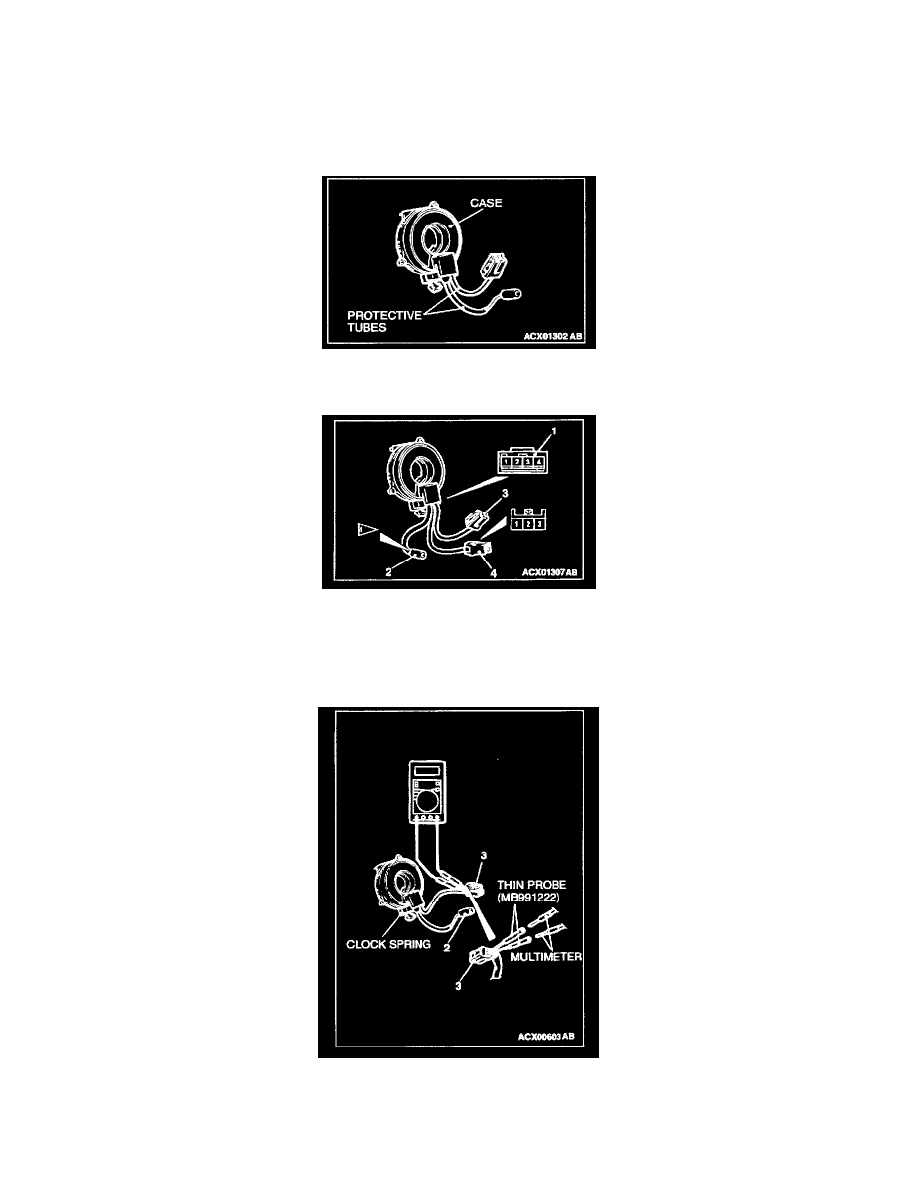
1. Check the connectors and protective tube for damage, and the terminals for deformation.
2. Visually check the case for damage.
3. Check that there is continuity among the clock spring connectors No.1, No.2 and No.4.
Connect terminal 1 of the connector No.1 and terminal 1 of connector No.4, terminal 2 of connector No.1 and terminal 3 of connector No.4,
terminal 3 of connector No.1 and terminal 2 of connector No.4, and terminal 4 of connector No.1 and terminal 1 of connector 2 respectively.
CAUTION: Do not insert the probe directly to the terminal from the front of the connector.
4. Insert the extra fine probe (MB991222) from the back of the clock spring No.3 connector.
5. Connect a circuit tester to the extra fine probe (MB991222) to check that the resistance value is 1 ohm and less. At the same time check the
open-circuit.
When the circuit is open: 1 MOhm and over