
Montero XLS 4WD V6-3.5L SOHC (2001)
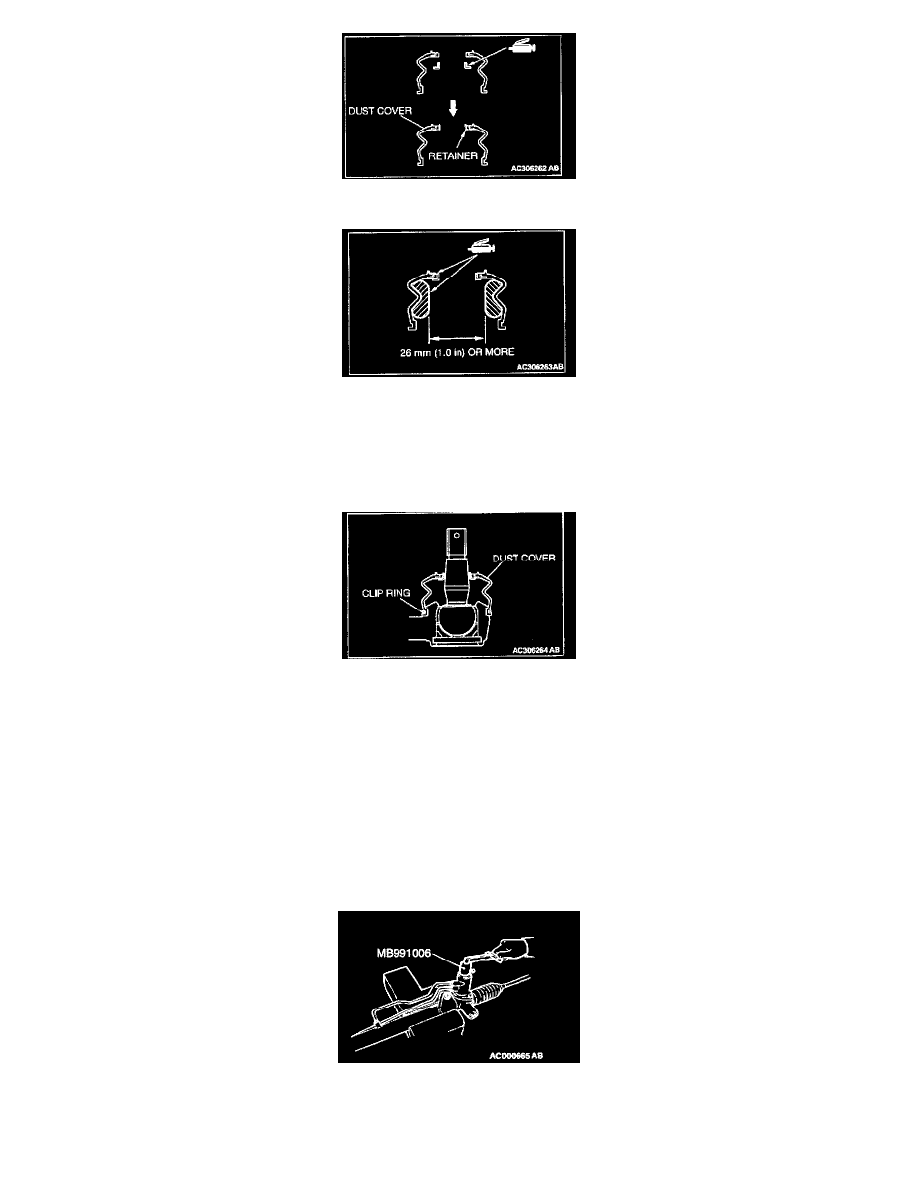
3. Apply multi-purpose grease to the new retainer, and assemble it to the new dust cover.
4. Fill multi-purpose grease inside the dust cover as shown.
Amount to use: 4 1 g (0.14 0.04 oz)
5. Apply multi-purpose grease to the dust cover lip.
6. Tape the stud threads to avoid damage.
CAUTION
Ensure grease does not come into contact with the ball joint threads and tapers.Wipe off the grease if contaminated.
7. Install the ball joint to the dust cover.
8. Secure the dust cover with the clip ring.
9. Engage the tie rod end ball joint with the knuckle.
NOTE
The retainer is secured in a predetermined position by tightening the ball joint nut to the specified torque.
INSPECTION
GEAR BOX TOTAL PINION TORQUE CHECK
CAUTION: When holding the steering gear box assembly in a vice, secure its mounting positions. If it is secured in any other places, the gear
housing may become deformed or damaged.
Using special tool MB990228 or MB991006, rotate the pinion gear at the rate of one rotation in approximately 4 to 6 seconds to check the total