
Montero XLS 4WD V6-3.5L SOHC (2001)
CAUTION: Be sure not to damage the bellows and the tie rod end dust cover when removing the gear box assembly.
Installation Service Points
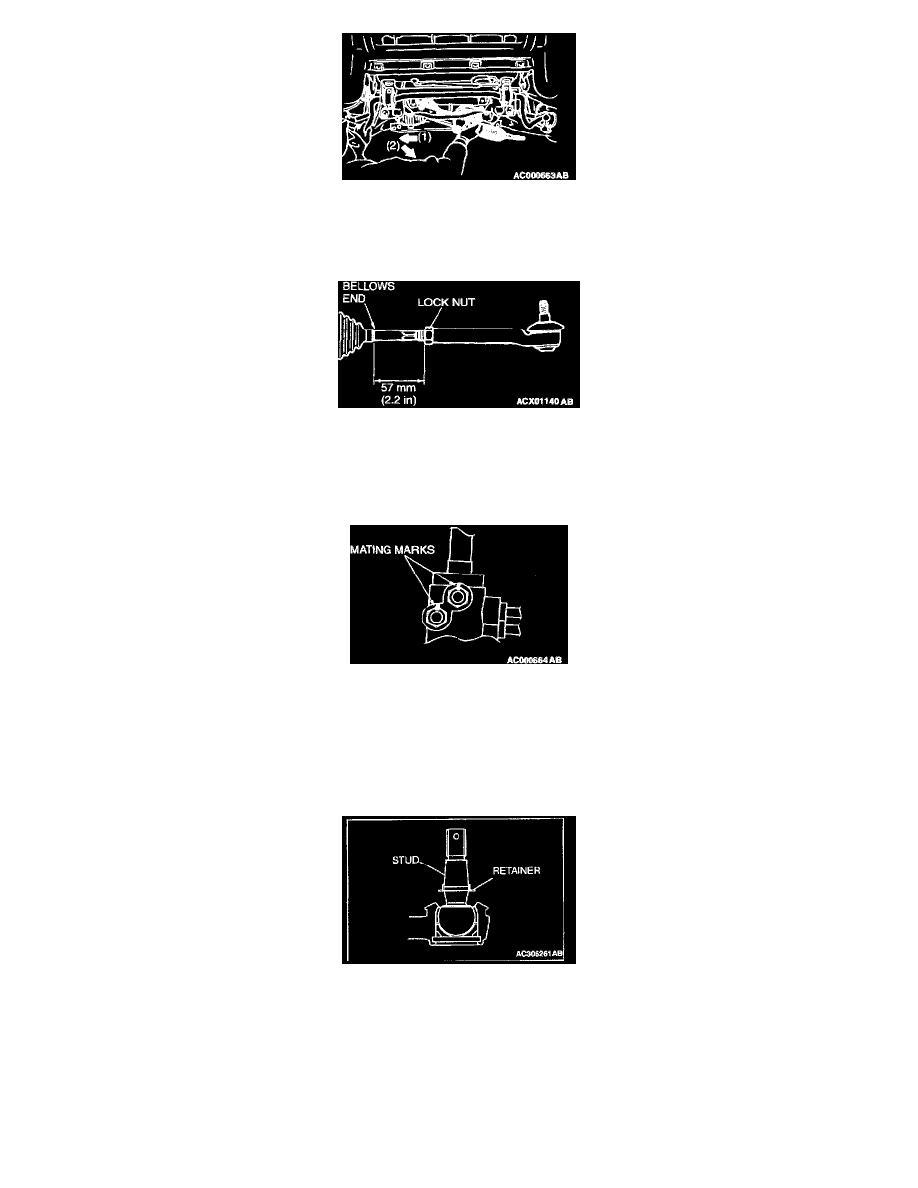
>>A<< Tie Rod End (LH) Installation
Screw the tie rod to the dimension shown in the illustration and secure it temporarily with the locknut.
NOTE: Tighten the locknut to the specified torque after installing the gearbox onto the body and adjusting the toe-in.
>>B<< Return Tube/Pressure Hose Assembly Installation
Align the markings at the gearbox side and the tube side.
>>C<< TIE ROD END AND KNUCKLE CONNECTION
If the tie rod end is disengaged from the knuckle, renew the tie rod end dust cover and retainer by following the procedure below.
1. Unclip the spring ring to remove the dust cover.
CAUTION
Be careful not to damage the ball joint stud.
2. Use a flat-tipped screwdriver to remove the retainer.