
Montero XLS 4WD V6-3.5L SOHC (2001)
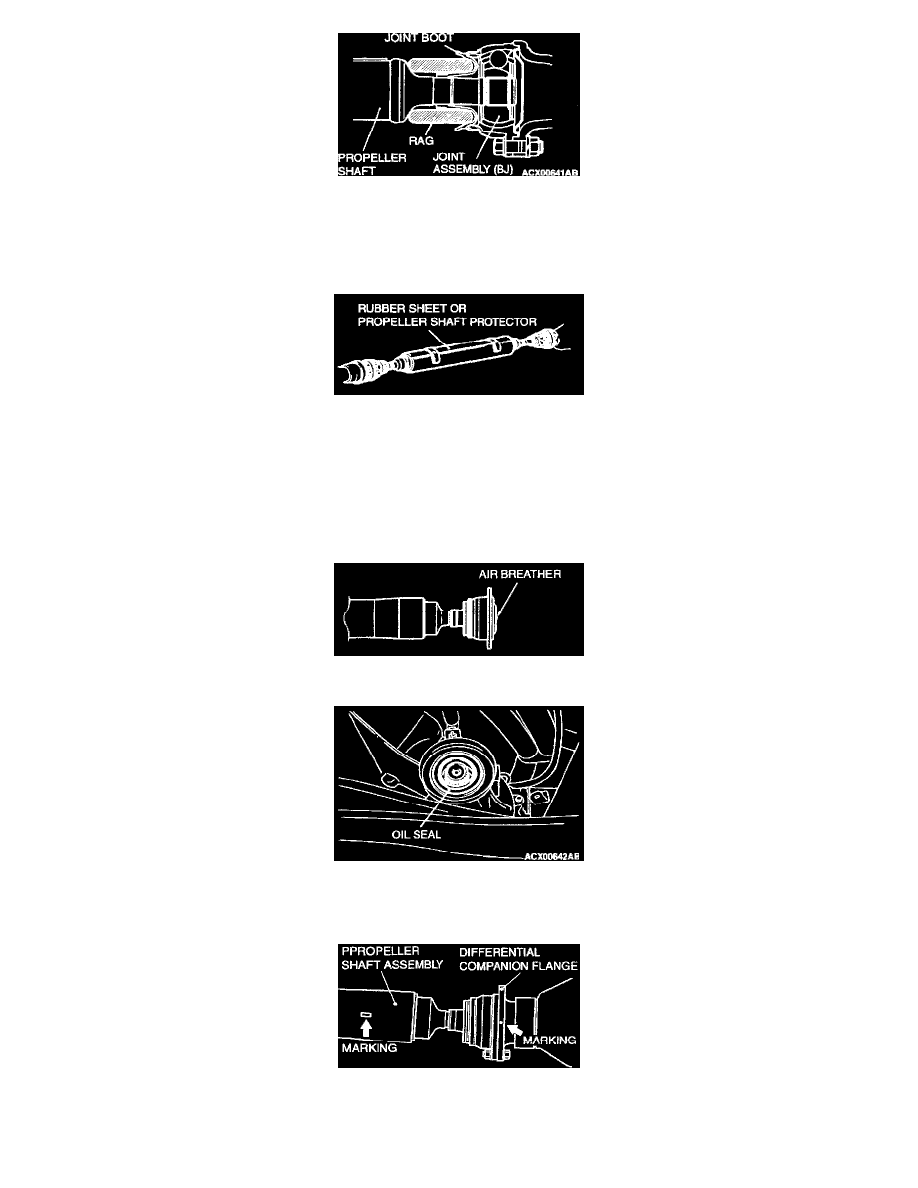
3. Remove the front propeller shaft assembly after placing a rag around the joint boot portion.
4. Cover the transfer case opening to prevent foreign material from entering.
INSTALLATION SERVICE POINTS
>>A<< REAR PROPELLER SHAFT ASSEMBLY INSTALLATION
1. Check that the rear propeller shaft assembly is wrapped with the rubber sheet.
CAUTION:
^
Work with the CFRP tube of the propeller shaft assembly under the condition that the tube is wrapped with rubber sheet to prevent scratch
on the outer surface. Do not drop, shock or scratch the rear propeller shaft.
^
Wipe out oil and grease on the threads of the mounting bolts and nuts before tightening, or they will loosen.
^
If the propeller shaft is dropped on the ground, replace it with new one. If the dropped rear propeller shaft is reinstalled, the rear propeller
shaft may be broken.
^
Do not drop the air breather at the end portion of propeller shaft differential side into the propeller shaft ball joint.
^
Do not damage the oil seal lips on the transfer case.
2. If reusing the propeller shaft, align the mating marks of differential companion flange and outer race of ball joint assembly to install.
3. When installing a new rear propeller shaft assembly, install it so that the mark on the propeller shaft tube and the mark at the side of the
differential companion flange come nearest (within 30-degree angle).