
Pickup 2WD L4-2350cc 2.4L SOHC 8 Valve (1996)
2.
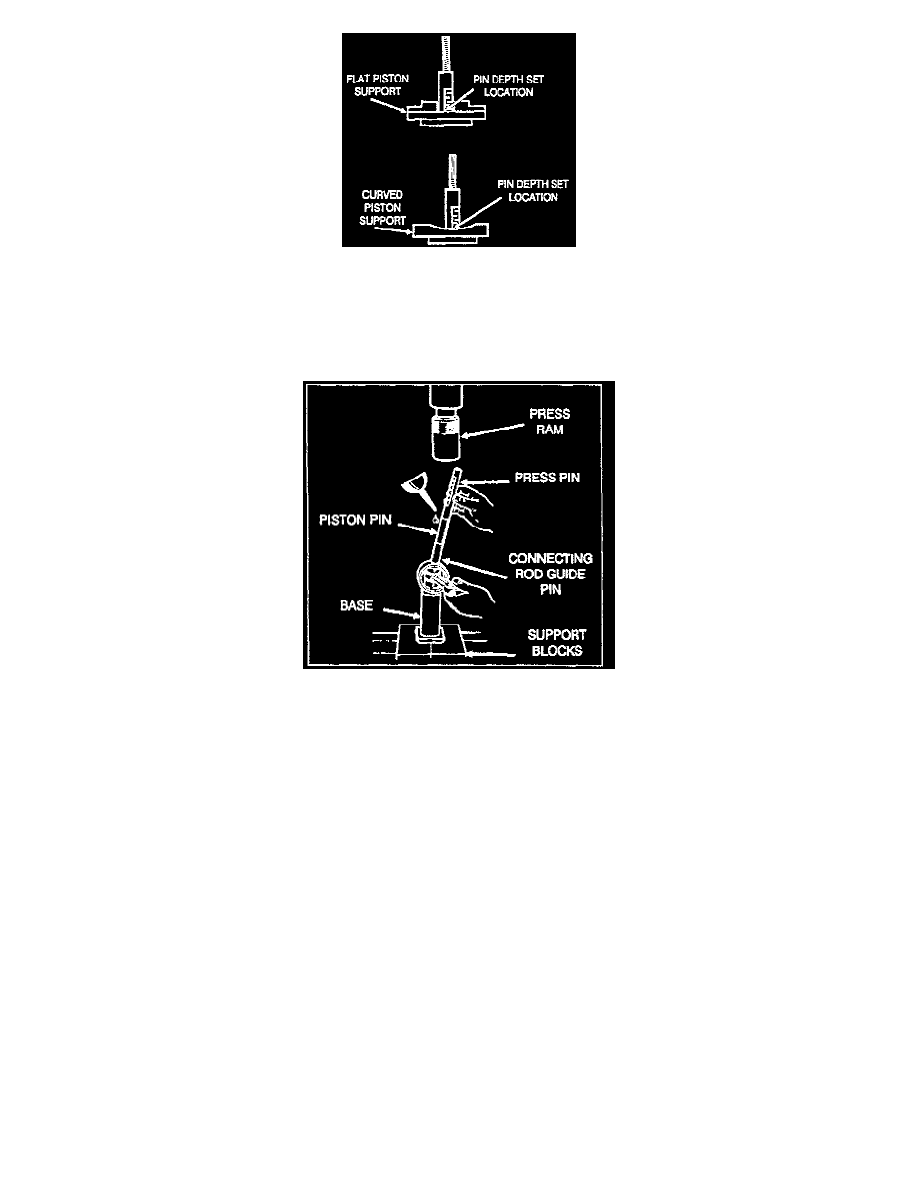
Using the markings on the press pin, adjust the stop screw to the correct depth according to the application table.
NOTE: The piston pin depth set location is measured on the piston support as shown. If a curved support is being used, measure to the bottom
center of the curve. For a flat support, measure to the lowest point of the flat surface.
3.
Place the base onto press support blocks.
4.
Slide the piston pin over the threaded end of the press pin, and thread the correct guide pin up against it.
5.
Coat the piston pin with oil, and with the connecting rod held in position, slide the guide pin through the piston and connecting rod.
6.
Press the piston pin through the connecting rod until the guide pin contacts the stop screw.
CAUTION: Due to production tolerance variations, it is necessary to visually inspect the piston pin depth after installation to verify that the
piston pin is centered. Adjust if necessary.
7.
Check that the piston moves smoothly. If not, press out the piston pin, determine the cause, correct it, and repeat the piston pin installation
procedure.