
Cutlass V6-191 3.1L VIN M SFI (1998)
17. Remove the front suspension support brace.
18. Remove the oil cooler lines from the transmission.
19. Remove the clips attaching the wire harness to the body.
20. Remove the left suspension support bolts and loosen the right bolts enough to remove the case side cover.
21. Lower the vehicle.
22. Lower the transmission with the engine support fixture enough to remove the case side cover.
23. Raise the vehicle.
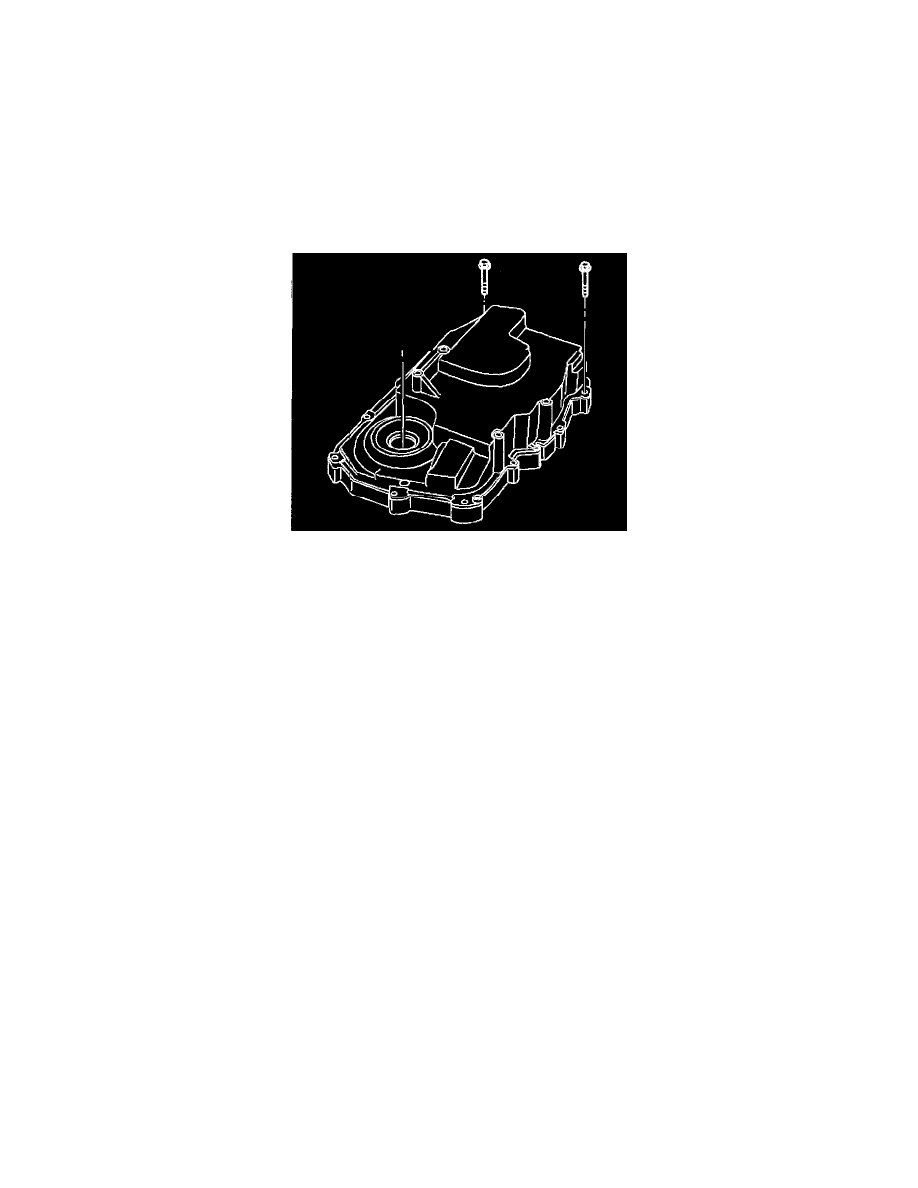
24. Remove the lower case side cover bolts.
25. Remove the case side cover and gasket.
26. Clean the case and side cover gasket surfaces.
INSTALLATION PROCEDURE
1. Install the seal protector into the side cover to prevent the seal from rolling.
2. Install the case side cover and gasket.
3. Install the case side cover lower bolts.
^
Tighten the case side cover bolts in a general star pattern to 28 Nm (21 ft. lbs.).
NOTICE: Refer to Fastener Notice in Service Precautions.
4. Loosely install the upper transmission support assembly with the lower bolts. Refer to A/T Mount Replacement (Front or Rear)
5. Raise the vehicle, refer to Vehicle Lifting.
6. Install the lower transmission support assembly bolts. Refer to A/T Mount Replacement A (Front or Rear)
7. Install the transmission mount.
8. Install the transmission mount to the body bolts. Refer to A/T Mount Replacement (Front or Rear)
9. Attach the wire harness to the body.
10. Install the oil cooler lines to the transmission.
11. Install the suspension support bolts.
12. Install the drive axle to the transmission.
13. Install the left ball joint to the steering knuckle assembly.
14. Install the left outer tie rod to the steering knuckle assembly.
15. Install the brake caliper to the steering knuckle assembly.
16. Install the left splash guard.
17. Install the left wheel and tire assembly.
18. Lower the vehicle.
19. Install the upper case side cover bolts.
NOTICE: Refer to Fastener Notice in Service Precautions.
20. Install the air cleaner assembly.
21. Remove the engine support fixture.
22. Connect the negative battery cable.
^
Tighten the bolt to 16 Nm (12 ft. lbs.).
23. Apply the brakes, turn the ignition to the ON position and shift transmission from reverse to drive.
24. Install the transmission mount pipe expansion bolt. Refer to A/T Mount Replacement (Front or Rear)
25. Check the fluid level.