
Colt L4-1597cc 1.6L SOHC Turbo (1985)
NOTE:
USE EXTREME CARE NOT TO DAMAGE THE PAINT FINISH OF THE VEHICLE.
Removal (if existing to be reused)
1.
Beginning at one end, separate the moulding from the vehicle using a cutter knife or equivalent.
2.
Using the cutter knife, remove as much of the adhesive from the vehicle and the moulding as possible, without damaging the paint or the
moulding.
NOTE:
ANY REMAINING ADHESIVE SHOULD HAVE AN EVEN SURFACE WHICH
WILL NOT INTERFERE WITH THE ADHESION OF THE DOUBLE FACE TAPE DURING INSTALLATION OF THE MOULDING.
Installation (new or used moulding)
1.
Using Mopar Super Kleen or equivalent, clean contact surfaces of vehicle and moulding.
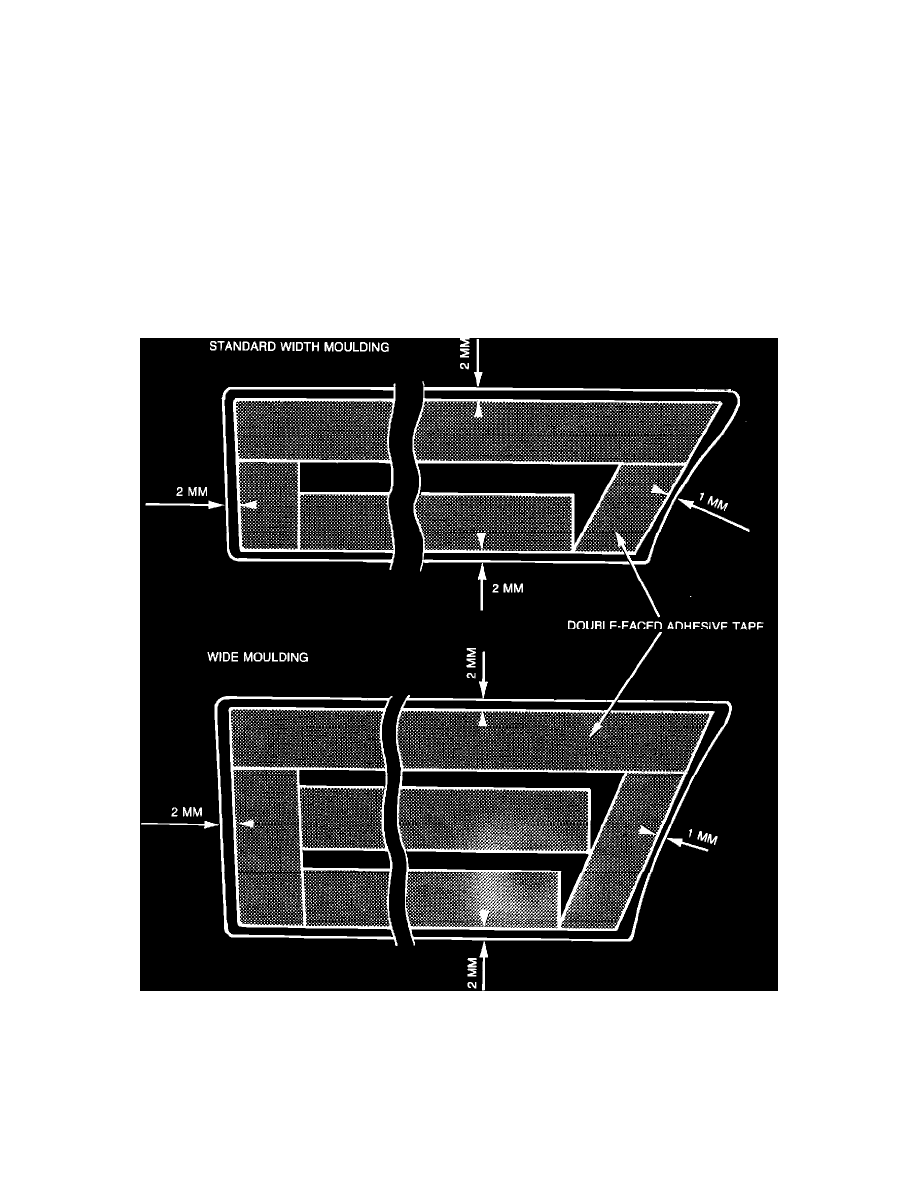
FIGURE 2 - Attachment Tape Application
2.
Apply Scotch-Mount Super Automotive Attachment Tape, PN 06380, to the moulding as shown in Figure 2.
3.
Install moulding on vehicle.
POLICY:
Information only