
Prowler V6-3.5L VIN G (1999)
Vacuum Brake Booster: Service and Repair
Remove
Caution: Reserve vacuum in the vacuum booster must be pumped down (removed) before removing master cylinder from vacuum booster. This is
necessary to prevent the vacuum booster from sucking in any contamination as the master cylinder is removed. This can be done simply by pumping
the brake pedal, with the vehicle's engine not running, until a firm feeling brake pedal is achieved.
1. With the engine not running, pump the brake pedal until a firm pedal is achieved (4-5 strokes).
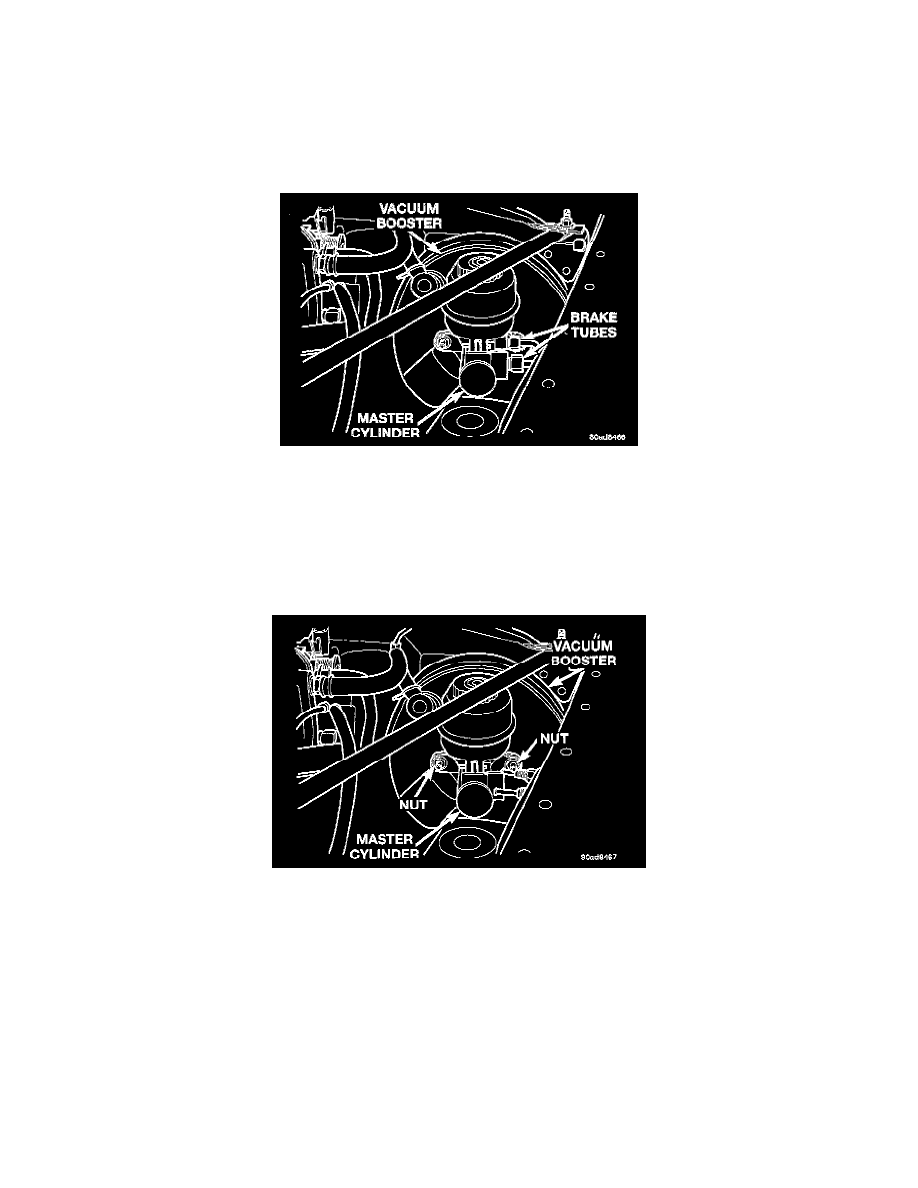
Master Cylinder Primary And Secondary Brake Tube
2. Remove the primary and secondary brake tubes from the master cylinder outlet ports. Install plugs in the master cylinder outlet ports.
Caution: Before removing the master cylinder from the vacuum booster, the master cylinder and vacuum booster must be thoroughly cleaned.
This must be done to prevent dirt from failing into the vacuum booster.
3. Clean area where master cylinder attaches to vacuum booster. Use only a solvent such as Mopar Brake Parts Cleaner or an equivalent.
Master Cylinder Attachment To Vacuum Booster
4. Remove the 2 nuts, attaching master cylinder to vacuum booster.
5. Remove master cylinder from vacuum booster.
6. Remove the 2 structural support struts from bracket above vacuum booster. Loosen the bolts on the other ends of structural support struts and
move the struts aside.
7. Remove vacuum hose from vacuum port on intake manifold and check valve on vacuum booster.
DO NOT REMOVE CHECK VALVE FROM POWER BRAKE BOOSTER.
Note: Removal of the knee blocker trim panel makes access to brake pedal and vacuum booster mounting nuts easier.