Prowler V6-3.5L VIN G (1999)

CAUTION: When installing shock into clevis, thread sealant must be used on the threads of the shock absorber and the shock absorber must be
tightened to the required torque specification.
ASSEMBLY
1. Coat the threads on the shock absorber with Mopar (R) Lock 'N Seal.
2. Thread the shock absorber into the clevis by hand as far as possible.
3. Using Adapter, Special Tool 6925, or equivalent tighten the shock absorber to a torque of 68 Nm (50 ft. lbs.).
4. Install the plastic collar and jounce bumper on the shaft of the shock absorber. The jounce bumper must be installed wish the tapered end down.
CAUTION: When installing the coil spring, the round coil of the spring must be installed down so it is on the clevis and the flat coil of the spring
up so it will be against the spring retainer.
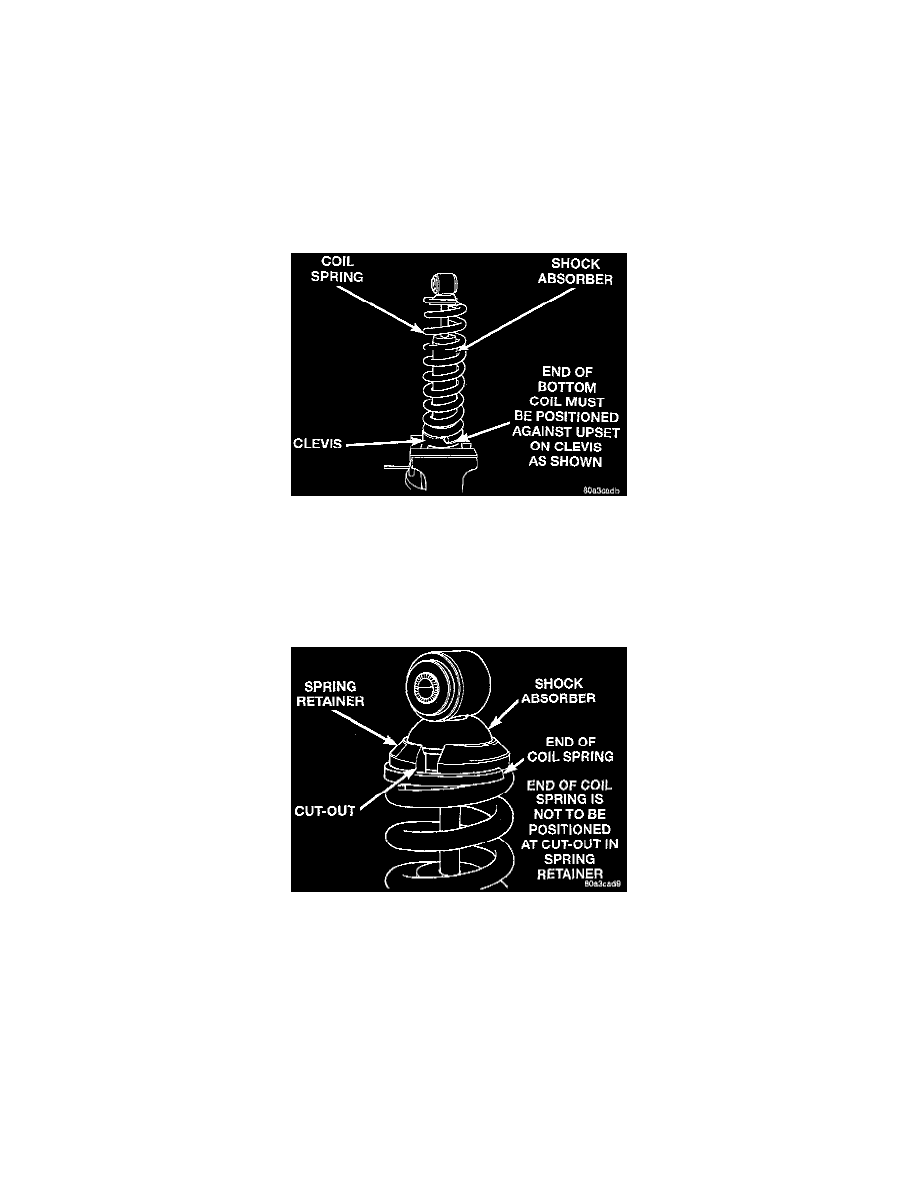
5. Install the coil spring on the shock absorber. Be sure the end of the bottom coil is seated correctly on the clevis of the shock absorber.
WARNING: When installing the spring compressor on the coil spring, the first full top and bottom coil of the spring must be fully
captured by the jaws of the coil spring compressor.
6. Install the spring compressor on the coil spring.
7. Compress the coil spring enough to allow the upper retainer for the coil spring to be installed on the coil spring and shock absorber.
8. Position the upper retainer on the coil spring so the end of the upper coil is not positioned at the cut-out in the retainer.
9. Relieve all tension from the spring compressor. After all spring tension has been remove from the spring compressor, remove it from the coil
spring.
10. Install the shock absorber.
