
Grand AM V6-3.4L VIN E (2001)
Wheel Cylinder: Service and Repair
Wheel Cylinder Replacement
Removal Procedure
1. Raise and suitably support the vehicle. Refer to Vehicle Lifting.
2. Remove the tire and wheel assembly.
3. Remove the brake drum. Refer to Brake Drum Replacement
4. Remove the brake shoes. Refer to Brake Shoe Replacement.
5. Clean the dirt and foreign material around the wheel cylinder.
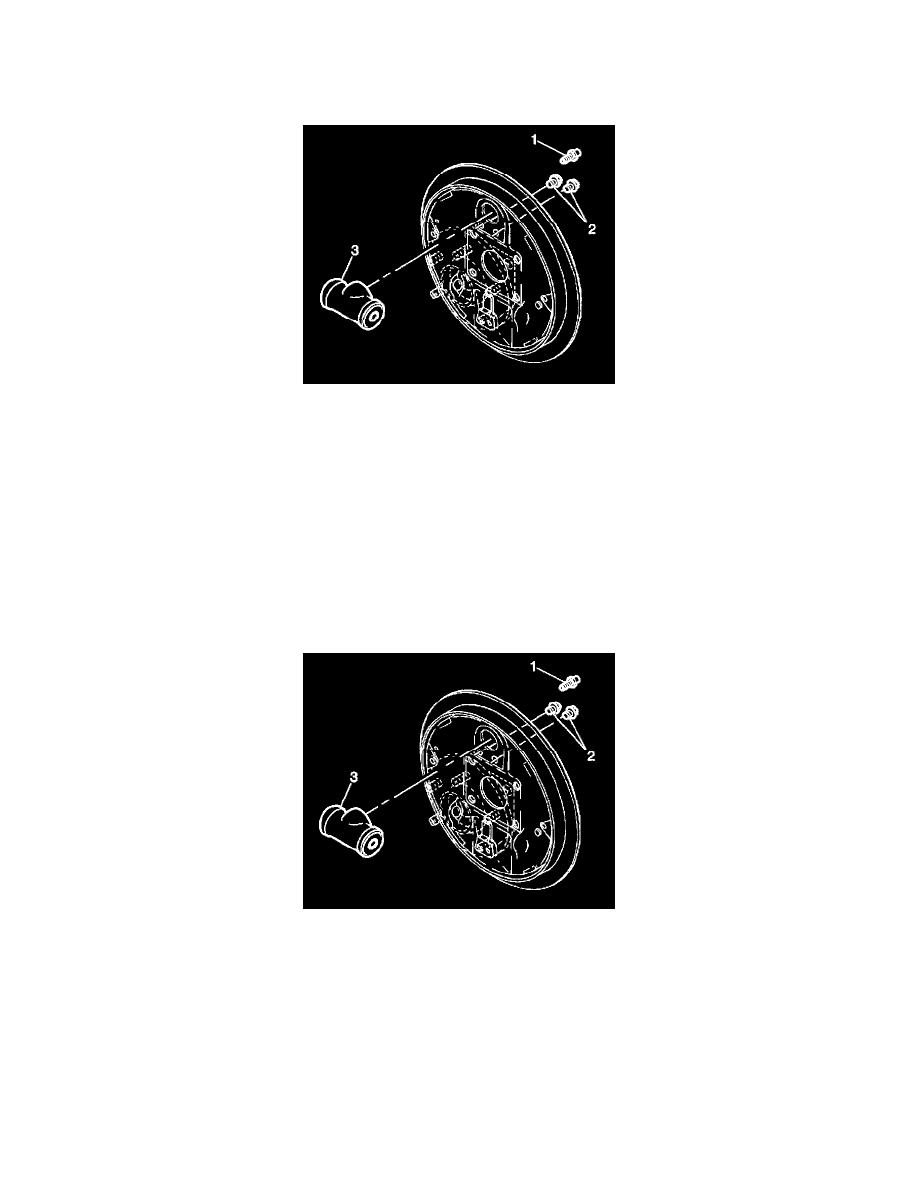
6. Remove the bleeder valve (1).
Important: Install a rubber cap or plug to the exposed brake pipe fitting ends in order to prevent brake fluid loss and contamination.
7. Disconnect the brake pipe fitting from the wheel cylinder. Plug the open brake pipe ends.
8. Remove the wheel cylinder mounting bolts (2).
9. Remove the wheel cylinder (3).
Installation Procedure
1. Apply Loctite(R) GM P/N 12345382 or equivalent to the wheel cylinder shoulder face that contacts the backing plate.
2. Position the wheel cylinder (3) to the backing plate.
Notice: Refer to Fastener Notice in Service Precautions.
3. Install the wheel cylinder mounting bolts (2).
^
Tighten the wheel cylinder mounting bolts to 20 Nm (15 ft. lbs.).
4. Remove the plugs from the brake pipe ends.
5. Connect the brake pipe fitting to the wheel cylinder.
^
Tighten the fitting to 23 Nm (17 ft. lbs.).
6. Install the bleeder valve (1).
^
Tighten the valve to 7 Nm (62 inch lbs.).
7. Install the brake shoes. Refer to Brake Shoe Replacement.