
900 L4-1985cc 2.0L (1982)
-
Driver's side front speaker grille
Part II:
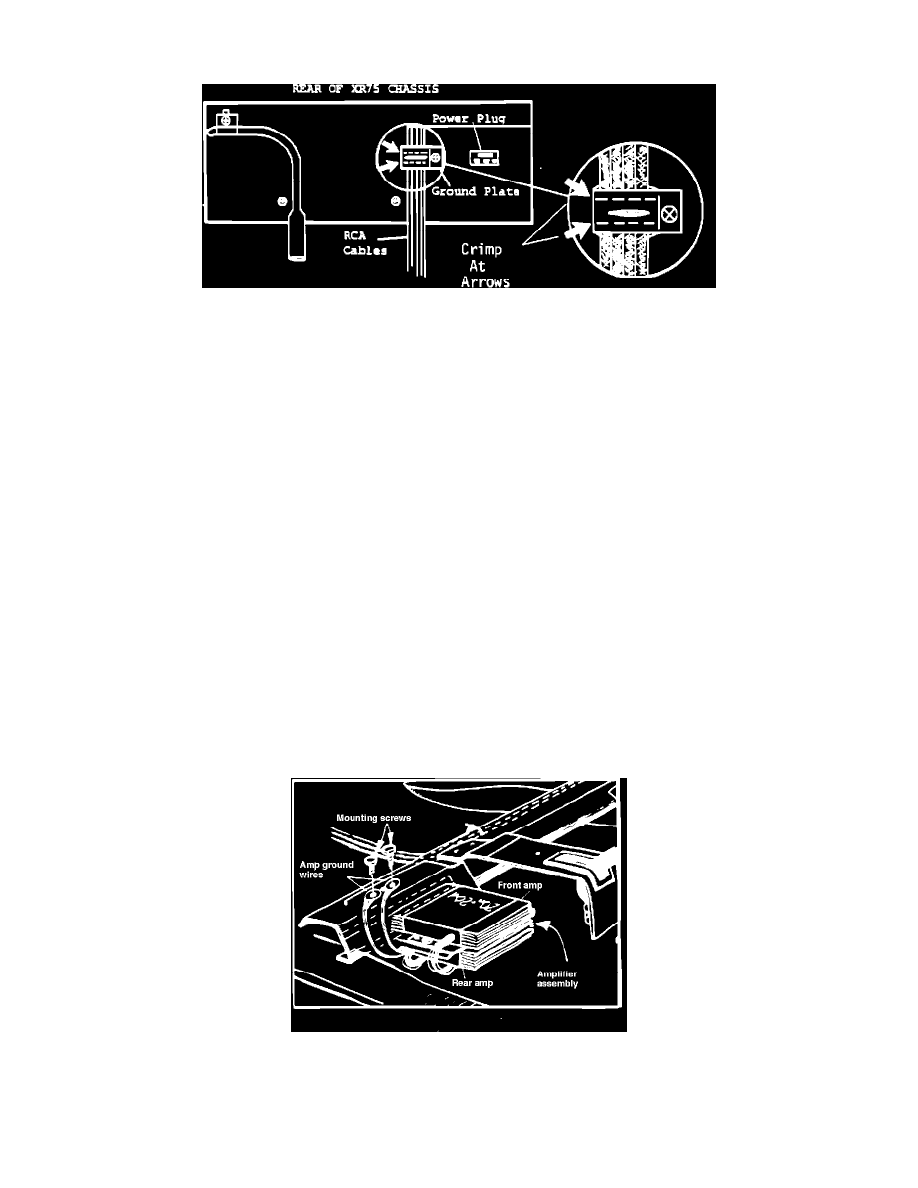
Improving radio grounds
1.
Unscrew the single Phillips screw and remove the square RCA ground plate from the radio chassis. Using a pair of diagonal cutters, crimp the
ground plate along the top and bottom edges about 3 mm in, just enough to make definite ground contact between the plate and the RCA cable
shields. Reinstall the plate to the radio making sure the screw is tight.
WARNING! Applying too much pressure or crimping too close to the edges of the plate will cause damage to the RCA cables.
2.
Cut the radio chassis ground wire from the radio side of the T power plug (cut at the plug) and connect it using the provided large ring terminal to
the stud at the rear of the radio chassis. (NOTE! Early cars [before Feb. 1983] have extra ground wire. It is not necessary to fabricate the ring
terminal connection.) Run the new ground wire provided in kit from the stud at the rear of the radio chassis to the ground buss bar on the beam
behind the instrument cluster. NOTE:
Remove any existing non-stock ground connections held together with "Scotch-Lok" connectors.
3.
If so equipped, remove and discard the plug-in in-line fuse between the blue radio antenna trigger and the green car trigger wires.
4.
Install the new 10" speaker jumper lead between the front-to-rear speaker harness and front speaker leads. Discard old jumper wire.
Part III:
Installing new RCA cables
1.
Cut and remove as much of the original RCA phono cables in the car as possible, both in the dash and under the rear seat. New RCA cables will be
installed. This will prevent any future wiring confusion.
2.
Mark one set of the new RCA cables at both ends with some type of identifying tag such as tape. Install both sets of RCA cables by passing them
down along the firewall just to the right of the radio opening. Reach your hand up between the knee pad and the firewall and pull both sets of
cables down. Connect the radio end of the RCA cables to the radio, connecting the flagged pair to the rear channel, so they don't fall into the
dashboard. Pass the cables under the carpet and run them under the rear seat support beam and connect the flagged pair of cables to the bottom or
rear amp. Connect the unmarked set of cables to the top or front amp.
3.
Using the small ring terminals and star washer provided, ground the two amplifier grounds separately to the two amplifier bracket mounting
screws.
Part IV:
Antenna Cable installation
1.
Cut and remove as much of the original antenna extension cable as possible.