
Astra L4-1.8L (2009)
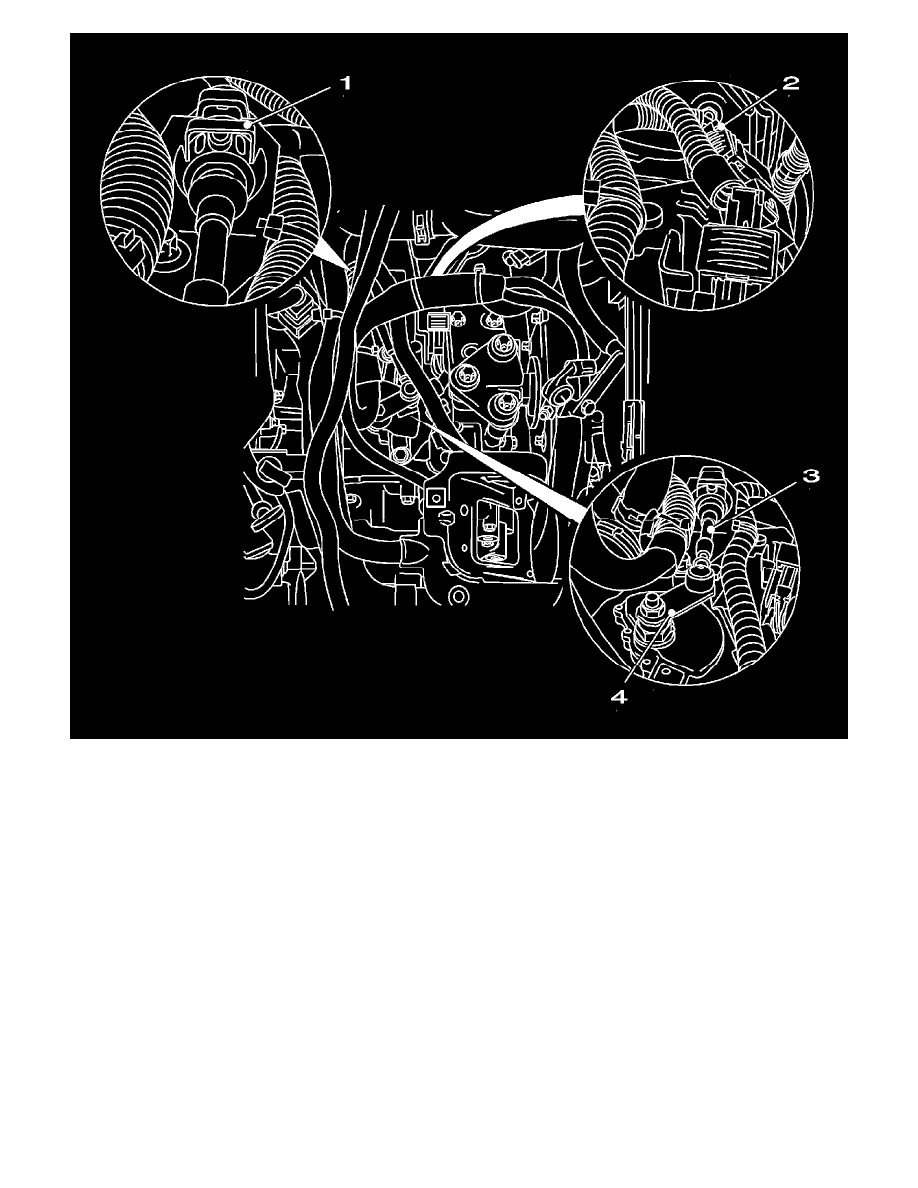
3. Remove the selector lever cable (3).
*
Remove the selector cable from selector lever (4).
*
Release the selector lever cable from the counterhold on the transmission.
*
Open the retaining clamp (1) with a screwdriver.
4. Disconnect wiring harness plug of the selector lever position switch (2).
Open the locking shackle.
5. Install KM-962-A (5).
*
Connect to the wiring harness plug of the selector lever position switch.
*
Connect to the battery with KM-962-A (1).
Note: The light diodes corresponding to the markings on the insert module must light up for the selector lever position "N".
6. Inspect the setting of the selector lever position switch.
*
Move the selector lever to the neutral position
*
Turn the selector lever (3) clockwise as far as the stop.
*
Twist back 2 notch positions ("P", "R", "N").
Note: Until all the light diodes corresponding to selector lever position "N" light up.