
ION L4-2.2L VIN F (2004)
3. Crimp the boot retaining clamp with the SA9203C.
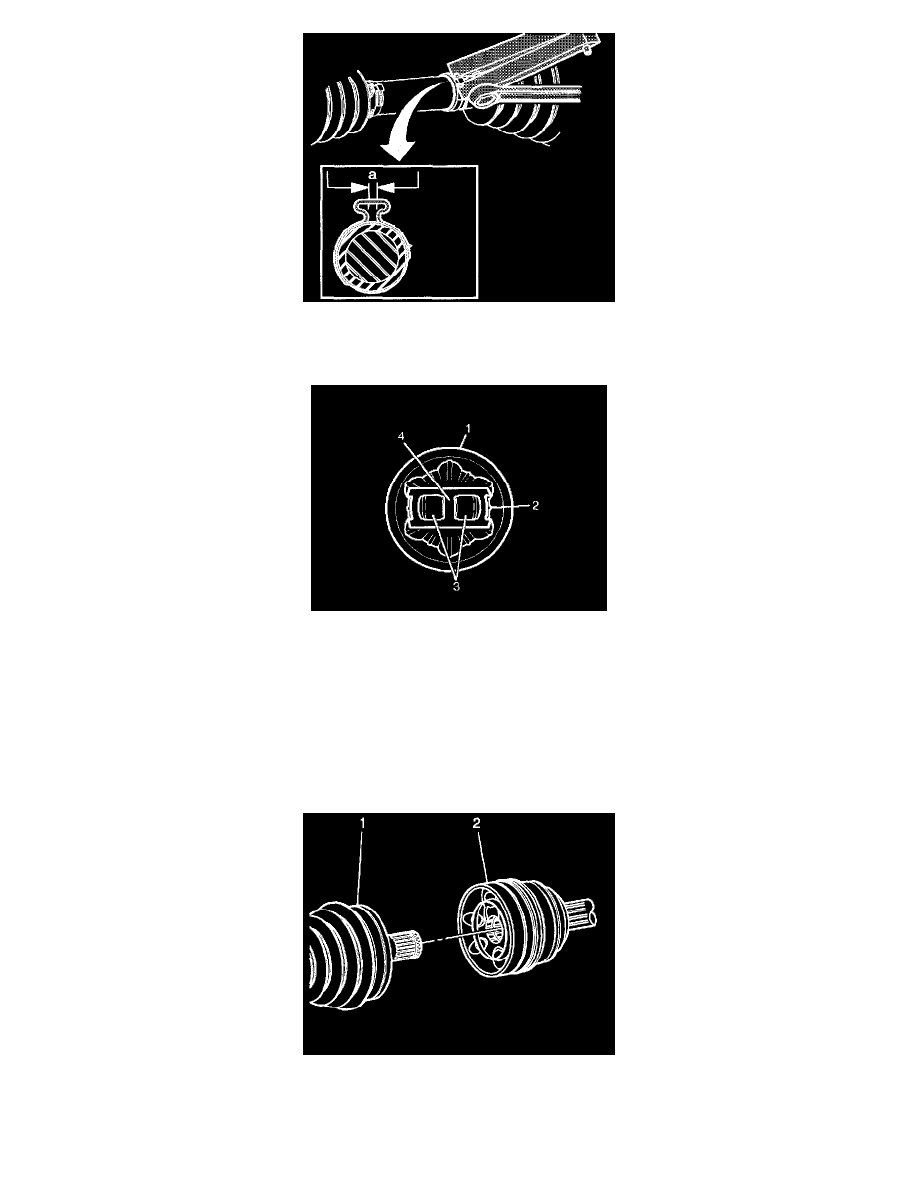
4. Measure the clamp end gap (a), taking care not to exceed 3 mm (0.118 inch). Repeat the previous step as necessary.
5. Check the gap dimension, continue tightening until the gap dimension is reached.
6. Put a light coat of grease from the service kit on the ball grooves of the inner race and the outer race.
7. Hold the inner race 90 degrees to centerline of cage (4) with the lands of the inner race (2) aligned with the windows (3) of the cage.
8. Insert the inner race into the cage.
Important: Ensure that the retaining ring side of the inner race faces the axle shaft.
9. Place the cage and the inner race into the outer race.
10. Insert the first chrome ball then tilt the cage in the opposite direction in order to insert the opposing ball.
11. Repeat this process until all 6 balls are in place.
12. Place approximately half the grease from the service kit inside the boot and pack the CV joint with the remaining grease.
13. Push the CV joint (2) onto the bar (1) until the retaining ring is seated in the groove on the bar.
Important: Ensure that the boot is not dimpled, stretched, or out of shape. If the boot is not shaped correctly, equalize the pressure in the boot
and shape the boot properly by hand.