
VUE AWD V6-3.5L VIN 4 (2004)
Notice:
Do not submerge the clutch drum in solvent. This will damage friction material and gerotor pump.
Important:
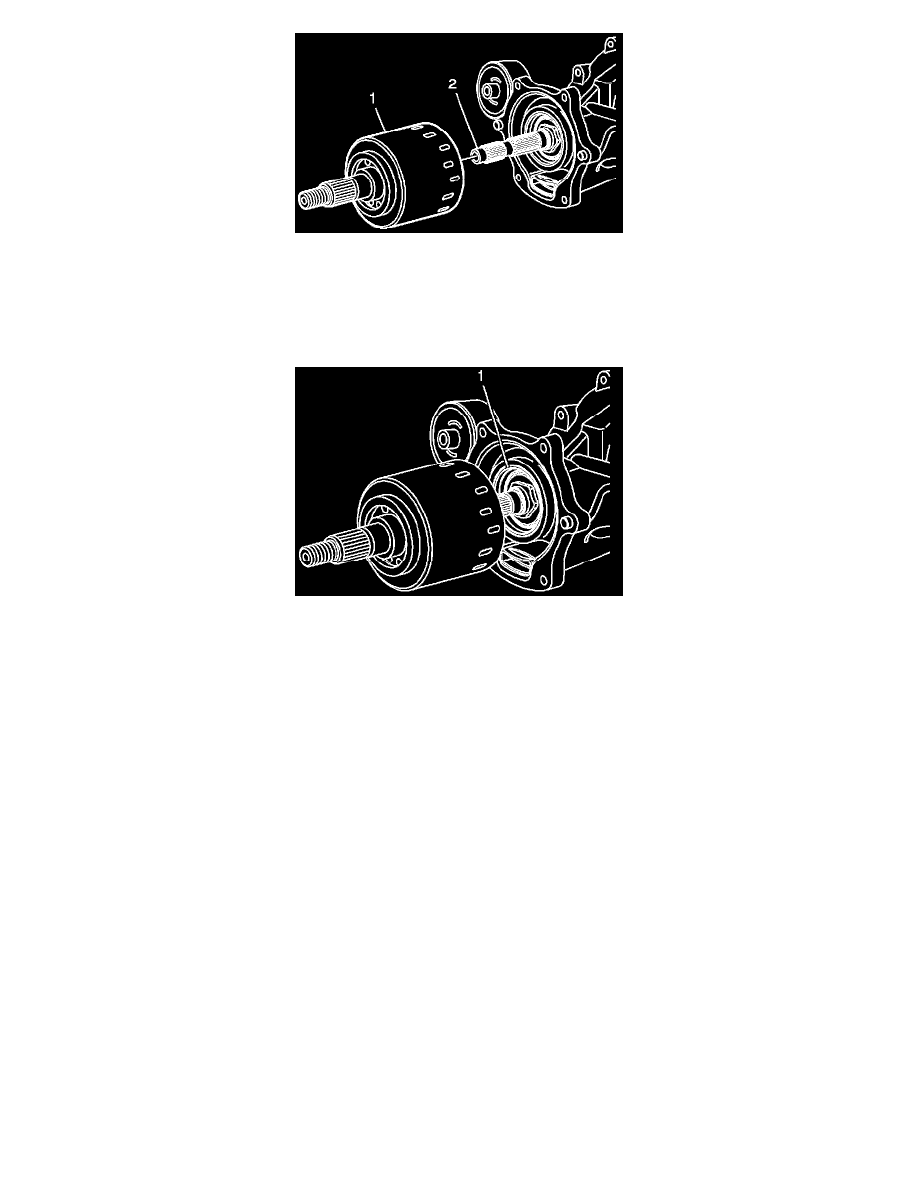
The clutch drum may require some slight rotational movement to install completely. If the clutch is not fully seated, the clutch housing may
break when tightening bolts.
4.
Install the NEW clutch drum (1) (P/N 15235314) onto the pinion shaft (2).
5.
When properly engaged, the RDM clutch drum will be fully seated against the clutch drum oil seal.
Notice:
The clutch cover housing must be fully seated to the rear drive module (RDM). Do NOT use the mounting bolts to draw the cover to the RDM.
If the cover does not fully seat to the RDM, the clutch drum assembly splines must be realigned to the pinion shaft splines before proceeding.
Failure to follow these instructions will result in damage to the clutch assembly.
Important:
Do not disturb the sealer bead applied to the RDM clutch housing when installing to RDM differential housing.
6.
Hand install the RDM clutch housing cover (1) and bolts (2) to the RDM differential housing, and then tighten bolts.
Tighten
Tighten Clutch Cover Bolts to 25 Nm (19 ft-lbs).