
VUE FWD L4-2.4L Hybrid (2007)
Caution: To help avoid personal injury, always treat the 3-phase cable and connectors as if voltage is present and as if the surface of all
parts of the cable is hot.
9. Verify that the generator control module 3-phase cables are disabled.
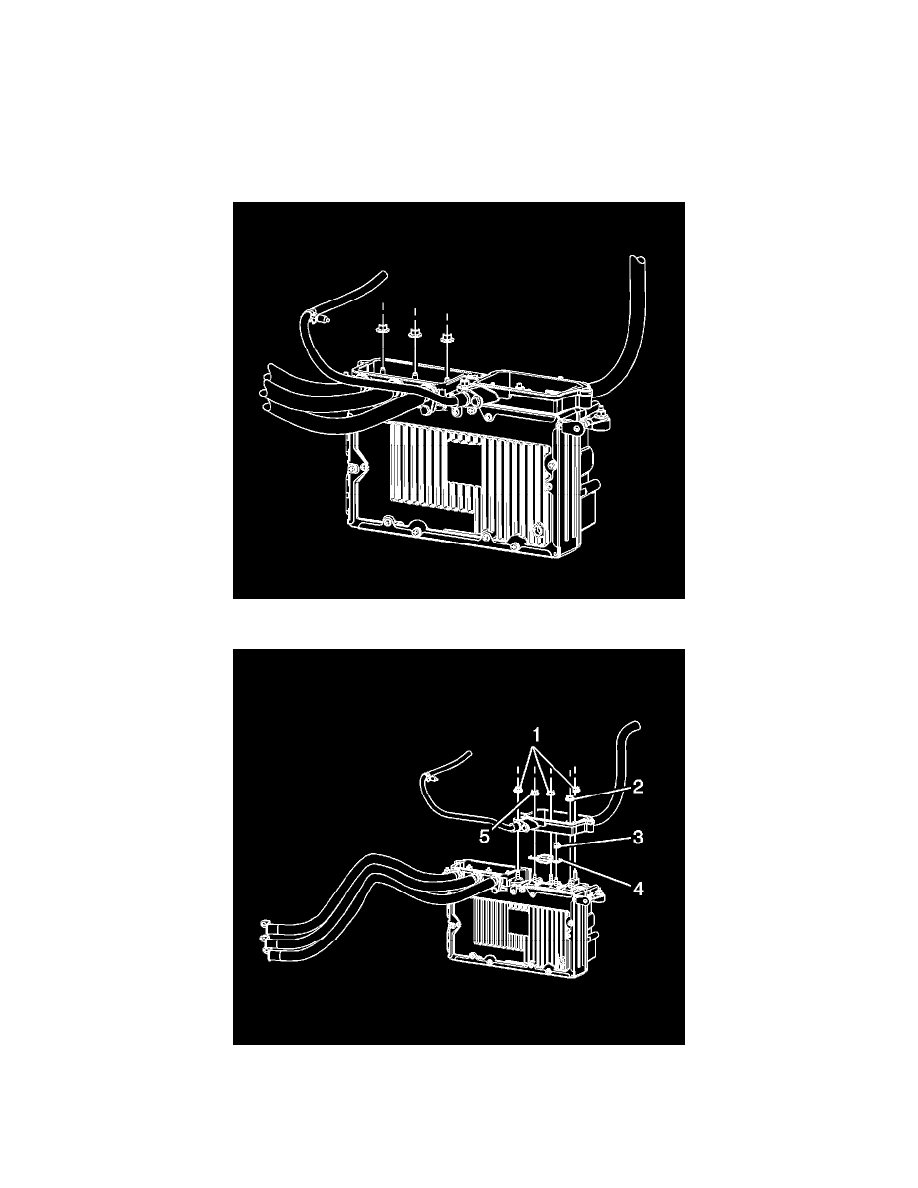
1. Measure from each phase 1, 2, and 3 connection (1) to ground (2). The voltage should be less than 3 volts.
2. After verifying that there is no voltage present, the 12-volt and 36-volt positive battery cables, and the generator control module 3-phase
cables can now be removed from the generator control module.
10. Remove the generator control module 3-phase cable nuts at the generator control module.
11. Remove the 12-volt positive battery cable nut (5) from the generator control module.
12. Remove the 36-volt positive battery cable nut (2) from the generator control module.
13. Remove the 36-volt terminal block nuts (1) from the generator control module.
14. Lift up, remove, and reposition the 36-volt terminal block, secure the block out of the way. Discard the terminal block seal.
15. Remove the negative terminal nut (3) and battery positive cable fuse (4).