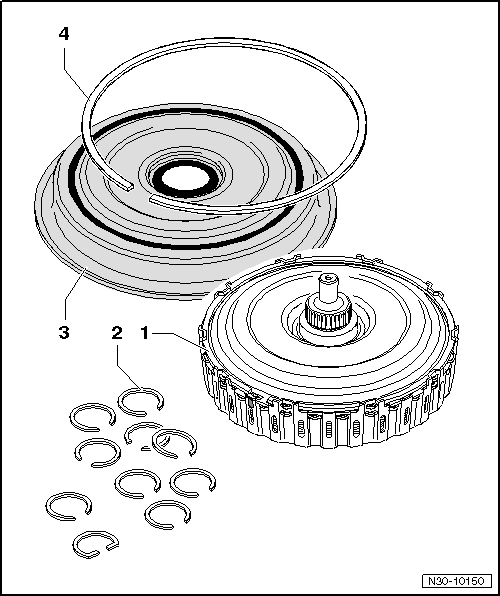
seat Workshop Repair Guides

SEAT Workshop Service and Repair Manuals

Installing and adjusting clutch > < Removing clutch
Preparing installation of multi-clutch
Multi-clutch as Genuine part
   
1 - Multiple clutch
q   The cover of a new clutch is secured with a retaining ring.
2 - 10 retaining rings
q   Rings have different thicknesses. They are sized in 0.1 mm increments.
q   Refer to instructions in → Chapter.
3 - Cover (end cover)
q   Ensure that inner sealing lip is not damaged → Chapter. Manufacturer inserts a bush to protect sealing lip. Please leave this bush in cover.
4 - Circlip
q   For cover.

   
–  When removing clutch from packing, press on clutch cover.
This is to prevent the clutch cover and the plate carriers beneath it from sliding out of the inner plates.
  A30-10044
–  Ensure that the 4 -piston rings- are properly seated.
Ring gaps should not be »over each other«.
–  Turn rings once. They must move freely and must not bind.
  N30-10091
Important: Position of clutch cover
–  Please check whether there is a marking on clutch -arrow-.
–  If there is no mark, make a coloured mark. Later the »lug« of the cover must be placed at the marked spot.
Set down clutch so that it cannot tip over.
The clutch is now ready for installation → Chapter.
  N30-10092

Installing and adjusting clutch > < Removing clutch