seat Workshop Repair Guides

SEAT Workshop Service and Repair Manuals

Brake pedal position senderG100: after 45/05: removing and fitting > < Brake light switchF and Brake pedal position senderG100: installation and removal
Brake light switchF: prior to week 45/05: removing and installing
Brake light switch -F-: prior to week 45/05: removing and installing
  Note
Switch may only be fitted once so as to ensure a firm fit.
Removing
–  Remove the lower trim of the driver's side foot well → Bodywork, interior work; Rep. gr.68 .
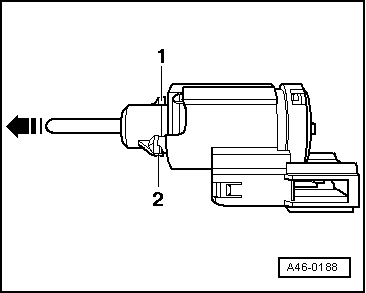
–  Release the connector from the light control switch and remove it from its bracket by rotating it 45° to left.
Installing
Carry out installation in the reverse sequence, noting the following:
   
–  Pull out plunger of brake light switch as far as it will go -arrow-.
–  Fit the switch by inserting the securing tabs -1 and 2- into the designated grooves in the opening and secure by rotating 45° to the right.
–  Connect the connector to the brake light switch.
  Note
t  Do not press brake pedal when installing.
t  When inserting the brake light switch, the push rod is automatically adjusted.
–  Check the operation of the brake lights by operating and releasing the brake pedal.
  A46-0188

Brake pedal position senderG100: after 45/05: removing and fitting > < Brake light switchF and Brake pedal position senderG100: installation and removal