Leon Mk2
 Note
Note
|
|
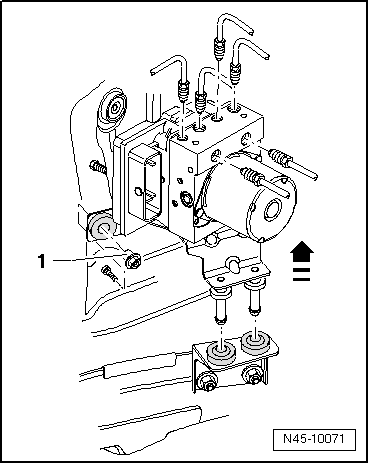
| Tightening torques: | |
| Hexagonal bolt to secure the hydraulic unit to the support | 8 Nm |
| Nut with bearing cap to the bodywork | 20 Nm |
| Brake pipes to ABS group: | |
| M 10 x 1 thread | 14 Nm |
| M 12 x 1 thread | 14 Nm |

Note
|
|
| Tightening torques: | |
| Hexagonal bolt to secure the hydraulic unit to the support | 8 Nm |
| Nut with bearing cap to the bodywork | 20 Nm |
| Brake pipes to ABS group: | |
| M 10 x 1 thread | 14 Nm |
| M 12 x 1 thread | 14 Nm |