seat Workshop Repair Guides

SEAT Workshop Service and Repair Manuals

Installing and removing the brake calliper > < Removal:
Fitting
Fitting
  Note
t  
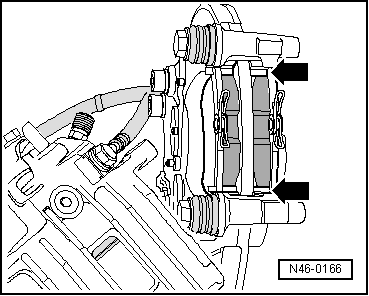
Before fitting the new brake pads, press the cylinder of the brake callipers. Before pressing the piston back, draw off brake fluid from the reservoir with a bleeder bottle. Otherwise, -if brake fluid has been replaced- it might leak and cause damage.
t  
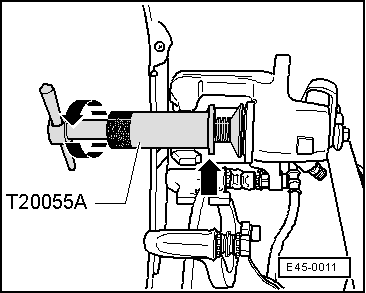
To avoid causing any damage, only use the compression tool -T20055A- to remove the piston.
t  Retracting the piston with the compression tool damages the calliper's automatic readjustment system.
   
–  Retract the piston by rotating the handle of the compression tool -T20055A - clockwise. Take special care not to damage the piston protective bellow.
  Note
Insert thecompression tool -T20055A-until the shoulder -arrow- is resting on the brake calliper.
  E45-0011
–  Fit the pad securing springs to the brake back plate -arrows- and the pads.
–  Remove the protective plastic cover from the back of the brake pad.
–  Secure the brake calliper casing with self-locking nuts and tighten them to tightening torque 35 Nm, blocking the guide pins.
  Note
The repair kit includes four self-locking hex bolts which should always be used.
  N46-0166
–  Press the brake lever -2- in the -direction of the arrow- and release the hand brake cable -3-.
–  Fit clip -1-.
–  Adjust handbrake → Chapter.
–  Fit the wheels.
  Note
t  After replacing the brake pads, fully step on the brake pedal a few times with the vehicle stopped, so that the pads adapt to their working position.
t  After each change of pads, check the level of brake fluid and top-up if necessary.
  N46-0232

Installing and removing the brake calliper > < Removal: