seat Workshop Repair Guides

SEAT Workshop Service and Repair Manuals

Suspension strut: removing and fitting|Fitting > < Suspension strut: removing and fitting
Removing
Removing
–  If the vehicle is fitted with a coded radio, note down the code or check if necessary.
–  Remove the battery.
   
–  Remove the cover/air duct -1--arrows-.
–  Remove the battery cover -2-.
Left-hand side suspension strut
To remove the left-hand side suspension strut, additional operations must be carried out.
  N40-0109
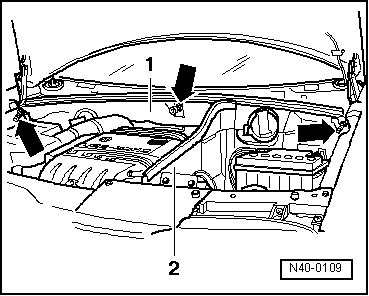
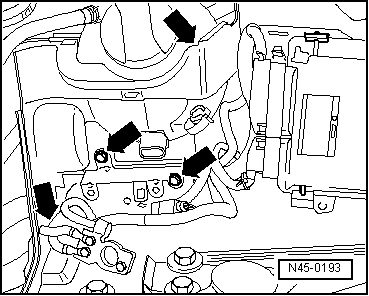
–  Loosen the battery cover together with the coolant reservoir -arrows-, and place aside. Do not open the cooling system.
The operations described below are for both sides
–  Remove the gasket from the water box.
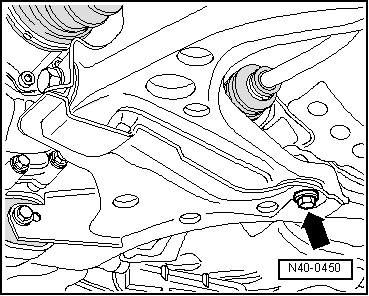
–  Raise the vehicle until the front axle no longer bears weight.
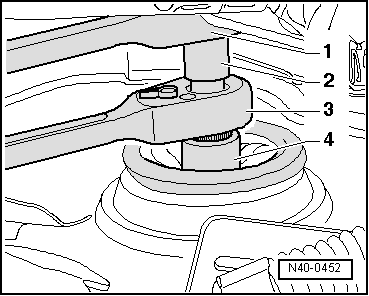
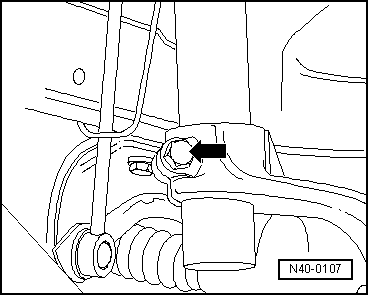
–  Unscrew the hexagonal bolt from the driveshaft.
  N45-0193
Remove the hexagonal nut which secures the top end of the shock absorber.
–  Assemble the tool outside the vehicle, and then attach it to the suspension strut.
1 - Standard ratchet
2 - -T10001/13-
3 - -T10001/11-
4 - -T10001/12-
–  Raise the vehicle and remove the wheel.
  N40-0452
–  Loosen the track rod -arrow- from the shock absorber tube. Do not twist the rubber bellows over the joint when carrying out this operation.
–  Place the elevator -V.A.G 1383 A- under the steering knuckle.
  N40-0110
–  Loosen the bolt -arrow- until it is no longer in contact with the strut support.
–  Lower the steering knuckle as far as possible with the elevator -V.A.G 1383 A-.
When lowering it, check that the driveshaft comes out of the wheel hub.
  N40-0450
–  Loosen the bolt -arrow-.
–  Pull the suspension strut together with the steering knuckle outwards.
–  Remove the suspension strut from the steering knuckle by pulling upwards. If necessary, the groove of the steering knuckle can be opened further with the appropriate tool to facilitate the operation.
  N40-0107

Suspension strut: removing and fitting|Fitting > < Suspension strut: removing and fitting