seat Workshop Repair Guides

SEAT Workshop Service and Repair Manuals

Removing and installing lower transverse link > < Removal:
Installation
Installation
–  Insert the upper transversal swinging arm in the vehicle and tighten the bolt by hand.
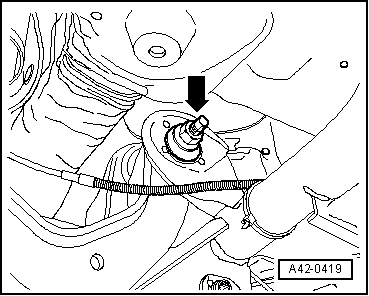
The transversal swinging arm must only be bolted when reaching level „a“ → Fig.
   
–  Bolt the upper transversal swinging arm to the subframe and tighten the new nut.
–  Observe mark made for position of eccentric bolt -arrow- relative to subframe.
  A42-0419
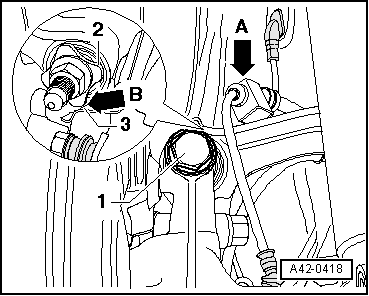
–  Tighten bolt -1- of the upper transversal swinging arm.
  Note
Washer -2- must be installed so that there is a gap -arrow B- between washer and splash plate -3-.
–  Unclip the cable for the revolution sensor -arrow A- from the upper transverse swinging arm.
–  Install coil spring → Chapter.
–  Install wheel and tighten bolts to specified torque → Chapter.
  A42-0418
Specified torques
ComponentTightening torque
Upper transverse link to wheel bearing housing
t  Use new nuts and bolts
t  Tighten threaded connections only when vehicle is in the normal running position
130 Nm + 90°
Upper transverse link to subframe
t  Use new nut
t  Tighten threaded connections only when vehicle is in the normal running position
95 Nm

–  Check and adjust wheel alignment → Chapter.
   

Removing and installing lower transverse link > < Removal: