seat Workshop Repair Guides

SEAT Workshop Service and Repair Manuals

Power steering box: removing and fitting|Fitting > < Power steering box: removing and fitting
Removing
Removing
  Note
When working on the airbag system, the battery earth strap must be removed. To this end, it is necessary to check whether the vehicle has a coded radio. If so, refer to the anti-theft coding.
   
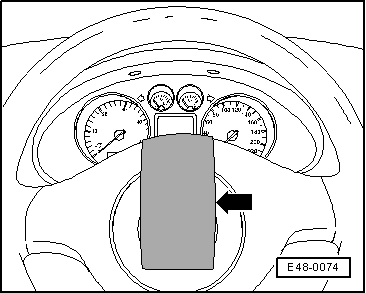
–  Secure the steering wheel; to do this, put the wheels straight and secure it -arrow- with adhesive tape.
  E48-0074
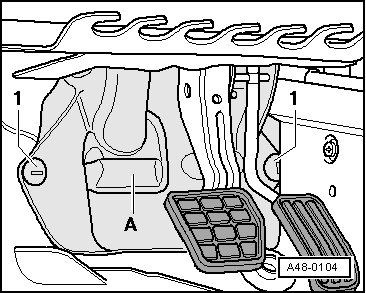
–  Remove the plastic bolts -1-.
–  Remove cover -A-.
  A48-0104
–  Unscrew the hexagonal bolt from the cross member -1-.
–  Release the cross member from the steering box.
–  Remove front wheels.
–  Remove the sound proofing: → Rep. Gr.50 .
–  Remove the front left-hand wheel housing moulding: → Rep. Gr.66
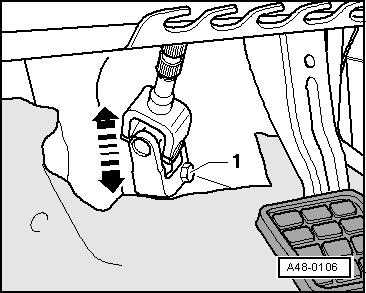
  A48-0106
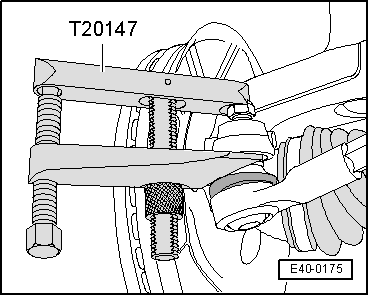
–  Release the left and right hand side steering bar heads from the wheel bearing housing.
  Note
Leave the hexagon nut on the ball joint threads to protect them.
  E40-0175
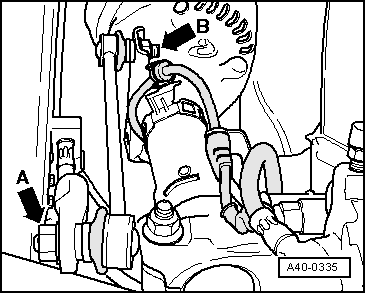
–  Remove the nut -arrow A-, left and right, and release the link bars, left and right, from the stabiliser bar.
  A40-0335
–  Unscrew the plug -1- for the hydraulic oil tank from the electro-hydraulic pump unit -2-.
–  Extract the hydraulic oil through the filling hole using the oil extractor -SAT 1100-.
  Note
t  The remains of the hydraulic oil will stay in the electro-hydraulic pump unit as well as in the return lines and the pressure lines following extraction.
t  The extracted hydraulic oil must not be reused.
t  The pressure and return lines should not be pinched off with the clamp -U-30042- or any other tools. This will cause damage to the pressure pipe and to the return lines.
t  When stretching or lifting the pressure pipe and the return line, the radius of the movement must not be less than 100 mm to avoid damage.
Vehicles with the exhaust pipe underneath the subframe
–  Remove the front exhaust tube with the catalytic converter: → Rep. Gr.26.
Continued for all vehicles
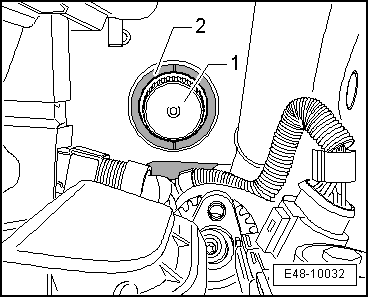
  E48-10032
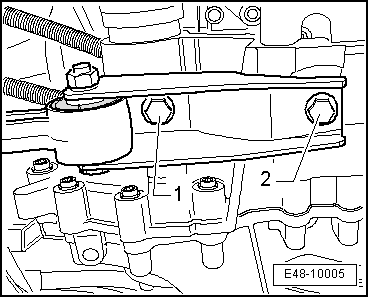
–  Remove the hexagonal bolts -1- and -2- from the pendulum support.
  E48-10005
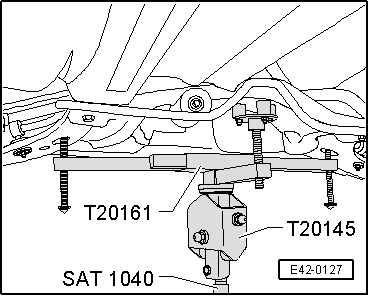
–  Position the hydraulic jack -SAT 1040- with the base - T20145- and with the support tool -T20161- underneath the subframe.
–  Clean the attachment pins of the centre guide -T20150 -.
  E42-0127
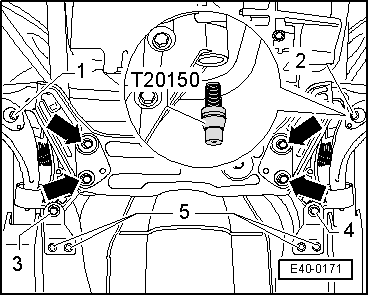
–  Take out the hexagonal bolts -arrows-.
–  Unscrew the bolt -1- for the subframe and tighten the attachment pin of the centre guide -T20150 -.
Specified torque: 20 Nm
–  Unscrew the bolt -2- for the subframe and tighten the attachment pin of the centre guide -T20150 -.
Specified torque: 20 Nm
Remove the hexagonal bolts -5-.
–  Unscrew the bolt -3- for the subframe and tighten the attachment pin of the centre guide -T20150 -.
Specified torque: 20 Nm
Unscrew the bolt -4- for the subframe and tighten the attachment pin of the centre guide -T20150 -.
Specified torque: 20 Nm
The attachment of the subframe is finished when the 4 bolts have been replaced by the attachment pins.
–  Lower the subframe by approx. 4 cm.
  E40-0171
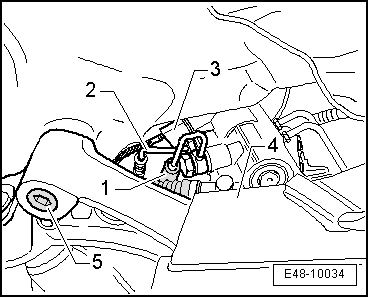
–  Unscrew the pressure pipe -1- and the return line -2- from the power steering box.
–  Cover the pressure pipe and the return line using a plastic bag and adhesive tape.
–  Attach the pressure pipe and the return line upwards.
–  Close the screw holes (pressure and return line connections) on the power steering box using plastic plugs.
–  Remove the power steering sensor -G250--3-. To do this, remove the Torx bolts for those vehicles fitted with TRW power steering or the bolt for Koyo power steering.
–  Take out the right hand side attachment clamp and the additional rubber from the steering box.
–  Swivel the steering box forwards. When doing so, guide the pinion through the groove of the heat shield.
–  Move the steering box to the right until the left hand side steering bar passes underneath the pin. Then take it out by the centre.
  E48-10034

Power steering box: removing and fitting|Fitting > < Power steering box: removing and fitting