| –
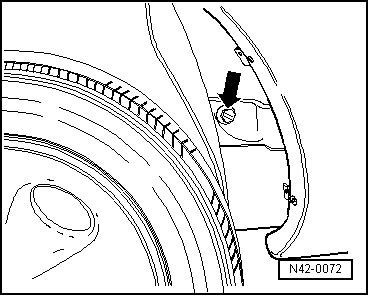
| With the vehicle standing on its wheels, remove bolt on both sides -arrow-. You may need to raise vehicle until bolt can be reached. |

WARNING | Even if you are “only” removing/renewing one spring, the upper shock absorber bolt on the other side still has to be removed. |
| Otherwise the coil springs cannot be completely detensioned when the vehicle is raised! |
|
| –
| Raise vehicle to assembly height, this relieves the pressure on the coil spring. |
| If you only want to remove/replace the spring(s), the shock absorber does not need to be unbolted from the wishbone. |
| –
| Unbolt shock absorber from wishbone. |
| The lower shock absorber bolt must be tightened with the vehicle empty and standing on its wheels! |
| Install in reverse order. |
|
|
|