
Leon Mk2
| Assembly overview - power assisted steering box |
| It is not intended that repair work be carried out on the power assisted steering box. If complaints are received, determine cause with the help of pressure test. |
 Note
Note| t | Renew self locking nuts and bolts. |
| t | Welding and straightening work on steering components is not permitted. |
| t | To lubricate steering rack, use only steering box grease -AOF 063 000 04-. |
| t | Hydraulic fluid -G 002 000- |
| t | Quantity of oil in system approx. 1 ltr. |
| t | Do not reuse drained hydraulic fluid. |

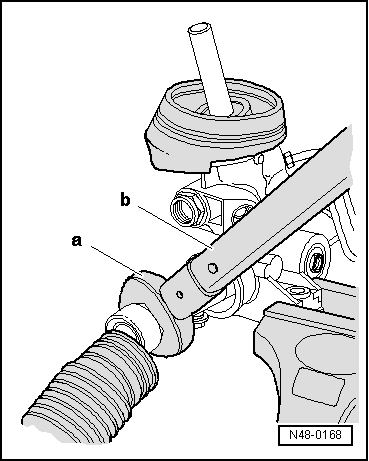
| 1 - | Return line |
| q | 12 Nm |
| The material for the return line was changed from steel to aluminium. |
| 2 - | Seal |
| q | Renew. |
| 3 - | Threaded port |
| q | Return line. |
| 4 - | Pressure line |
| q | 30 Nm |
| 5 - | Heat shield |
| 6 - | Hexagon nut |
| q | 8 Nm |
| 7 - | Rubber insert |
| 8 - | Clamp with nuts |
| q | Renew if threads are damaged. |
| 9 - | Hexagon bolts |
| q | 60 Nm |
| q | Always renew after removing |
| q | Qty. 4, used to attach steering box to subframe. |
| 10 - | Hydraulic line |
| q | 7 Nm |
| q | When installing ensure that the seals are not damaged. |
| q | Install stress free. |
| q | Do not damage surface; rectify paint damage if necessary. |
| 11 - | Right-hand track rod ball joint |
| q | Marked with “R”-arrow-. |
| q | Check that dust caps are seated correctly and not damaged. |
| 12 - | Left track rod |
| q | 80 Nm |
| q | Unbolting and bolting on → Fig.. |
| q | Removing and installing when steering box is installed → Chapter. |
| q | Check length and set → Chapter. |
| q | Adjusting toe → Chapter |
| 13 - | Clamp-type clip |
| q | Tension with -V.A.G 1275-. |
| 14 - | Bellows |
| q | Check for damage. |
| q | Can be replaced with steering box installed. |
| Removing: |
| q | Mark position of track rod ball joint on thread. |
| q | Loosen lock nut. |
| q | Unscrew track rod ball joint. |
| q | Perform test drive after installation. |
| q | Check position of steering wheel and adjust toe if necessary. |
| q | Must not be twisted after adjusting toe. |
| 15 - | Clamp-type clip |
| q | Tension with -V.A.G 1275-. |
| 16 - | Hexagon nut |
| q | 55 Nm |
| 17 - | Left-hand track rod ball joint |
| q | Marked with “L”-arrow-. |
| q | Check that dust caps are seated correctly and not damaged. |
| 18 - | Self-locking nut |
| q | 30 Nm and turn 90° further. |
| 19 - | Right track rod |
| q | 80 Nm |
| q | Unbolting and bolting on → Fig.. |
| q | Removing and installing when steering box is installed → Chapter. |
| q | Check length and set → Chapter. |
| q | Adjusting toe → Chapter |
| 20 - | Self-locking nut |
| q | Renew. |
| 21 - | Power steering box |
| q | Removing and installing to model year 2000 → Chapter. |
| q | Removing and installing from model year 2001 → Chapter. |
| 22 - | Seal |
Note
|
|