Skoda Workshop Service and Repair Manuals
HOME
FEATURES
MENU
INDEX
ABOUT US
Assembling planetary gear >
< Disassembling and assembling planetary gear - Assembly sequence
Fabia Mk1
Power transmission
Automatic Gearbox 001
Automatic gearbox, control, assembly, housing
Disassembling and assembling planetary gear - Assembly sequence
Disassembling planetary gear
Disassembling planetary gear
Disassembling planetary gear
l
Gearbox suspended on gearbox suspension device -MP 3-478-
–
Position the catch pan under the gearbox.
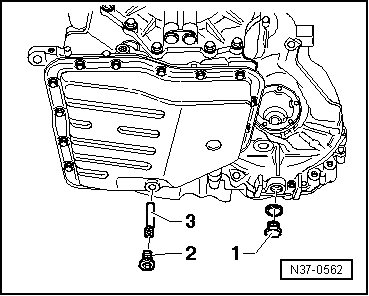
–
Remove screw plug
-1-
.
–
Remove screw plug
-2-
and ATF overflow tube
-3-
.
–
Drain the ATF.
–
Remove torque converter.
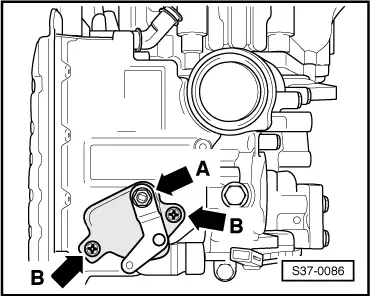
–
Release nut
-arrow A-
for lever/gearshift shaft.
–
Remove screws
-arrows B-
for multi-function switch from the gearbox.
–
Removing electrical connections and sender from gearbox
→ Chapter
.
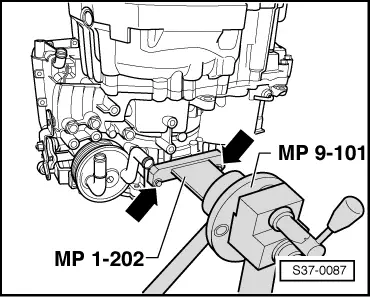
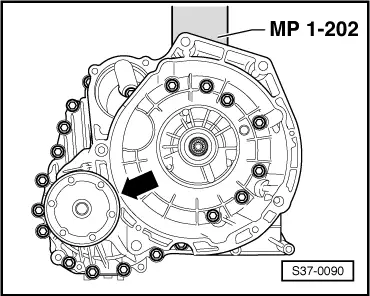
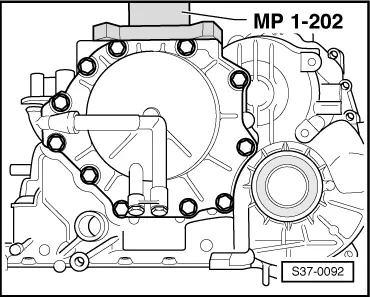
–
Secure gearbox to engine and gearbox mount -MP 1-202 -
-arrows-
and place in assembly stand -MP 9-101-.
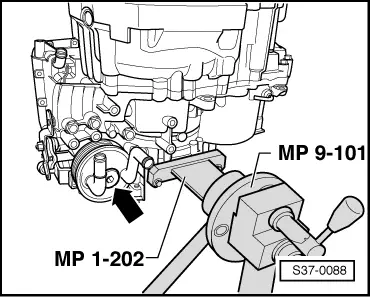
–
Remove gearbox suspension device -MP 3-478-.
–
Remove ATF radiator from gearbox
-arrow-
.
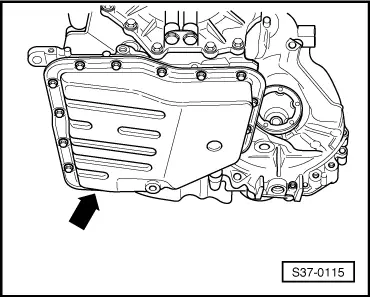
–
Remove oil pan
-arrow-
.
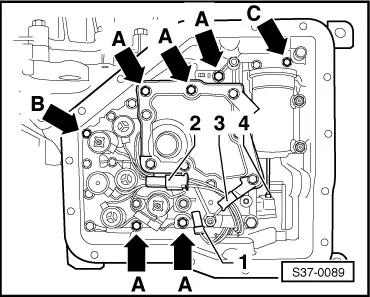
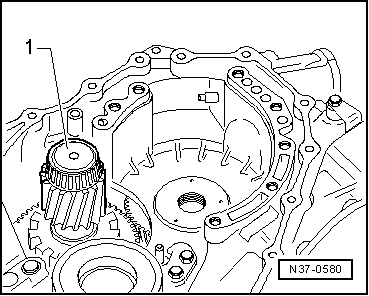
–
Unclip sender
-1-
for ATF temperature.
–
Disconnect the plug connection
-2-
to the solenoid valves.
–
Unhook the wiring loom from the holder
-3-
.
–
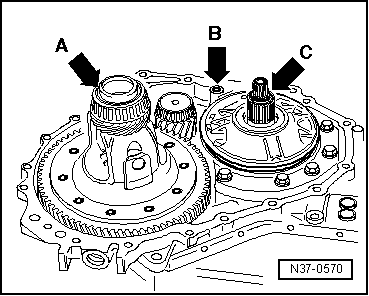
To remove the slide valve body just release the bolts marked
-arrows A through C-
(pay attention to the different lengths when mounting).
When removing the slide valve body the manual slider
-4-
remains in the slide valve body.
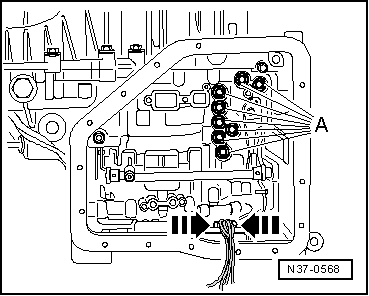
–
Secure manual slider against dropping out.
–
Remove O-rings
-A-
.
–
Unclip cable guide
-arrows-
, remove wiring loom for solenoid valves.
–
Remove the left and right flange shafts
-arrow-
.
–
Unscrew the fixing bolts (20 pieces) of the converter housing.
–
Remove converter housing.
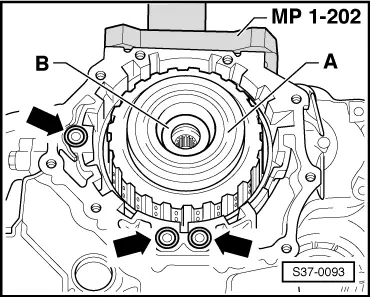
–
Remove the differential
-arrow A-
from the gearbox housing.
–
Remove the O-ring
-arrow B-
from the gearbox housing.
–
Remove the O-ring
-arrow C-
from the turbine shaft.
–
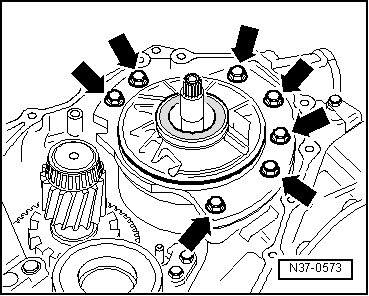
Remove the screws
-arrows-
from the ATF pump.
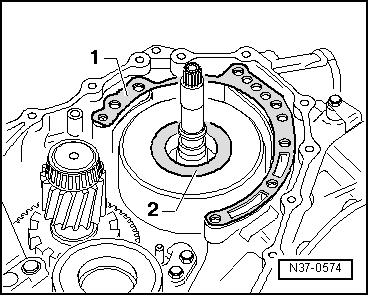
–
Remove gasket
-1-
of the ATF pump from the flange/gearbox housing.
–
Remove adjusting washer
-2-
from the reverse gear-clutch -K2-.
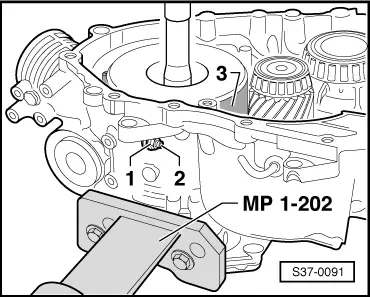
–
Release lock nut
-1-
at adjusting screw
-2-
for brake band
-3-
.
–
Unscrew adjusting screw.
–
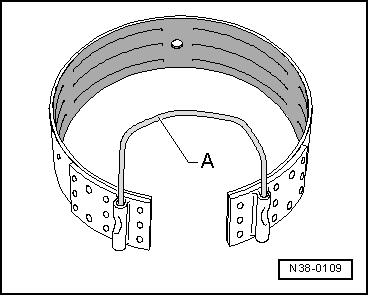
Remove brake band.
–
After removing secure the brake band against spreading open, e.g. with a self-adapted wire hanger
-A-
.
–
Remove reverse gear-clutch
-1-
.
–
Remove 1st to 3rd gear clutch
-B-
with axial needle bearing
-A-
.
–
Remove axial needle bearing
-1-
from drive shaft
-2-
.
–
Pull out drive shaft.
–
Remove needle bearing
-A-
with large sun gear
-B-
.
–
Remove input shaft
-1-
from the gearbox housing.
–
Rotate gearbox in assembly stand -MP 9-101- 180°.
–
Release the cover screws gradually and crosswise.
–
Remove cover for gearbox housing
–
Remove the O-rings
-arrows-
from the gearbox housing.
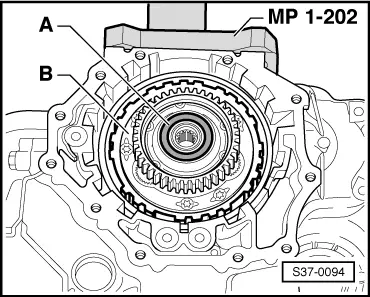
–
Remove 3rd and 4th gear clutch
-A-
with axial needle bearing
-B-
.
–
Remove axial needle bearing
-A-
from planet carrier
-B-
.
–
Draw out planet carrier.
–
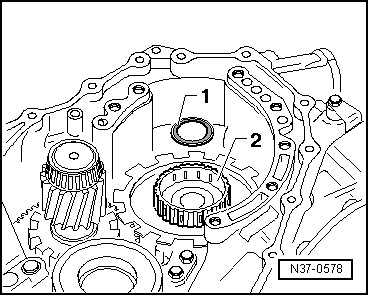
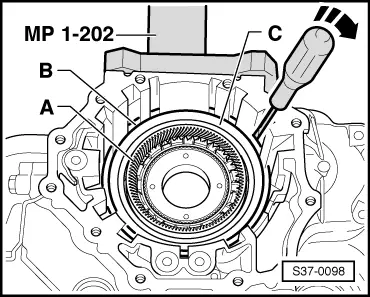
Remove circlip for reverse gear-brake -B1- with a screwdriver.
–
Remove the washers, pressure plate, plates and thrust plate of the reverse gear-brake -B1-.
–
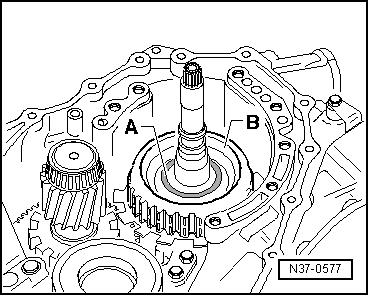
With a screwdriver straighten the tab of the lock washer of the tensioning screw
-A-
.
–
Release the tensioning screw from the gearbox housing.
1 -
Torque wrench (40...200 Nm), e.g. -V.A.G 1332-
–
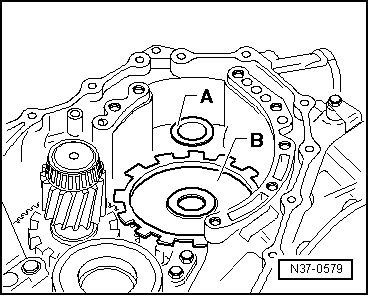
Remove drive gear with ring gear
-A-
from the gearbox housing.
–
Remove the circlip
-B-
for overrunning clutch
-C-
with a screwdriver.
–
Draw out overrunning clutch together with the thrust washer from the gearbox housing.
–
Removing drive gear and ring gear
→ Chapter
.
Power transmission
Automatic Gearbox 001
Automatic gearbox, control, assembly, housing
Disassembling and assembling planetary gear - Assembly sequence
Disassembling planetary gear
Assembling planetary gear >
< Disassembling and assembling planetary gear - Assembly sequence