skoda Workshop Repair Guides

Skoda Workshop Service and Repair Manuals

Removing and installing the bracket with the master cylinder (Fabia II 2011 ?; Roomster 2011 ?) > < Summary of components - foot controls (Fabia II 2011 ?; Roomster 2011 ?)
Removing and installing clutch pedal switchF36
Removing and installing clutch pedal switch -F36-
  Note
The clutch pedal switch -F36- may only be installed once to ensure that it has an adequately tight fit in the bracket.
Removing
–  Removing the footwell vent → Heating and Air Conditioning; Rep. gr.80.
  Note
The clutch pedal switch is installed from the front wall.
–  Unplug connector from the clutch pedal switch -F36-.
   
–  Turn the clutch pedal switch at the bracket 45° in -direction of arrow- and remove it from the support.
Install
  N30-10223
l  
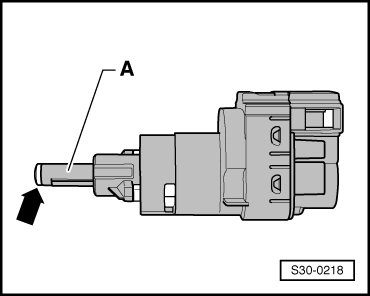
The tappet -A- of the clutch pedal switch must not be pulled out.
l  
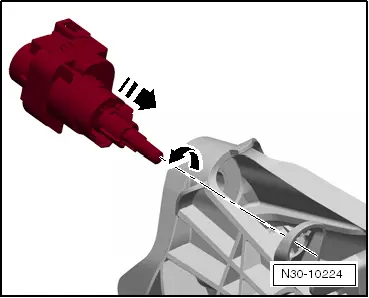
Grease the tappet head -arrow-.
l  Assign the grease via the → Electronic Catalogue of Original Parts.
l  When installing the clutch pedal switch the clutch pedal must always remain in the off position. During the complete assembly, the clutch pedal must only be touched with the tappet head -arrow- of the clutch pedal switch.
  S30-0218
The clutch pedal switch is installed from the front wall.
–  Insert the clutch pedal switch into the support of the bracket and turn it 45° in -direction of arrow-.
–  Insert connector for the clutch pedal switch.
–  Install the footwell vent → Heating and Air Conditioning; Rep. gr.80.
  N30-10224

Removing and installing the bracket with the master cylinder (Fabia II 2011 ?; Roomster 2011 ?) > < Summary of components - foot controls (Fabia II 2011 ?; Roomster 2011 ?)