
Fabia Mk2
|
|
|
 WARNING
 Note
Note
|
|
|
|
|
|
 Caution
Note
Note
|
|
|
|
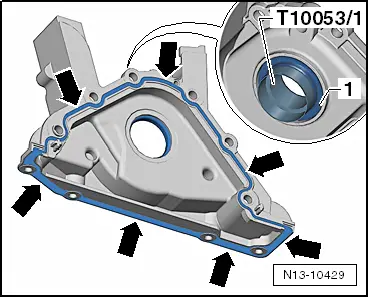
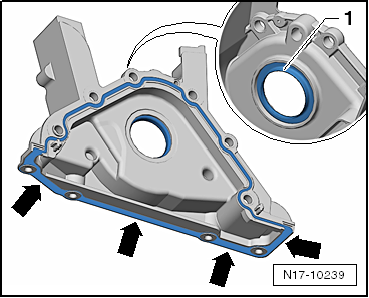
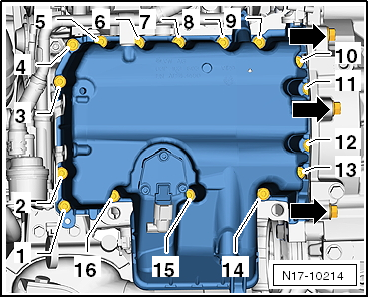
| Stage | Screws | Tightening torque |
| 1 | -1 … 16- | crosswise to 5 Nm |
| 2 | -Arrows- | 40 Nm |
| 3 | -1 … 16- | crosswise to 15 Nm |
|