skoda Workshop Repair Guides

Skoda Workshop Service and Repair Manuals

Repairing drive shaft > < Disposing of the shock absorber
Removing and installing a drive shaft
Special tools and workshop equipment required
t  Extractor -MP 6-425-
t  Torque wrench, e.g. -V.A.G 1756-
Removing
  Note
t  The wheel bearing must not be loaded when the twelve-point nut is loose. At full load the wheel bearing is initially damaged through the vehicle's own weight, thus shortening the life of the wheel bearing.
t  When moving vehicles with drive shaft removed, it is advisable to install an external joint instead of the drive shaft and tighten with a torque of 50 Nm otherwise the wheel bearing may get damaged.
Assignment of the drive shaft and marking → electronic catalogue of original parts.
–  Remove wheel trim cap, for light-alloy wheels remove the cap (pull-off hook in tool kit).
–  Raise the vehicle until the front axle is free of stress.
–  Slacken twelve-point nut.
–  Remove wheel and raise vehicle.
–  Remove noise insulation → Engine - Mechanics; Rep. gr.10.
–  Unscrew the drive shaft from the flange shaft/gearbox.
  Note
Mark installation position of bolts -1-, otherwise the steering geometry must be checked.
   
–  Release screws -1-.
  A40-0130
–  Push out the drive shaft. To do so position the tool as shown in the fig.
  Note
t  While pushing out the drive shaft make sure there is sufficient clearance.
t  The drive shaft must not hang down while being pressed out. Otherwise overstretching will cause damage to the inner joint.
–  Remove the drive shaft.
  Note
The following working step must only be performed on vehicles with automatic gearbox.
  S40-0079
–  Slacken screws of gearbox-pendulum support -arrow- at assembly carrier.
  A40-0131
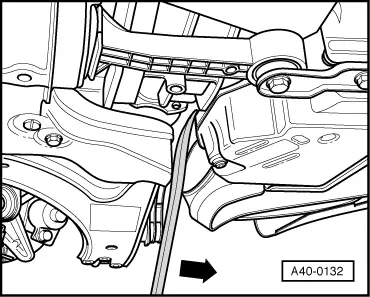
–  Lever out the engine/gearbox assembly with a tyre iron in direction of travel, at the same time the drive shaft with tripod can be removed.
–  The -arrow- shows the direction of travel.
Install (vehicles with manual and automatic gearbox)
- Remove possible corrosion in the thread/serration of the outer joint.
–  Moisten the serration of the wheel hub with oil.
–  Insert drive shaft.
–  Insert outer joint as far as possible into the serration of the wheel hub.
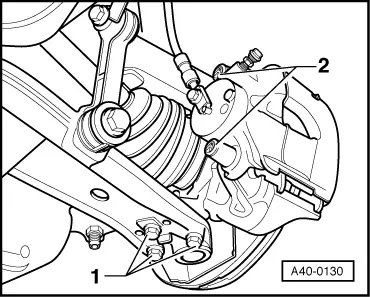
–  Screw the steering joint and track control arm with the new screws in the former positions.
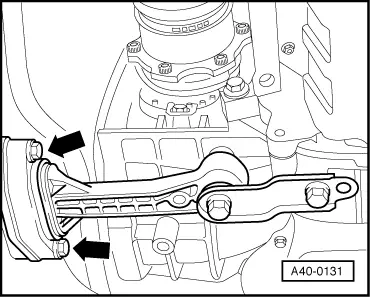
–  Screw drive shaft onto flange shaft.
–  Screw the pendulum support to the assembly carrier.
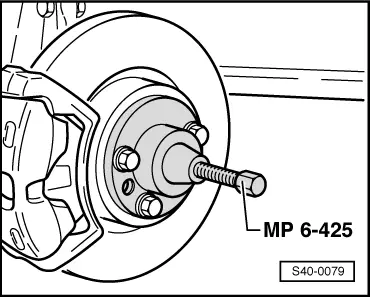
- Moisten the contact surface of the twelve-point nut as well as the serration and the thread of the outer joint with oil and screw on new twelve-point nut as far as possible.
–  Insert the outer joint into the wheel hub until the outer joint rests in the wheel bearing.
–  Install noise insulation → Engine, Mechanics; Rep. gr.10.
–  Attach the wheel.
–  Lower vehicle, when doing so, ensure that the wheels do not yet touch the ground.
If the wheel bearings are loaded through the vehicle's own weight, the wheel bearing will be initially damaged. This shortens the life of the wheel bearing.
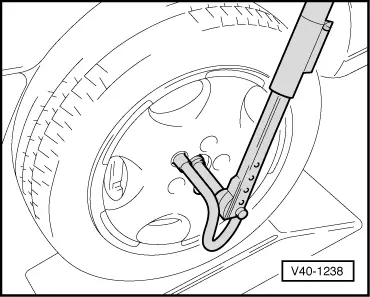
–  Depress brake pedal (assistance of second mechanic required).
–  Tighten new twelve-point nut to 225 Nm and release by 1/2 a turn.
–  Torque wheel hub a further min. 90°.
–  Tighten twelve-point nut:
Tightening torque:
50 Nm + 60°.
  Note
  A40-0132
The torque wrench is recommended e.g. for tightening the twelve-point nut -V.A.G 1756-.
  V40-1238
Tightening torques:
Steering joint to track control arm
t  Use new screws and new lock washer!
20 Nm + 90°
Tighten drive shaft to flange shaft diagonally across in 2 steps (I and II)  
 I.2nd
Screw M8 x 1810 Nm20 Nm + 90°
Screw M8 x 4810 Nm20Nm + 180°
t  Use new screws!
  
Tighten drive shaft to flange shaft diagonally across in 2 steps (I and II)  
 I.2nd
Screw M1010 Nm50 Nm + 45°
t  Use new screws!
  
Pendulum support to assembly carrier
t  Use new screws!
20 Nm + 90°


Repairing drive shaft > < Disposing of the shock absorber