| Component | Nm |
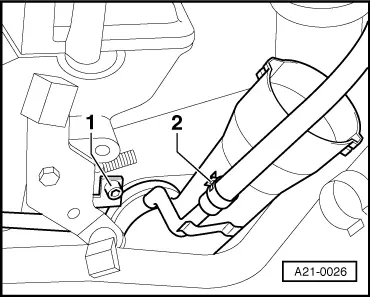
| Oil feed line on the exhaust turbocharger | 30 |
| Oil return line on the exhaust turbocharger | 10 |
Bracket for oil feed line to
exhaust turbocharger | 10 |
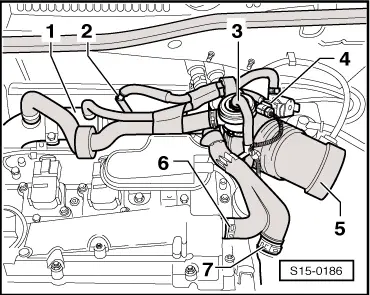
| Coolant feed line at cylinder block | 35 |
Coolant return-flow line at
exhaust turbocharger | 35 |
| Bracket for turbocharger to turbocharger | 45 |
| Bracket for turbocharger to cylinder block | 25 |
| Heat shield on cylinder head | 25 |
| Socket at top/bottom bracket for top air guide pipe | 10 |
| Turbocharger to exhaust manifold | 351) |
Front exhaust pipe to
exhaust turbocharger | 401) |
| Heat shield for drive shaft to cylinder block | 35 |
| Nuts for clamping sleeves of exhaust pipes | 40 |

 Note
Note