| Removing and installing oil pan |
| Special tools and workshop equipment required |
| t
| Plug in unit -3249- or -T10058- |
| t
| Sealant remover gasket stripper (bearing code GST, bearing article no. R 34402), manufacturer Retech GmbH |
| t
| Cleaning and degreasing agent -D 000 401 04- |
| t
| Silicone sealant - D 176 404 A2- |
| t
| Protective goggles and gloves |
| –
| Remove the noise insulation. |
| –
| Disconnect plug from oil level and oil temperature sender -G266-. |
| –
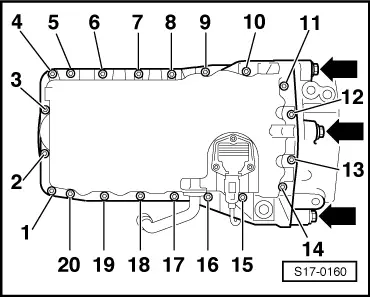
| Unscrew oil pan screws. |

Note | Use hinged wrench -3185- to slacken oil pan bolts at flywheel side and unscrew with socket insert -3249- or -T10058-. |
| –
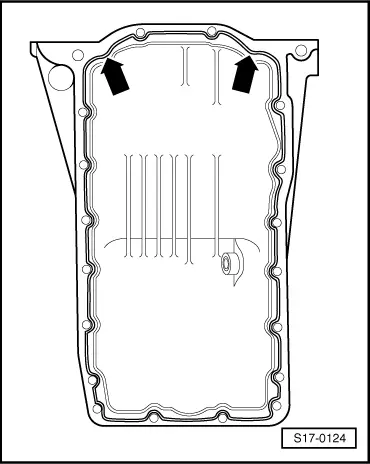
| Remove oil pan. If necessary release by applying slight blows with a rubber-headed hammer. |

WARNING | Wear protective googles and gloves when working with sealant and grease remover! |
|
| –
| Remove residual sealant from the sealing surface using a chemical sealant remover and thoroughly clean. |
| –
| Degrease the sealing surfaces. They must be free of oil and grease. |
| Installation is performed in the reverse order. Pay attention to the following points: |
Note | t
| Pay attention to the use by date on sealant. |
| t
| The oil pan must be installed within 5 minutes after applying the silicone sealant. |
| t
| Make sure when installing the oil pan on the removed engine that the oil pan is aligned flush with the intermediate plate on the flywheel side, that is that the oil pan must be 0.8 mm above the cylinder block. |
| t
| The oil pan must lie flush with the installed engine at the gearbox flange. |
| –
| Cut off nozzle tube at the front marking (Ø of nozzle approx. 3 mm). |
|
|
|